Trouble Cementing Zirconia Crowns?
Posted on 05/18/2015
Zirconia based crowns have become one of the most popular restorative materials in dentistry. Originally branded as Lava by 3M, or Procera Zirconia by Nobel Biocare, today’s Zirconia are perhaps best known by the Bruxzir brand promoted by Glidewell. However, there are at least a dozen other brands of Zirconia now on the market, and we can be sure to see many others in the upcoming future.
But while the PFM has been around for over forty years, Zirconia restorations are less than ten years old. And that places some challenges for doctors with regards to cementation. What cements to use, and how to cement, are among the more common questions we receive.
In searching for answers to this topic, the best information we have come across has been from Dr. Michael DiTolla—a speaker and dentist in residence at Glidewell. In a video available at http://tinyurl.com/ZirconiaCement, Dr. DiTolla outlines the following protocol:
Step 1: Try in the crown.
Step 2: Clean the crown to remove phosphates found in saliva. He recommends Ivoclean by Ivoclar. We have found good results with this as well. Note: Phosphoric Acid, Water or Hydroflouric Acid will not remove the phosphates. Only sandblasting with 50 micron alumina oxide or Ivoclean will do the trick.
Step 3: Use a Silane solution with Phosphate groups such as Monobond by Ivoclar or Z Prime from Bisco. Both will make the zirconia adhere to cements.
Step 4: Use any cement of your choice
So what’s so special about Ivoclean? It is essentialy zirconia oxide in a liquid form. So it attracts the phosphates off of the zirconia. Making the restoration clean again for cementation.
Zirconia Crowns, Cementation, Dental Lab, Dental Tech
Too much chair time on Locator® Overdentures?
Posted on 04/15/2015
Implants and Locator® brand Overdentures are unquestionably one of the best things that have happened to removable dentistry - especially on the mandibular arch.
In addition to the clinical benefit, the economic benefit to your practice can be quite compelling. The conversion of existing dentures and the fabrication of new implant supported dentures is often a fee for service option and not dictated by insurance reimbursements.
So what’s stopping doctors from offering this service? In many cases, we’ve seen frustration with the chair time necessary to insert locator attachments. Self cure acrylic can lead to slight distortions, which over time lead to unstable attachments. The key to saving chair time is to get the lab to do most of the work. And to verify and re-verify the position of the abutments:
Here’s a technique we’ve found to be consistent and easy:
Step 1: Ask the lab for a custom tray
Step 2: Take a PVS impression using impression copings part # 8505.
Step 3: Ask the lab to return the base plate with the male housings in the base plate. This allows for a better bite, and verification of abutment position.
Step 4: Try in setup with male housings in place. This allows for a second verification of abutment position.
Step 5: Lab processes with housings and final plastic males.
The key is the verification. Once abutment position is verified twice, the insertion visit can be as short as ten minutes! And patient’s are thrilled!
Locators, Overdenture, Dental Lab, Technician, Denture, Full Denture, Complete Denture
We’ve Moved… What’s coming next?
Posted on 03/15/2015
We’re happy to relay the news that we have moved our lab to a larger facility in Manhattan.
First, for some bookkeeping issues.
Our new address is:
Streamline Dental Laboratory
224 West 35th Street Suite 403
New York, NY 10001
Please update your accounting software so you have our new address. We’ve also sent out new shipping labels for customers using Fedex or UPS. If you did not receive them, please call 1-866-545-6190 and we’ll send them again.
And now for the exciting news...Our new lab features a whole host of new digital technologies - enabling us to offer you more options for your patients.
Here are some Digital highlights:
- 3Shape Digital scanner to create 3D models of your Zirconia CAD/CAM cases and accept digital files
- Roland 5 Axis Milling unit to mill your zirconia using the most precise mill on the market
- Erkodent 3D motion for digital consistency of nightguards and thermoformed devices
As always, thank you for the opportunity to work with your practice. We look forward to many more years of creating new smiles for your patients!
3shape, Roland, 3d milling, dental lab, technician
Reduction Copings and Occlusal Clearance
Posted on 02/15/2015
Among the most common fixed technical questions in the lab is lack of occlusal clearance. The general rules for clearance are:
Posterior teeth require a minimum of 2mm clearance.
- 0.3mm substructure (metal or zirconia)
- 0.2mm opaque
- 1.5mm porcelain
Anterior teeth require a minimum of 1.5mm clearance
- 0.3mm substructure
- 0.2mm opaque
- 1mm porcelain
When adequate space is not available for the technician, there are some options, but none really ideal. The lab tech can reduce the opposing tooth, reduce the prep, or leave a metal or zirconia occlusal.
Reducing the opposing can affect mastication, so we try to avoid it. Reducing the prep can be effective, especially when endo has been done. But replicating a technician’s reduction is not always easy. Even with the best reduction copings, our doctors have reported frustration with replicating the techs work in the mouth—especially on the posterior. And leaving a metal or zirconia occlusal is certainly an esthetic compromise.
So what can be done? Luckily, there a number of great products on the market for checking clearance in the mouth. We recommend PrepCheck by CommonSense Dental Products (888-853-5773). With PrepCheck, you’re on your way to avoiding occlusal clearance issues
Zirconia, Reduction Coping, Occlusal Clearance, Dental Lab, New York
Cementing Zirconia
Posted on 12/14/2014
As a newer material, one of the most common questions we receive is how to cement an All Zirconia or Zirconia to Porcelain restoration.
The general rule of thumb is to measure the prep length. If the prepared abutment height is 4mm or more, than virtually any glass monomer and resin modified glass monomer cement can be used.
Where the prepared tooth abutment height is shorter than 4mm or where retention may be an issue, it is recommended to bond zirconia using a resin cement.
However, unlike lithium disilicate (e.Max), the intaglio surface of Zirconia cannot be acid etched and silanated. So traditional bonding methods may not always work. It may be important to speak to your cementation company if issues come up.
For traditional cements, options include:
Panavia 21 (Kuraray), GC Fuji (GC America). RelyX Lucing Plus Cement (3M Espe).
Resin Cements for bonding include:
Rely X ARC (3m Espe), Clearfil (Kuraray), Multilink (Ivoclar), NX3 (Kerr), or Panavia F 2.0 (Kuraray).
If you haven’t tried our Zirconia options, we encourage you to give it a try! Use the coupon for great savings!
Zirconia, Solid Zirconia, Bruxism, Bruxer, Dental Lab Tech
Light and Shades
Posted on 11/15/2014
Shades can be tricky. Lighting is perhaps the most important element to obtaining the correct shade, but its also the most difficult to control. Windows are not always available in the operatory, and patients are often seen at night or on overcast days.
However, we were recently introduced to a shade tool called the Rite-Lite 2 by AdDent. It’s the second generation of the Rite-Lite and admittedly the first generation was not a great help. But the Rite-Lite 2 has made several significant improvements to the design, and we’ve found it to be an excellent tool for custom shades. We now use it regularly for all of our custom shades.
The Rite Lite 2 has three modes:
Color-corrected light at a color temperature of 5500 degrees Kelvin. This is designed to mimic day light.
Incandescent room light at 3200 degrees Kelvin. This is designed to mimic indoor light.
Ambient light at 3900 Kelvin. This is a combination of sun light and day light.
The shade is chosen in the first mode (day light), and verified in incandescent and ambient light. If you’ve struggled with shade matching and you're looking for an affordable tool, we’d recommend this one.
Shade matching, dentistry, dentist, dental lab techn, Rite Lite
High Occlusion?
Posted on 10/1/2014
Chairside adjustments for high occlusal contacts are a truly frustrating experience. And it doesn’t get easier with Emax or Zirconia crowns - they are can be even more difficult than porcelain to adjust.
What can be done to minimize chairside adjustments and reduce the possibility of high occlusion?
Here are some tips:
Our technicians and CAD software use the following defaults for occlusion:
1. Normal Occlusion - 0.3mm gap from the opposing
2. Light Occlusion - 0.5mm gap from the opposing
3. Out of Occlusion - 0.7mm gap from opposing
4. In Occlusion - No gap
Normal occlusion is used by default. But if you are finding crowns coming back with high occlusion, we recommend to change your default to light occlusion or out of occlusion.
How can I change my default preferences?
Use our Digital Rx and click “Settings > Design Preferences”. Set your occlusion to light or out of occlusion.
Alternatively, download our preference sheet from StreamlineDental.com and fax back to us. We’ll update your preferences in our internal system.
Occlusion, Crown, Denture Implant, Emax, Zirconia
To Screw or to Cement?
Posted on 09/15/2014
To Screw or to Cement?
With the continuing growth of implant dentistry, the restorative dentist often finds her or himself faced with the choice of screw versus cement retained. We’ve been asked the question - which is better?
As with most decisions in dentistry, the answer is that it depends. Neither is better or worse. In general, screw retained offers easier options for retrieval, but typically inferior esthetics. Cement retained offers the lab more flexibility, but can be more complicated to remove. Here is an overview:
Screw Retained:
Commonly used in the posterior. Limited by implant position. If implant is off the ridge on the buccal or lingual, the screw hole often will not have path of insertion.
Cement Retained:
Commonly used anywhere in the mouth. Allows technician to correct angulation issues. Does not require composite to cover access hole. But creates difficulty for retrieval. If screw loosens, doctor may compromise the abutment when attempting to access the screw.
Hybrid Screw Retained:
A new hybrid approach where the lab makes a custom abutment, but then fabricates a crown with a screw access hole and cements the two together, in the lab, has become more popular. While a bit more expensive on lab labor, the parts are cheaper as a stock abutment can be used.
Screw Retained Implant Crown, Custom Abutment, Implant Dentistry, Lab Technician, Dental Laboratory
Contrast and its Impact on Shade
Posted on 06/15/2014

We’ve all experienced that difficult shade...the one where the shade matches the tab, but looks so different in the mouth.
A common reason for this is the natural phenomenon “contrast effect” - the impact that one color has on the perception of another color. Here’s an example:
In this illustration, the inner gray rectangles are identical colors and sizes. However, when viewed against the darker background the inner rectangle looks lighter, and viewed on the lighter background, it looks darker. In addition, they appear to be different sizes.
This visual phenomenon has a direct impact on tooth shade selection. For example, a tooth viewed against a dark gingiva will appear lighter than a tooth viewed against a lighter gingiva. So what can we do to compensate for this?
Here are some helpful ways to deal with contrast effects:
When in doubt, choose a lighter shade. The lab can always stain darker, but going lighter means stripping the porcelain or redoing the crown for Emax or All Zirconia.
Use a Vita Easy Shade machine. It’s a great tool to help set a reference point for the shade. We use it for all custom shades.
Provide a picture. Download our new App to make it easy to take a picture with your phone and add it to the Rx. No email or separate camera needed!
Shade Matching, Digital Dentistry, Dental Lab, Technician
To Lute or to Bond?
Posted on 05/13/2014
In a recent article in JADA 145A (April 2014, pgs 383-385), Dr. Gordon Christenson discusses the common question – what is the best method to cement an all ceramic crown such as e.Max or Zirconia?
Dr. Christenson offers a number of recommendations outlined below. But among his key observations is that a clinician should consider the eventual removal of the restoration first. If removal is of a high concern, luting cements are almost always recommended.
Here are the general rules:
1. Bonding: If preparation lacks retention, like onlays, short crown preparations, or significantly tapered restorations, bonding cements are recommended. However, removing that restoration may be impossible, as the material and the natural tooth will look nearly identical. So care should be taken to confirm the fit is excellent and margins are sealed, before cementing.
2. Luting: If preparation has adequate retention (i.e. acceptable length and parallelism of axial walls), luting cements (such as resin-modified glass ionomer, or conventional glass ionomer) are recommended. The advantages include easier removal, less likelihood of tooth sensitivity.
Dr. Christenson does not mention specific cements, but the following list is, from our experience, the most widely used:
Bonding: Insure, Cosmodent; Nexus, Kerr; Choice, Bisco;
Luting: Vivaglass, Ivoclar Vivadent; Variolink, Ivoclar Vivadent;GC Fuji, GC America; Panavia F, J. Morita; C&B Metabond;
e.Max, Zirconia, Gordon Christenson, JADA, Dental Technician, Dentist
Nesbits and Implant Supported Unilaterals
Posted on 02/12/2014
Treating the unilateral edentulous space, for example where #3 and 4 are missing, poses certain challenges if the patient has limited funds for a fixed bridge or for implant supported fixed prostheses.
In a recent article in Denstistry Today*, Dr. John F. Carpenter discusses the implant supported nesbit. He notes the inherent problems with standard nesbits - risk of swallowing - and the deficiencies associated with instability of the cast nesbit and tissue pressure with a flexi nesbit.
His alternative is an attachment or implant supported nesbit - or a combination. For example, a single implant between #3,4 with a locator abutment. For three unit bridges, he offers the option of a mini era attachment on the most mesial tooth, and an implant in the far distal area. He argues that implant and attachment supported nesbits have a much lower risk of patient swallowing.
From a cost perspective, the option of an implant supported nesbit is a great option. But we do recommend that doctors planning a case should make sure they feel comfortable with chairside placement of the male attachments using self curing acrylic. A common issue that arises in the lab is where a doctor not familiar with chairside placement of male parts asks for an implant supported denture, without providing an impression using an impression coping and analog. It’s important to note that lab techs cannot process male attachments on a stone model replica of the locator abutment or era attachment. The lab needs to work on the metal analog.
One easy and effective solution is for the lab to make the partial with space left for the attachment. This requires that the doctor purchase the parts and tools needed for chairside placement. It is the most cost effective approach as there is no implant labor charge by the lab, and no markup of the implant parts.
Thanks for reading and have a great day!
*Dentistry Today January 2014 Pg. 106. Implant-Assisted Unilateral Removable Partial Dentures by Dr. John F. Carpenter
Implants, Dental Implants, Unilaterals, Nesbits, Dental Lab Tech, Dentist
Reducing the Gag Reflux
Posted on 11/19/2013
In a recent case for a full upper immediate denture, we noticed that part of the hard palate was distorted in the impression. We contacted the doctor about this and he informed us that the patient is a gagger and it was the best impression after three attempts. He knew the denture would need to be relined.
Are there any options to help patients who consistently gag during impressions?
In a recent article published in Dental Economics*, Dr. Joseph Massad offers some interesting techniques to address the gagger situation. We summarize those techniques below. A copy of the original article is available at the link below this article.
1. Place a Q-Tip with salt on the tip of the patient’s tongue. This should stimulate the taste sensors which seem to stimulate the hypothalamus – the same area that may cause gagging. A second stimulus often reduces the gag reflux.
2. Offer the patient a Tetracaine Lollipop. Allow enough time for the lollipop to coat the hard and soft palate. This topical anesthetic can reduce the gag reflux. It is also used after tonsillectomies.
3. Give the patient an extremely cold object such as chemical ice to hold in their hands. Cold sensations seem to be signaled in the hypothalamus and may reduce the gag reflux as a result.
We hope some of these techniques are helpful. Please let us know if you hear of others.
(*Dental Economics October 2013, page 20)
Full Denture, Complete Denture, Gagging, Gag Reflux, Dentistry, Dentist
Options for Temporization during Osseointegration - TCS Flexi Partial
Posted on 11/13/2013
Osseointegration, the period during which an implant integrates into the bone, can take anywhere from three to six months. During that time, most patients require some form of temporization - either using a temporary built over the implant healing cap/temporary abutment or a removable appliance such as a flipper.
In situations where a doctor prefers to use a flat cover screw, often a flipper is the best choice. Many flippers are made from acrylic and can break if the patient is not careful or can cause an allergic reaction. A terrific alternative is a flexible partial. A flexible partial is virtually unbreakable and offers excellent retention and esthetics. The one major drawback is that a flexi material cannot easily be relined or repaired. However, since acrylic flippers often lose their retention when relined or repaired, the benefits usually outweigh the drawbacks.
In particular, we have found the TCS® Unbreakable flexible material to be a terrific option for temporization. Our lab offers rush and regular ten business day processing.
The TCS® flexi partials offer consistent shade matching and quality. They recently published a guide to chairside adjustments that we are summarizing below. An original copy can be found in the link below.
Chairside Adjustment Techniques for TCS® Flexi Partials
Check 1: Pain
If patient feels pain, usually it is due to one of two reasons:
1. High Occlusion - check the occlusion and reduce teeth accordingly
2. Overextended flange - reduce the flange using this technique:
2.1 Use a Green Mounted Point or Brown Rubber Point.
2.2 Set your hand piece to a low speed (32,000 - 35,000 rpm)
2.3 Use fast, light scraping back and forth movements
2.4 Do not keep bur in one spot. Use constant motion.
2.5 Do not use acrylic burs
2.6 If threads remain, use a sharp blade to remove
Check 2: Tightness
If patient feels tightness at the clasp area, you can loosen the clasp using the following technique:
1. Submerge in hot water for about 30 seconds
2. Remove from hot water
3. Hold under running cold tap water and gently bend the clasp outward
If patient feels that the clasp is too loose:
1. Submerge in hot water for about 30 seconds
2. Remove from hot water
3. Hold under running cold tap water and gently bend the clasp inward.
Additional information is available using the link below. Click on "Doctor Information Booklet".
Implant integration, TCS Flexible, Unbreakable, Partial, Denture, Dentist, Dental Lab Tech
Implant Screw Loosening
Posted on 11/08/2013
We probably can all recall a screw related issue with an implant case. The screw loosened, the screw would not fully torque, the screw was not retrievable - these are all common scenarios in implant dentistry. And with the increased number of generic parts available, this particular issue will likely only increase.
How can we address this issue pro-actively to avoid situations where the patient is in the chair and the abutment fits well, but cannot be screwed securely down?
Here are a couple of recommendations we have found to be helpful:
1. Purchase a set of drivers for all implant systems. Two companies in particular sell drivers for virtually any screw type: Diamo Dent (1888-281-8850) and Implant Direct (1-888-649-6425). We like the Diamo Dent drivers very much and they have come in handy one more than one occasion. A full set won't cost more than $500. And it's certainly worth the investment.
2. Keep a set of extra screws at your office. Using the lab screws is really not recommended. The lab screws and unscrews the screw at least five times during the fabrication of the abutment and fitting. Even with a durable titanium screw, it is better to use a new screw when inserting the abutment into the patient. If you did not supply the parts for the lab, then ask the lab what screw they used. Ask them to send you an extra screw, or ask them the company information so you can buy some extra spare screws.
3. Ask the lab to specify which size screw they've used for the try in screw. There are some European companies with FDA registration that are selling generic screws. While the screws can work well, we have noticed on occasions that they require a .048" driver rather than a .050" driver. Most practices have a .050" driver. So, if you're finding that you cannot torque a screw down, it is probably related to the wrong size driver.
Thanks for joining us today. Have a wonderful weekend.
Implant Screws, Nobel Biocare, Diamo Dent, Implant Direct, Streamline Dental Lab, Dentist, Dental Lab Tech
Small Diameter (Mini) Implant/Abutments
Posted on 10/16/2013
In a recent article entitled “Mini Implants: Insights from Dr. Gordon Christensen”*, Dr. Christensen discusses some of the advantages of the small diameter (mini) implants. Among the benefits of the mini implant over the standard diameter implant, Dr. Christensen lists easier surgical technique, quicker healing time and immediate loading. In addition, the cost to the patient can be lower since there is usually no need for a separate abutment and the surgery can be done by the general dentist.
He notes some general rules of thumb when placing the mini implant, that we felt were good advice and we’ve summarized them below:
1. A facial-lingual radiograph (either a tomograph or a CBCT scan) is highly suggested to help with choosing the ideal location.
2. Soft tissue should not be more than 2mm on the crest.
3. A 13mm implant is the average and preferred length
4. Implants should not diverge by more than 15 degrees
5. Mini implants are not recommended for patients who are bruxers
We would like to add some additional points to this from our experience in the lab. For removable appliances, we feel that the mini implant is a terrific option. We have had a great deal of success fabricating standard dentures to be supported over mini implants.
However, we have seen the use of mini implants for fixed cases and these have often been quite problematic. Among the challenges for the lab are:
1. Models are extremely difficult to pour accurately unless an abutment/implant analog is provided. Even an epoxy material does not always capture the abutment well – and it usually tears the impression.
2. The crown over the mini implant often has a poor emergence profile due to the narrow abutment platform.
3. Fear of gingival recession often leads the dentist to request the crown to look like a “Full Ridge Lap Pontic” where the crown extends beyond the abutment margin to the gum. This places an undue pressure on the implant and often creates a food trap. It is not recommended.
In light of these issues, we highly suggest the use of a secondary abutment to be either cemented or screwed down to the mini implant. This often solves the lab side issue and allows for a more esthetic final
restoration.
Wishing you luck with your next mini implant case!
Mini Implants, CBCT Scan, Tomograph, Implant dentistry, dental lab tech, dentist
Choosing an Abutment
Posted on 10/02/2013
One of the more common questions we receive from our clients is what type of abutment to use for a case: a straight abutment, angled abutment or custom abutment. With the incredible amount of available systems and parts, it can be awfully confusing.
Of course, there are advantages from a cost perspective to use a pre-fabricated abutment. But be cautious. Choosing the wrong abutment will often increase your costs. The key factors to consider when selecting an abutment include:
1. Depth of the implant: This determines the height of the abutment collar
2. Inter-occlusal space: This determines whether you can do a cement retained crown. If you have limited space, a screw retained crown will likely need a castable part.
3. Angulation: If the implant is placed off the ridge bucco-lingually or close proximally to a natural tooth, an angled abutment will often be needed. Typically, abutments are made at 15 degree or 25 degree angles. Choosing the correct one requires either a measurement or ideally an actual abutment to place into the implant and confirm angulation.
If unsure, we recommend opting for a custom abutment using either a UCLA castable abutment, or a milled titanium abutment. The former, in particular, allows for almost any scenario. The UCLA abutment allows the lab to cast any collar height, create either a cement retained or screw retained design, and contour for virtually any angulation. The titanium milled abutment offers the same but cannot easily be used for screw retained crowns.
Abutments, Straight Abutments, Angled Abutments, Custom Abutments, Crown and Bridge
Implant Supported Cantilever Pontics
Posted on 08/28/2013
In a recent article entitled: Confronting Controversial Issues in Dental Implant Therapy, Part I by Dr. Gary Greenstein, Dr. John Cavallaro, and Dr. Dennis Tarnow in Denstistry Today, the authors discussed options and recommendations for implant supported cantilever pontics.
A link to the original article can be found below this article.
Here are some of the highlights that we felt were helpful to us:
Doctor Side Recommendations:
1. Number of Implants: Each cantilever should be supported by at least two to three implants
2. Horizontal Distance Between Implants: 8mm is the ideal spacing between the center of the implants.
3. Implant Width: Increased diameter implants are preferred. Higher fracture rates were shown with 3.3.mm implants.
4. Mesio-Distal Length: Cantilever should be no larger than the size of a pre-molar
5. Preloading: Abutment screws should be tightened after initial torqueing.
6. Implant Design: Implants with a textured surface are ideal as they provide increased retention to bone.
7. Crown-to-Root Ratio: Wider implants should be considered if implant to crown ratio is extreme.
Lab Side Recommendations
1. Material and Thickness: A metal substructure is ideal. Cantilever should be cast as one unit with the implant supported retainers. Lab should place more occlusal-gingival height for the metal connecting the cantilever and doubling the buccolingual width.
2. Occlusion: It is best to leave the cantilever in infraocclusion by 0.1 to 0.2mm (i.e. Out of occlusion)
3. Abutments: Abutments should have maximum axial wall length with minimal taper. This will increase retention and resistance form.
Cantilevers, Dental Implants, Dental Lab, Dentist, PFM
Tissue Recession on Implant Bridges
Posted on 08/21/2013
In a recent article in Inclusive Magazine by Glidewell Laboratories, Dr. Dennis Tarnow addressed the issue of tissue recession - specifically with regards to the papilla - between two implant crowns. For us, this was really an eye opening article. We have seen on more than one occasion cases come back to us to add gingival porcelain specifically in the interproximal embrasure space between laterals and canines.
Here is a brief summary of the points that Dr. Tarnow discussed:
1. The importance of keeping at least 3mm of space between each implant fixture
2. The realization that for implant cases, the average height of tissue over the crest of the bone is not the desired 5mm but actually 3.4mm.
3. The subsequent realization that limiting the number of repeat removals of the abutment or healing cap will aid in the healing process
These points have all helped us to anticipate cases that would be good candidates for gingival pink porcelain in advance. It allows us to communicate our concerns with the doctor and pro-actively design the abutment and crown to deal with future gingival recession.
For a fully copy of the article, please click the link below:
Tissue Recession, Implant Supported Crowns, Dental Crowns, Dentist, Dental Lab
Case Discussion: Adjusting the Bite of a Finished Denture
Posted on 07/17/2013
Dealing with an incorrect bite on a partial or complete finished acrylic denture is never easy. The teeth setup and subsequent resets are designed specifically to avoid a situation of the incorrect bite. But, inevitably, there are circumstances where the open bite was not noticed at try in, or the actual teeth position changed during processing in the lab.
For acrylic finished partial or complete dentures, the following protocol is recommended:
1. If infraocclusion (i.e. open occlusion), take a new bite using wax (either sticky wax, or pink wax). Send back the denture, the counter model and the bite. The lab will pour a new model using the denture itself and articulate with the new bite. The lab will then remove the teeth and reset in wax and return for a final try in. Assuming the bite is correct, the lab will proceed to finish based on the new position of the teeth.
2. If hyperocclusion (i.e. teeth hit prematurely), doctor should grind down the teeth to the point where patient is occluding correctly or out of occlusion. Then take a new full arch bite with wax. Lab will articulate and reset teeth in wax and return for try in. Assuming the bite is correct, the lab will proceed to finish based on the new position of the teeth.
Note: It is NOT recommended to take bites for removable using blue mouse. This is because acrylic teeth are not sharp enough to fully pierce the material, which then often leads to open occlusion.
Acrylic Denture, Complete Denture, Infraocclusion, Hyperocclusion
Case Discussion: Biomet 3i Encode System
Posted on 07/10/2013
One of the challenges faced by the general dentist in implant dentistry is the impression taking technique. Most systems utilize a metal device called an impression coping which is screwed down to the implant using either the open tray or closed tray technique.
Both techniques, however, are subject to error. The open tray technique, while generally more accurate, does allow for errors when removing the tray. Often, the impression coping will move slightly during removal or during fitting of the analog. Even a slight movement allows for error in the model. The close tray technique is subject to a different error – misplacement back into the impression. Properly designed impression copings have only one way to seat into an impression. However, there are many impression coping systems that do not have an ideal anti-rotational design which often leads to misplacement in the impression.
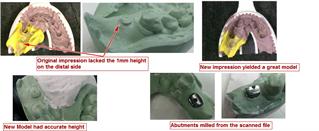
To address this issue, the Biomet 3i Bellatek Encode system designed the impression technique around the healing cap (cover screw). The doctor takes an impression of the healing cap either digitally or with a PVS material and send it to the lab. The healing cap is specially designed for this purpose and has a groove which indicates the position of the implant. The lab has the option of pouring a traditional model and either scanning it, or sending the model directly to Biomet 3i for fabrication of the abutment.
Biomet 3i will then mill the abutment from the scanned file and also robotically place the analog in the model.
This technique is an excellent way to avoid errors. But it does require a learning curve. For example, the impression of the healing cap must allow for at least 1mm of height of the healing cap. If it does not, an abutment cannot be scanned. In a recent case in our lab, the original impression did not yield that 1mm height and the patient was forced to come back for a second impression.
One other consideration here is cost. The traditional impression allows for the use of a pre-fabricated abutment or a cast UCLA abutment. This is typically more economical than the Encode system which is priced at a premium.
Here is a look at a recent Bellatek Encode case:
Implant Abutment, Biomet 3i, Encode, Custom Abutment
Case Discussion: Multiple Implant Units
Posted on 07/03/2013
I have decided now to turn some attention to actual cases. I will attempt to choose interesting cases that present specific challenges.
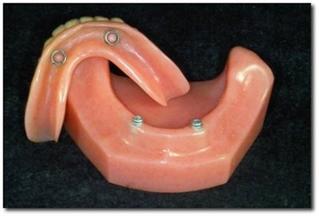
The following case presented a male patient with six mandibular implants (19,20,21 and 29,30,31) and eight maxillary implants (3,4,5,6 and 11,12,13,14). Patient had existing teeth 7,8,9.
Doctor asked for custom abutments and all individual PFM white gold crowns except for 10,11,12 where #10 was a cantilever pontic. We splinted #11,12 to #10.
In this case we were faced with two main challenges
1. Establishing the correct vertical
2. Ensuring implant transfer is correct
In working to establish the bite, the doctor initially gave us a vanilla mouse bite using the anterior remaining teeth. We did not feel we could mount the case, so we returned bite blocks. Doctor proceeded to take a new bite which allowed us to establish the vertical.
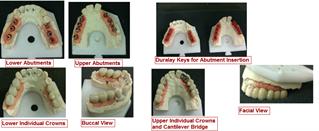
Implant transfer has always been an area of art and science. Doctor used standard metal impression copings for Zimmer Screw Vent using the closed tray impression technique. We poured the impression and poured a duplicate without the impression copings in the impression. We then double checked the position of the impression copings against the solid model for verification. We cast the abutments from UCLA abutments and created a duralay key for insertion. Lucky for us, the transfer was correct and all abutments seated in the correct position.
We then proceeded to fabricate individual crowns. We like individual crowns over implants as they offer better eshtetics, future retrieval and easier troubleshooting if the implant position is off.
Doctor tried in the crowns but there was indeed an issue with the left side bite. Crowns were out of occlusion. We asked for a bite over the crowns and a pickup impression of the crowns in the mouth. Doctor left the abutments screwed down.
We then added porcelain and rebuilt the contacts for the individual crowns. Doctor was able to seat and patient left very happy with his new bridge.
Lesson learned from this case is to really verify the mounting before baking porcelain - especially on individual crowns. Adding porcelain and rebuilding contacts is not easy the secong go round:)
Here is a photo of the case. You can click the link below to blow up the picture.
Implants, Zimmer, Abutments, White Gold, PFM
Tooth Anatomy and Shade Selection
Posted on 05/29/2013
Natural teeth vary in shade (color) in all three axes commonly known as the X, Y and Z axis
1. Mesial-Distal (X)
2. Gingival - Incisal (Y)
3. Buccal/Labial - Lingual (Z)
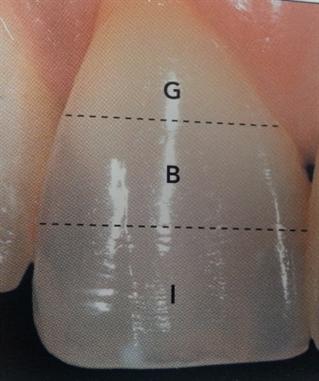
Variation seems to be most pronounced on the Y plane, and as a result, standard communication between dentists and labs refer only to this plane.
The Y plane is divided into three zones (see picture below):
1. Gingival/Cervical (closes to the gum) - G
2. Body (middle) - B
3. Incisal (biting edge) - I
The gingival third of the tooth is typically the darkest and gradually becomes lighter as it reaches the incisal edge. However, as the X and Z axes can also impact tooth color, it is often the case that a single shade tab does not accurately capture all of the distinctive lines, or communicate the opaque or translucent qualities of the tooth.
In such cases, especially when attempting to match a single central, it is often recommended for the dentist to both take a digital picture and send the patient to the laboratory for custom shading. The laboratory may use a different set of shade tabs, or devices such as the Vita Easy Shade® Machine, to help determine the correct porcelain colors to use.
Picture from page 47 of Fundaments of Color - Shade Matching and Communication in Esthetic Dentistry published by Quintessence Publishing Co. Inc and written by Dr. Stephen J. Chu, Dr. Alessandro Devigus, Dr. Rade D. Paravina and Mr. Adam J. Mieleszko
Gingival, Body, Incisal, Tooth Shade, Vita Easy Shade
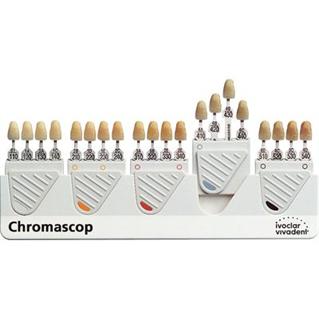
Chromoscop Shade Guide
Posted on 05/08/2013
The Chromoscop shade guide developed by Ivoclar Vivadent, whose products include Emax and Empress, is also a popular shade guide for practices and labs working with Ivoclar porcelains.
The shade guide consists of five groups of tabs organized by hue.
Groups:
100 = White
200 = Yellow
300 = Orange
400 = Gray
500 = Brown
The tabs are further organized by a numbering system to distinguish chroma and value.
10 = Least Chromatic, Highest Value
40 = Most chromatic, Lowest Value
A photo of the Shade Tab is found below.
Portions of this post were adapted from the book:
Fundaments of Color - Shade Matching and Communication in Esthetic Dentistry published by Quintessence Publishing Co. Inc and written by Dr. Stephen J. Chu, Dr. Alessandro Devigus, Dr. Rade D. Paravina and Mr. Adam J. Mieleszko
Chromoscop, Ivoclar, Shade Tabs
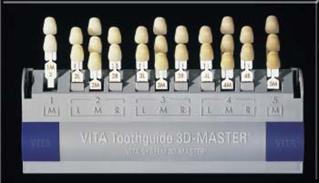
Vita 3D Master Shade Guide
Posted on 08/14/2012
The Vita 3D Master shade guide, introduced in 1998, represented an important shift in the design of shade guides. Unlike virtually all previous systems, the 3D Master organized tabs by Value first, and then by Hue and lastly by Chroma. Previous to this guide, tabs had been organized in groups based on Hue.
The design of the 3D Master Shade Guide was specifically meant to improve the process of shade taking - leading the professional to the right shade in a systematic, repeatable process. This is a marked contrast from previous shade guides which relied primarily in the professional placing any tab next to the tooth and choosing a shade that he felt most closely matched the tooth. In the 3D Master Shade Guide, the professional selects first an appropriate value, then a hue and lastly a chroma.
To achieve this process, the 3D Master organized the 29 tabs according to the following numbering/lettering system:
Each tab is given a number, letter, number - i.e. 2M1. The first number represents the value, the second number the hue and the third number the chroma.
First Number - Value
Group 0 = consists of 3 tabs in a bleached white color
Group 1 = consists of 2 tabs in a slightly darker value than group 0
Group 2 = consists of 7 tabs in a slightly darker value than group 1
Group 3 = consists of 7 tabs in a slightly darker value than group 2
Group 4 = consists of 7 tabs in a slighly darker value than group 3
Group 5 = consists of 3 tabs and is the darkest value
Letter - Hue
L = Yellowish, Left position
M = Medium, Middle position
R = Reddish, Right position
Last Number - Chroma
1 = Low Chroma
2 = Medium Chroma
3 = High Chroma
Portions of this post were adapted from the book:
Fundaments of Color - Shade Matching and Communication in Esthetic Dentistry published by Quintessence Publishing Co. Inc and written by Dr. Stephen J. Chu, Dr. Alessandro Devigus, Dr. Rade D. Paravina and Mr. Adam J. Mieleszko
Vita 3DMaster Shade Guide, Vita, Vident, Dentist, Dental Lab Tech
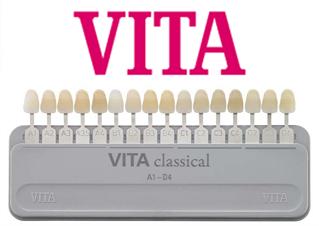
Vita Classical as the Industry Standard
Posted on 08/13/2012
With its early introduction in 1983 coinciding with the rise in demand for porcelain based restorations, the Vita Classical system became the most commonly used system for porcelain and composite based shade matching in the industry. As a result, most porcelain systems - even competitor's products - adopted the Vita shades. The fact, then, that the Vita Classical shades became the industry standard for fixed restorations, has led to its continued wide ranging use.
However, Vita realized that there were some flaws in the design of the classical shade guide. Specifically, because the shade tabs were organized by Hue rather than Value, dental professionals often chose the wrong shade simply because they were looking within the wrong color group.
As a result, in 1998 Vita introduced the 3D Master Shade guide offering a more extensive range of shade tabs and reorganizing the tabs to incorporate all three dimensions of color as outlined by Prof. Munsell: Hue, Value and Chroma.
We will further discuss this system in our upcoming posts.
Vita Classical Shade Guide, Vita 3D Master, Shade Tabs, Porcelain, Dental Lab Tech, Dentist, Vident
Shade Guide Systems
Posted on 08/09/2012
We will now turn our attention to perhaps the most practical side of shade selection in dentistry - the shade guide. And while the contrast effects noted earlier are certainly important to keep in mind, it is ultimately the tool that we use to select a shade that has the greatest impact. If the tool is itself of a high quality and is used properly, shade selection can be predictable. If the tool used is worn out, distorted or incomplete; or alternatively if the professional is not trained in the use of the tool, shade selection becomes an onerous task.
We will begin our discussion with the most widely used shade guide system in the US - the Vita Classical Shade system by Vita Zahnfabrik from Switzerland. It is sold and distributed in the US by Vident Inc. in California.
The Vita classical shade system was introduced in 1983 and has become the most widely used shade guide for porcelain restorations.
It consists of 16 shade tabs arranged according to hue alphabetically:
A - Orange
B - Yellow
C - Yellow/Gray
D - Orange/Gray (Brown)
The tabs are further organized by value and chroma designated by a number that suffixes the letter.
1 - Lease Chromatic, Highest Value
4 - Most Chromatic, Lowest Value
For example, A1 has a an orange Hue, a low Chroma and a High Value. Please see the picture below for the complete shade tab arrangement.
Portions of this post were adapted from the book:
Fundaments of Color - Shade Matching and Communication in Esthetic Dentistry published by Quintessence Publishing Co. Inc and written by Dr. Stephen J. Chu, Dr. Alessandro Devigus, Dr. Rade D. Paravina and Mr. Adam J. Mieleszko.
http://vident.com/products/shade-management/vita-classical-previously-the-lumin-vacuum-shade-guide/
Vita Classical Shade Guide, Shade Selection, A1, A2, B1, B2, Dental Technician, Dentist
Viewer Related Color Effects
Posted on 08/02/2012
In addition to the color contrast effects noted in our previous blogs, there are a number of viewer associated effects that can impact the perception of color.
The following list, while not exhaustive, covers the more common viewer related effects that can influence shade selection:
Color Blindness – the inability to distinguish red, green and blue colors can cause for improper shade selection.
Age – professionals over the age of sixty will often face difficulties in perceiving blue and purple colors.
Fatigue – tired eyes from consecutive shade selections will often compromise proper shade selection.
Nutrition – macular degeneration can severely impact the professional’s ability to distinguish colors and shades.
Emotion – emotion has been shown to affect papillary diameter and thus cause changes in perception of colors. Anger or sadness, for example, can impact the professional’s ability to choose the correct shade.
Medication – certain medications can cause vision distortions. Studies have shown that Viagra can give a blue tint to objects, and this medication as well as any other medication with visual side effects should be avoided prior to shade selection.
Binocular Difference – perception differences between the right eye and the left eye can lead to incorrect shade selection. Holding the shade tab above or below the tooth, rather than to the side of the tooth, often helps to account for this perception difference.
Portions of this post were adapted from the book:
Fundaments of Color - Shade Matching and Communication in Esthetic Dentistry published by Quintessence Publishing Co. Inc pages 33-35, and written by Dr. Stephen J. Chu, Dr. Alessandro Devigus, Dr. Rade D. Paravina and Mr. Adam J. Mieleszko.
Color blindness, Shade Age, Fatigue, Nutrition, Medication, Binocular Difference, Shade Selection, Dentist, Dental Lab Tech
Successive Color Contrast Effect
Posted on 07/30/2012
The successive contrast effect is the result of two colors being viewed in succession. The first color can affect the perception of the second color because the first color remains in the viewer’s perception and is known as an "afterimage". For example, if a doctor takes a shade from the maxillary right and immediately takes another shade from the maxillary left, it is likely that the shade on the maxillary right will affect his/her perception of the shade on the maxillary left.
Afterimages are divided into two categories: positive afterimages and negative afterimages. Positive afterimages are afterimages that retain the color of the original image. For example, if the viewer sees a red image, the afterimage will be red. A negative afterimage is when the afterimage is an opposite or complementary color to the originally viewed color. For example, if the original color was red, the viewer will retain a green color as the afterimage. The causes of positive afterimages are not well known, but the causes of negative afterimages are attributed to long visual contact and overstimulation of the rods resulting in a loss of sensitivity.
The easiest and probably most effective way of dealing with the afterimages is to view a neutral color, such as gray, between each shade selection. Viewing the neutral color will help to reduce or eliminate the effects of the original color on the perception of the new color.
Portions of this post were adapted from the book:
Fundaments of Color - Shade Matching and Communication in Esthetic Dentistry published by Quintessence Publishing Co. Inc and written by Dr. Stephen J. Chu, Dr. Alessandro Devigus, Dr. Rade D. Paravina and Mr. Adam J. Mieleszko. and the
Wikipedia article/s:
http://en.wikipedia.org/wiki/Contrast_effect
http://en.wikipedia.org/wiki/Afterimage
Successive Color Contrast, Afterimages, Red, Green, Shades, Dentists, Dental Lab Tech
Position Contrast Effect
Posted on 07/24/2012
The position contrast effect describes the changes in perceived color based on position of an object relative to another object. Specifically, if an object is placed behind another object, the anterior object will often appear lighter in value compared with the posterior object.
Similarly, with overlapping teeth, the anterior tooth often appears lighter than the posterior tooth, although both teeth are of the same shade. This contrast effect is also noted with regards to posterior teeth (i.e. molars) relative to anterior teeth - the posterior teeth will appear slightly darker than the anterior teeth.
To address the position contrast effect, the dentist or dental lab tech is advised to follow fabricate posterior teeth one shade or half shade lighter than the anterior teeth. For example, if Vita shade A2 is chosen for the anterior teeth, choose shade A1.5 for the posterior teeth.
Color Contrasts, Shade, Vita Shade A2, Dental Lab Tech, Dentist
Size Contrast Effect
Posted on 07/23/2012
The size of an object can impact the perceived value (i.e. lightness or darkness) of the object. For example, larger teeth will often appear lighter to the human eye than smaller teeth - although both teeth are made of the same shade.
In the event that two restorations, one for a central and one for a lateral, appear to be two slightly different shades, the size of each should be considered as a factor that influences the perceived color. If the lateral appears slightly darker than the central, but when we removed from the mouth appears to be the identical shade, it is not unlikely that the difference in size is affecting the perceived color. As such, either staining the central to be a bit darker, or reapplying porcelain to the lateral to be a shade lighter, will likely fix the issue.
Color Contrast Effects, Value Contrast Effect, Size, Dental Lab Tech, Dentist
Chroma Contrast Effect
Posted on 07/06/2012
The chroma contrast effect occurs when a color's chroma is increased or decreased when observed against a background of another color. The general rules are:
1. An object will appear to have a more intense chroma when viewed against a color low in chroma
2. An object will appear to have a less intense chroma when viewed against a color high in chroma
3. The more similar the hue and chroma of the object is to the background color, the less visible the object becomes.
For example, a tooth viewed against a dark orange color background will appear lighter in chroma than the same tooth viewed against a light orange background. This effect is similar to the simultaneous contrast effect noted earlier.
The following illustration* demonstrates the chroma contrast effect.
Portions of this post were adapted from the book:
Fundaments of Color - Shade Matching and Communication in Esthetic Dentistry published by Quintessence Publishing Co. Inc. *Photo from page 31.
Color Contrast Effects, Chroma Contrast Effect, Dental Lab Tech, Dentist
Value Contrast Effect
Posted on 07/03/2012
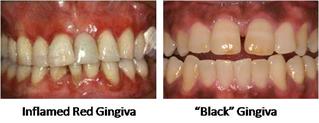
A value contrast effect occurs when a color appears lighter or darker in relation to another color. For example, if a gray color is overlaid on a black background, it will appear lighter than if the same gray color is overlaid on a white background. An illustration of the value contrast effect was noted also in our post on "Contrast Effects" - http://goo.gl/1j22z.
In dentistry, the value contrast effect occurs often when a tooth is viewed against an inflamed gingiva. The tooth shade will often appear lighter when contrasted with a dark red gingiva and darker when viewed against the natural pink gingiva. The same effect will occur when a tooth shade is viewed against a gray or black gingiva caused by smoking or diabetes. The photos below illustrate this value contrast effect.
To address the value contrast effect, the dental professional is advised to follow the following rules when taking a shade:
1. Always note the gingiva color
2. If the gingiva color is naturally dark, choose a shade that is slightly darker from the ideal shade. The darkness of the gingiva will cause the shade to appear lighter.
3. If the gingiva color is naturally light, choose a shade that is a bit lighter than the ideal shade. The lightness of the gingiva will cause the shade to appear a bit darker.
4. If the gingiva is temporarily discolored due to inflammation, double check the chosen shade against the patient's healthy gingiva. Communicate the value contrast effect with the patient, and explain that the initial tooth color may appear a bit lighter, but as the gingiva heals, the tooth shade should match the surrounding dentition.
Portions of this post were adapted from the book:
Fundaments of Color - Shade Matching and Communication in Esthetic Dentistry published by Quintessence Publishing Co. Inc. Photos courtesy of: Dr. Marcus Whitmore from Planodental.com and obtained from WebMD http://goo.gl/HqkvC.
Value Contrast Effect, Inflamed Gingiva, Red Gingiva, Diabetes, Smoking, Dental Lab Tech, Dentist
Hue Contrast Effect
Posted on 06/29/2012
A hue contrast effect occurs when a color is perceived differently due to hue contrast with a background color. The color often appears closer to the complementary color of the background color (see illustration below).
For example, a shade tab viewed against an orange background will often appear to have more blue, and when viewed against a yellow background will often appear to have more purple. If a tooth shade tab is placed in front of a natural tooth that has an orange hue, the dental professional will often perceive a shade tab to have more blue than it actually has, and therefore choose a different shade even when the original choice was correct.
To counter act such perceived difference, it is advisable for the dentist or dental lab tech to pre-condition his or her eye by viewing the complementary color before choosing a shade. Because most natural tooth shades fall within an orange hue, viewing the complementary light blue color will often allow the eye to perceive the actual shade more accurately and thereby choose the correct shade tab.
Portions of this post were adapted from the book:
Fundaments of Color - Shade Matching and Communication in Esthetic Dentistry published by Quintessence Publishing Co. Inc

Contrast Effect, Hue, Shade, Shade Tab, Dentist, Dental Lab Tech
Contrast Effects
Posted on 06/28/2012
A contrast effect in color theory is the impact that one color has on the perception of another color.
A common example of a contrast effect is a "simultaneous contrast" in which two colors are observed at the same time. This is best understood through the following graphic illustration*.

In this illustration, the inner gray rectangles are identical colors. However, the inner gray rectangle appears lighter when viewed against the darker background, and darker when viewed against the lighter background.
This visual phenomenon has a direct impact on tooth shade selection in dentistry. For example, a tooth viewed against a dark gingiva will appear lighter than a tooth viewed against a lighter gingiva.
For the purpose of our discussion of contrast effects in clinical settings, we will delineate contrast effects in the following six categories:
1. Hue
2. Value
3. Chroma
4. Areal
5. Spatial
6. Successive
*Source: http://en.wikipedia.org/wiki/Contrast_effect
Portions of this post were adapted from the book:
Fundaments of Color - Shade Matching and Communication in Esthetic Dentistry published by Quintessence Publishing Co. Inc
and the
Wikipedia article/s:
http://en.wikipedia.org/wiki/Contrast_effect
Contrast Effects, Simultaneous contrast, Hue, Value, Chroma, Color in dentistry, shade selection, dentist, dental lab tech
Metamerism
Posted on 06/26/2012
Metamerism is the term used to define the capability of humans to recognize different colors and their relation under different light sources (such as natural light, fluorescent light etc.)
Metameric matches occur more frequently in the near neutral colors such as white and gray and the dark colors such as black. As colors become lighter or more saturated (i.e. on the chroma scale), metameric matches become more difficult.
In dentistry, it is often the case that a lab fabricated restoration which appears to be a very close match under fluorescent lighting, is noticeably different under natural sun light or color corrective lighting. The term: "illuminant metameric failure" describes this situation and can be extended to any two material samples that match when viewed under one light source but not under another.
Achieving metameric color matches in dentistry is often a challenge due not only to color matching, but due to other material attributes including translucency, gloss or surface texture of adjacent teeth. As in color matching in the paint industry, dental labs often aim at achieving spectral color match rather than metameric color match. Spectral color match attempts to give two colors the same spectral reflectance characteristic, which in turn often makes them good metameric matches.
Portions of this post were adapted from the book:
Fundaments of Color - Shade Matching and Communication in Esthetic Dentistry published by Quintessence Publishing Co. Inc
and the
Wikipedia article/s:
http://en.wikipedia.org/wiki/Metamerism_(color)
http://en.wikipedia.org/wiki/Metamerism
Metamerism, Color Matching, Spectral Color Matches, Shades, Dentist, Dental Lab Tech
Conflicts of Illumination
Posted on 06/25/2012
As noted earlier, there are six different types of illuminants according to the CIE. In dental practice settings, these different forms of illuminants often cause conflict by mixing light from one source with light from another. For example, if an operatory has a window with natural sunlight and fluorescent ceiling lights, there is automatically a conflict of lighting.
To address conflicts, dental practices often purchase color corrective lighting. Color corrective lighting often works well so long as the color temperature is 5,500K. If the color temperature varies either because the color corrective lights are not cleaned regularly or the bulbs are not changed regularly, shade matching will not be ideal. To verify the color temperature, a color temperature meter can be purchased and used to verify color temperature. Color corrective lights, when used properly, will provide among the most accurate and consistent lighting environments.
Conflicts of Illumination. color temperature meter, lighting, shade, dental, dentistry, dental lab, lab tech
Illumination
Posted on 06/21/2012
Illumination refers to any use of light, natural or artificial, to achieve a practical or esthetic effect. Natural light from the sun and artificial light from incandescent light bulbs are both examples of illumination.
The types of illumination have been standardized by the International Commission on Illumination known as CIE (French abbreviation for Commission internationale de leclairage). The CIE was founded in 1913 and currently is based in Viena, Austria. It is responsible for developing standards for illumination and colors.
The CIE classified six different types of illuminants known as A, B, C, D, E, F where the letters represent the following types of lighting:
A - incandescent light
B - direct sunlight
C - average daylight
D - phases of daylight
E - equal energy illuminant
F - fluorescent lamps
The CRI or color rendering index is the measurement guide to assess a light sources ability to reproduce an objects color accurately in comparison to an ideal or natural light source. The higher the CRI score, the more accurate the light source as compared to natural light - which is used as the benchmark.
In dentistry, the light source in the office setting has a dramatic impact on shade selection. We will discuss some of the challenges to office light in future blogs.
Portions of this post were adapted from the book:
Fundaments of Color - Shade Matching and Communication in Esthetic Dentistry published by Quintessence Publishing Co. Inc and written by Dr. Stephen J. Chu, Dr. Alessandro Devigus, Dr. Rade D. Paravina and Mr. Adam J. Mieleszko. and the
Wikipedia article/s:
http://en.wikipedia.org/wiki/Color_rendering_index
http://en.wikipedia.org/wiki/Standard_illuminant
International Commission on Illumination, Illumination, CIE, CRI, Shade Selection, Dentistry, Dental Lab, Dental Lab Tech
Conclusion of Color Theory
Posted on 06/19/2012
We have now completed the first section of our discussion on shade communication: Color Theory. Within this section, we highlighted the three sources of light perception: emission, transmission and reflection. We spoke about color models used to reproduce colors: RGB (emission) and CMYK (transmission and reflection). Finally, we concluded this section by noting the significance of complementary colors under either model, and the dimensions of color: hue, value, and chroma that allow us to depict colors on a visual scale.
Our next topic, Elements Affecting Color, will focus primarily on sources of light emission. We will discuss artificial illumination in office settings, the effects of contrast elements and the impact of fatigue and age on our color perception.
Portions of this post were adapted from the book:
Fundaments of Color - Shade Matching and Communication in Esthetic Dentistry published by Quintessence Publishing Co. Inc and written by Dr. Stephen J. Chu, Dr. Alessandro Devigus, Dr. Rade D. Paravina and Mr. Adam J. Mieleszko. a
Color Theory, Illumination, Emission, Transmission, Reflection, Shades in Dentistry, Shading, Dental Lab Tech, Dentist
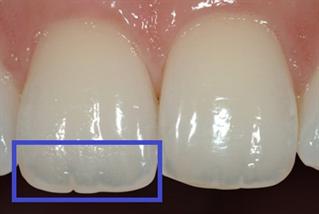
Translucency
Posted on 06/18/2012
In addition to the three dimensions of color devised by Dr. Munsell: Hue, Value and Chroma, dentistry utilizes another dimension of color called Translucence.
Translucence is the degree to which a material transmits wavelengths of light as opposed to reflecting or absorbing the light. For example, a stained glass window is translucent. It is not, however, transparent - a term used to describe the physical property that allows light to pass through a material without being scattered. A clear glass window can be described as transparent.
The opposite of translucency is opacity. An opaque object will reflect or absorb all wavelengths of light and will not transmit any light. An apple, for example, is opaque.
Translucency is inherent to teeth as the incisal (biting) edge of teeth is translucent. Mistakes in translucency (either adding too much translucency or too little) can significantly alter the appearance of a restoration and promote a dull or "unnatural" look. The photo below shows the natural translucency of the maxillary centrals.
Portions of this post were adapted from the book:
Fundaments of Color - Shade Matching and Communication in Esthetic Dentistry published by Quintessence Publishing Co. Inc and written by Dr. Stephen J. Chu, Dr. Alessandro Devigus, Dr. Rade D. Paravina and Mr. Adam J. Mieleszko. and the
Wikipedia article/s:
http://en.wikipedia.org/wiki/Transparency_and_translucency
Translucency, Translucent, Opacity, Opaque, Transparent, Dentist, Dental Lab Tech
Munsell Color System
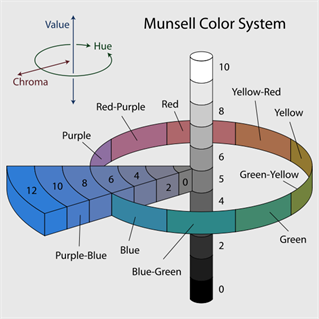
Posted on 06/14/2012
The observation of complementary colors is further expressed in the Munsell color system developed by Professor Albert Munsell of the Massachusetts Normal Art School in the early 20th century. Professor Munsell divided color into three dimensions and applied a numeric formula to express colors. The three dimensions of colors are:
Hue: Loosely defined as the color (i.e. Red, Yellow, Green, Blue and Purple)
Value: Lightness (i.e. how dark the color is on a black to white scale)
Chroma: Purity or saturation of the color.
Each of these dimensions is expressed on a scale for which hue is measured by degrees around horizontal circles, chroma is measured radially outward from the neutral gray axis and value is measured vertically from bottom (0 - black) to top (10 - white).
Complementary colors are defined as any two colors that have the same value and chroma, and lie opposite each other on the hue scale.
This color system is most easily understood visually in the diagram below. This color system has been adopted in dentistry to form the basis of most shade guide systems including the popular Vita Classic and Vita 3D Master Shade Guides.
Portions of this post were adapted from the book:
Fundaments of Color - Shade Matching and Communication in Esthetic Dentistry published by Quintessence Publishing Co. Inc and written by Dr. Stephen J. Chu, Dr. Alessandro Devigus, Dr. Rade D. Paravina and Mr. Adam J. Mieleszko. and the
Wikipedia article/s:
http://en.wikipedia.org/wiki/Munsell_color_system
Munsell Color System, Albert Munsell, Hue, Value, Chroma, Dentistry, Dentist, Dental Lab Tech, Vita Classic, Vita 3D Master Shade Guide
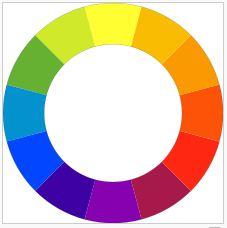
Complementary Colors
Posted on 06/12/2012
In addition to the term Primary and Secondary colors, another term has been used to describe colors that when combined, create neutral colors: "Complementary Colors". In color theory, two colors are called complementary if when mixed, they produce one of the neutral colors: gray, white or black.
While the term complementary colors can refer to different sets of colors depending on the color model (i.e. Additive - RGB, versus Subtractive - CMYK), for our purposes we will describe complementary colors based on their usage in art and design. The following color combinations are considered complementary colors:
Red - Green
Blue - Orange
Yellow - Violet
Within the subtractive system (CMYK), these complementary colors are similar to the colors created through the mixing of the two primary colors:
Red complements (blue + yellow) = Green
Blue complements (red + yellow) = Orange
Yellow complements (red + blue) = Violet
The BYR color wheel (see below) is a helpful visual of complementary colors as used in art and design. Colors opposite of each other are considered complementary.
In dentistry, complementary colors play a significant role in porcelain staining. For example, if a restoration is seen as too orange, adding shades of blue will create a more grayish color.
Portions of this post were adapted from the book:
Fundaments of Color - Shade Matching and Communication in Esthetic Dentistry published by Quintessence Publishing Co. Inc and written by Dr. Stephen J. Chu, Dr. Alessandro Devigus, Dr. Rade D. Paravina and Mr. Adam J. Mieleszko. and the
Wikipedia articles:
http://en.wikipedia.org/wiki/File:BYR_color_wheel.svg
http://en.wikipedia.org/wiki/Complementary_colors
RGB, CMYK, Colors in Dentistry, Complementary Colors, Primary Colors, Secondary Colors, Dental Lab Tech
Primary Colors & Secondary Colors
Posted on 06/11/2012
Pigments can be divided into two categories of colors: Primary Colors and Secondary Colors.
Primary colors refer to any set of colors that can create a secondary color. The most common and popular primary pigment colors among artists are Red, Yellow and Blue - which is very similar to Cyan Magenta and Yellow in the CMY model. However, any two colors that create another color can in fact be called a primary color. Secondary colors refer to any color created from two primary colors.
Secondary colors created from red, yellow and blue include:
Red + Yellow = Orange
Yellow + Blue = Green
Blue + Red = Violet
Portions of this post were adapted from the book:
Fundaments of Color - Shade Matching and Communication in Esthetic Dentistry published by Quintessence Publishing Co. Inc and written by Dr. Stephen J. Chu, Dr. Alessandro Devigus, Dr. Rade D. Paravina and Mr. Adam J. Mieleszko. and the Wikipedia articles: http://en.wikipedia.org/wiki/pigment, http://en.wikipedia.org/wiki/Secondary_color
http://en.wikipedia.org/wiki/Primary_colors
Primary Colors, Secondary Colors, Colors in Dentistry, Dental Tech, Lab Tech, Dentist
Pigments
Posted on 06/07/2012
After noting in previous posts the various sources of light (emission, transmission and reflection) and the color models that reflect those sources (RGB - emission, CMYK - transmission and reflection), we are now ready to discuss colors in dentistry.
Our first topic is pigments. A pigment is a material (such as a dye or stain) that changes the color of reflected or transmitted light. The change in color is due to a wavelength absorption by the pigment.*
Because pigments can alter the color of existing materials, pigments are ideal for use in many industrial applications including dying of fabrics, paints, foods and cosmetics. Ideal pigments will exhibit high tinting strength relative to the color to which is applied and maintain stability in a range of temperatures.
In dentistry, pigments play a large role in determining the final color of ceramics, composites and acrylics.
*It should be noted that the physical process of pigments differs from other forms of luminescence such as fluorescence and phosphorescence in which materials emit light.
Portions of this post were adapted from the book:
Fundaments of Color - Shade Matching and Communication in Esthetic Dentistry published by Quintessence Publishing Co. Inc and written by Dr. Stephen J. Chu, Dr. Alessandro Devigus, Dr. Rade D. Paravina and Mr. Adam J. Mieleszko. and the Wikipedia article: http://en.wikipedia.org/wiki/pigment
Pigments, RGB, CMYK, Emission, Transmission, Color in Dentistry, Dentist
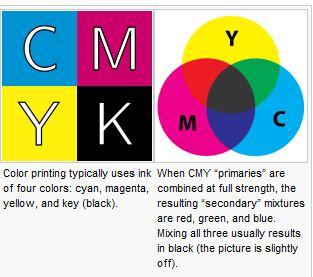
CMYK
Posted on 06/06/2012
The CMYK color model, in contrast to the RGB model, is a representation of the transmission/absorption and reflective/absorption sources of light – also known as a subtractive color model. This color model describes the printing process which utilizes mediums that absorb certain wavelengths and transmit or reflect other wavelengths. Examples include paper (reflective) and slides (transmissive).
In the CMYK model the letters represent:
C - C stands for Cyan which is the color that is produced when red is absorbed by the medium and green and blue are transmitted/reflected.
M - M stands for Magenta which is the color that is produced when green is absorbed and red and blue are transmitted/reflected.
Y - Y stands for Yellow which is the color that is produced when blue is absorbed and green and red are transmitted/reflected.
K - K stands for Black (B was not used since it is used in the RGB model). Black ink was added to darken the ink produced by the CMY colors since the output produced by all three of them was a brown instead of a pure black.
For this reason, it is common that the RGB color model will be used by computer screen manufacturers as they are concerned with the emission of light. Conversely, commercial printers will discuss colors using the CMYK model which represent the colors that are depicted on paper or other reflective mediums.
Portions of this post were adapted from the book:
Fundaments of Color - Shade Matching and Communication in Esthetic Dentistry published by Quintessence Publishing Co. Inc and written by Dr. Stephen J. Chu, Dr. Alessandro Devigus, Dr. Rade D. Paravina and Mr. Adam J. Mieleszko. and the Wikipedia article: http://en.wikipedia.org/wiki/CMYK_color_model
RGB, CMYK, Emission, Transmission, Absorption, Reflection, Color, Shade Matching
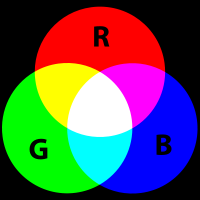
RGB
Posted on 06/05/2012
The practical application of our discussion of the different sources of light - emission, transmission/absorption and reflection/absorption - can be observed in two common color models used for color reproduction: RGB and CMYK.
RGB represents the emission color source while CMYK represents the transmission/absorption and reflective/absorption model.
RGB stands for Red, Green and Blue. It is an additive color model whereby red, green and blue are added together in various ways to create a broad spectrum of colors. Devices that use the RGB color model include television screens, computer screens and digital cameras.
However, because the RGB model does not clearly define what red, green and blue mean colorimetrically, the use of them by different devices often leads to variations in the actual color output. This variation is one of the major factors to be considered when using digital imagery for shade matching in dentistry. We will discuss techniques to help improve consistency of interpretation in future posts dealing specifically with digital photography.
Portions of this post were adapted from the book:
Fundaments of Color - Shade Matching and Communication in Esthetic Dentistry published by Quintessence Publishing Co. Inc and written by Dr. Stephen J. Chu, Dr. Alessandro Devigus, Dr. Rade D. Paravina and Mr. Adam J. Mieleszko. and the Wikipedia article: http://en.wikipedia.org/wiki/RGB_color_model
RGB, CMYK, Emission, Transmission, Absorption, Reflection, Color, Shade Matching
Color Perception
Posted on 05/31/2012
Color perception by the human eye refers to wavelengths that are sensed by the rods and cones - the sensory cells of the eye. Rods are more sensitive than cones and can sense the brightness or intensity of light. However, rods cannot perceive colors. Cones are responsible for distinguishing colors based on interpreting wavelengths of light. The human retina contains more than 100 million rod cells but only about 5 million cone cells.
Light that is perceived by the human eye is a result of one of three sources: emission, transmission or reflection. Emission refers to light that originates from a chemical or physical process and is "emitted" directly from the source without an interference to the eye. Transmission refers to light that is "transmitted" through another material such a transparent (i.e. clear glass) or translucent material (i.e. stained glass). Reflection refers to light that is "reflected" off of another object - such as solid object like the lips. Both transmission and reflection also include the concept of absorption - which refers to the wavelengths that are "absorbed" by the interfering or reflecting object.
All three of these sources influence the perception of color. In dentistry, the color of the a tooth and the material best designed to achieve the designed color are affected by emission, transmission and reflection.
Portions of this post were adapted from the book:
Fundaments of Color - Shade Matching and Communication in Esthetic Dentistry published by Quintessence Publishing Co. Inc and written by Dr. Stephen J. Chu, Dr. Alessandro Devigus, Dr. Rade D. Paravina and Mr. Adam J. Mieleszko. and the Wikipedia article: http://en.wikipedia.org/wiki/Photoreceptor_cell
Rods, Cones, Emission, Transmission, Reflection, Absorption, Dentistry
Visible Light Spectrum
Posted on 05/24/2012
Our discussion of shade must begin with a basic discussion about color. Around the year 1670, Sir Isaac Newton demonstrated that a prism could separate white light into a spectrum of colors or wave of colors.
Newton further proved that white light contains all colors, but only some of these colors can be perceived by the human eye. The wavelengths of colors that are visible to the human eye are Red, Orange, Yellow, Green, Blue, Indigo and Violet.
Portions of this post were adapted fromthe book:
Fundaments of Color - Shade Matching and Communication in Esthetic Dentistry published by Quintessence Publishing Co. Inc and written by Dr. Stephen J. Chu, Dr. Alessandro Devigus, Dr. Rade D. Paravina and Mr. Adam J. Mieleszko. and the Wikipedia article: http://en.wikipedia.org/wiki/Early_life_of_Isaac_Newton#Newton.27s_theory_of_colour.
Shade, Visible Light Spectrum, Dental Lab
Shade Communication in Dentistry - An Introduction
Posted on 05/22/2012
Shade communication in dentistry is our next topic of discussion.
As patient esthetic requirements demand ever superior shade matching, the doctor and lab tech find themselves addressing complex shade issues which increasingly often require open lines of communication about final restoration shades, stump shades (prep shades) and material options.
And with the growth in all ceramic restoration - specifically IPS e.Max by Ivoclar Vivadent ® and the full contour zirconia restorations or porcelain fused to zirconia - doctors now have a broad range of restorative material options to offer patients beyond the standard PFM (porcelain fused to metal).
But understanding how to communicate a shade to a lab tech, and deciding on material options, is not a simple challenge. Shade guides are not always adequate, digital images are subject to screen resolution or printing distortion, lighting constraints hinder correct visual observation, and even machines like Vident Easy Shade ® leave much of the confirmation to the human eye.
Our discussion of this subject will loosely follow the outline set in the book: Fundaments of Color - Shade Matching and Communication in Esthetic Dentistry published by Quintessence Publishing Co. Inc and written by Dr. Stephen J. Chu, Dr. Alessandro Devigus, Dr. Rade D. Paravina and Mr. Adam J. Mieleszko. The book is available at: http://www.quintpub.com/display_detail.php3?psku=B4979.
The outline is as follows:
1. Color Theory
2. Elements Affecting Color
3. Shade Matching
4. Technology and Shade Matching
5. Digital Imagery
6. Material Options
7. Predictable Outcomes
However, we may digress from this outline when we find an interesting case in our lab that warrants discussion. As always, we welcome feedback at blog@streamlinedental.com.
Shade Communication, e.Max, Zirconia, PFM, Vident Easy Shade
Preparation for Clasps and Conclusion of RPD Framework Design
Posted on 04/12/2012
As our final blog post on RPD Framework design, we will conclude with some brief points regarding preparations for clasps and evaluation of rest/clasp preparations in the mouth.
For I-Bar clasps - a dimple preparation is sufficient. For Circumferential clasps, a groove should be prepared directly under the arm of the RPD when fully seated. The gingival lip of the groove should be removed.
It is, indeed, often difficult for doctors to prepare teeth for RPDs without constant and consistent practice. Regretfully, most dental schools today require only a few frameworks for graduating students and many students rely on their professors for the design. Few receive formal training after graduating. As a result, an increasing number of doctors rely on their lab for ideal preparation and design. While this is simply a fact of modern dentistry, there are some techniques that can help the doctor interested in preparing teeth for the RPD. These techniques include:
1. Rest preparation can be evaluated with soft, NON-STICKY wax. The wax can be pressed into the preparation recess and then removed and inspected for proper form.
2. Occlusal clearance can be assessed by having the patient bite on the wax and move into lateral excursions.
3. If time allows, models should be poured and surveyed in the office to ensure proper path of insertion and dislodgement.
4. Finally, after all teeth preparations are made, it is very important to polish the areas of alteration with rubber points and flour of pumice. Additionally topical fluoride should be applied at the time of preparation, seating and all recall visits.
For further discussion of frameworks including a terrific atlas of case designs, we recommend to purchase the book Atlas of Removable Partial denture Design by Dr. Russell J. Stratton and Dr. Frank J. Wiebelt published by Quintessence Publishing Co., Inc. in 1988. Much of our blog posts have been adapted from this excellent book.
Thank you for reading our blog on RPD framework design. We hope you enjoyed it!
RPD Frameworks, Removable Partial Denture, Clasps, Dental Lab Tech, Dentist
Incisal Rest Seats
Posted on 04/11/2012
Incisal rests are designed into the incisal edge of anterior teeth most commonly found on mandibular frameworks. This design is increasingly unpopular with patients due to the exposure of metal in the smile line. It is rarely ever used on the maxillary and used sparingly on the mandibular. The only real indication for incisal rests are situations where an elderly patient has worn down the incisal edge and created a recess suitable for an incisal rest. In such a case, it is usually advantageous to take advantage of such a recess rather than preparing a separate rest seat on natural tooth.
The preparation specifications for incisal rests include:
1. Use of a tapered diamond stone or carbide bur
2. Extend over the incisal edge of the tooth
3. Preparation should be 1.0 to 1.5mm deep and 1.5mm wide
4. Should be located 1 to 2mm medial or to the medial or distal corner of the tooth
*Portions of this post were adapted from the book: Atlas of Removable Partial denture Design by Dr. Russell J. Stratton and Dr. Frank J. Wiebelt published by Quintessence Publishing Co., Inc. in 1988.
RPD Framework, RPD, Removable Partial Denture, Dental Lab Tech, Incisal Rest, Dentist, Laboratory
Cingulum Rest Seats
Posted on 04/09/2012
Cingulum rest seats are most commonly created on canines. Compared to incisal rests, cingulum rests offer a number of advantages including:
1. Superior esthetics
2. Loading is placed at a more apical level, causing less stress on the abutment than an incisal rest
3. Less annoyance to the tongue compared to incisal rests
The technical specifications for cingulum rests include:
1. Usage of a small, round carbide bur or diamond stone and a tapered round-ended or flame-shaped diamond stone.
2. Preparation 1.0 to 1.5mm deep over the center of the cingulum
3. Maxillary rest seats often need to be larger and deeper than mandibular rest seats due to occlusal interferences. The rest must lie within the rest preparation while maintaining sufficient mass for strength.
4. In the event that the enamel is penetrated during preparation, it is advisable to restore the enamel with composite or amalgam before placing the framework.
Please see the photos below for illustrations.
*Portions of this post were adapted from the book: Atlas of Removable Partial denture Design by Dr. Russell J. Stratton and Dr. Frank J. Wiebelt published by Quintessence Publishing Co., Inc. in 1988.
RPD Framework, Removable Partial Denture, Cingulum Rest, Dentist, Dental Lab Tech
Occlusal Rest Seat Preparation
Posted on 04/04/2012
Occlusal rest seats should be prepared in the tooth enamel only. If the dentin is touched, it is important to restore the tooth (usually with a composite or amalgam restoration) prior to placing the framework. Rests that penetrate the enamel will often lead to caries - so restorations are critical.
Occlusal rest seats should be prepared as follows:
1. Preparation should be made using a No. 4 or No. 6 round carbide bur or diamond stone.
2. Spoon shaped with no sharp edges or vertical walls
3. Buccal-Lingual width should be approximately half the distance between the buccal and lingual cusp tips.
4. Mesio-Distal length depends on occlusal surface morphology and axial inclination of tooth. Generally, length mesio-distally should be set so the deepest portion of the prep is located at the closest naturally occurring fossa (picture A below). If the abutment is tilted, the rest seat can extend to the center of the tooth (picture B below).
5. Marginal ridge should be reduced by 1.0 to 1.5mm
6. Center portion of the rest should be about 0.5mm deeper than the common plane of the rest.
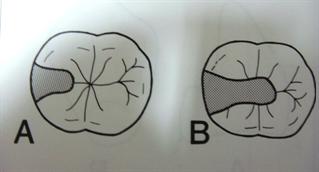
*Portions of this post were adapted from the book: Atlas of Removable Partial denture Design by Dr. Russell J. Stratton and Dr. Frank J. Wiebelt published by Quintessence Publishing Co., Inc. in 1988. Pages 86-87.
Occlusal Rests, RPD Framework, Removable Partial Denture, Dentist, Dental Lab Tech
Preparation for Clasps
Posted on 04/03/2012
Reciprocating and bracing clasps of an RPD framework should be designed to touch the tooth above the height of contour. This creates two challenges:
1. For posterior teeth, the height of contour is often very close to the occlusal surface. If the clasp sits to close to the occlusal plane, patients will often bite into the clasp causing both discomfort, dislodging and possible fracture of an opposing tooth.
2. For anterior teeth, the height of contour is often close to an esthetic zone (in addition to being close to the occlusal plane). Patients are rarely willing to have a metal clasp showing prominently in their smile.
As a result of these challenges, it is recommended to reduce the tooth to create a new height of contour closer to the gingiva or re-design the clasping design to an I-bar, Y-Bar or T-bar design. Alternatively, a flexi clasp such as Valplast (R) or Acetal Resin is a good option when aesthetics are important.
Clasps, Height of Contour, Framework, RPD, Valplast, Acetal Resin, Denstist, Dental Lab Tech
Reducing Interferences
Posted on 03/29/2012
Interferences are most common on mandibular anterior teeth. Specifically, lingually inclined pre-molars or overlapping incisors both cause interference for the major connector.
If a lingual bar design has been chosen, it is recommended to reduce pre-molars that are lingually inclined so as to avoid a dislodgement issue. If the pre-molars are not reduced, the lingual bar will need to be placed closer towards the floor of the mouth which can irritate the tissue.
If a lingual plate has been chosen, it will be important to correct overlapping incisors to avoid undercuts that would inhibit easy insertion and removal of the prosthesis. Additionally, overlapping incisors can lead to food entrapment between the tooth and the lingual plate. Correcting the teeth before fabricating the framework would give the best functional result.
*Portions of this post were adapted from the book: Atlas of Removable Partial denture Design by Dr. Russell J. Stratton and Dr. Frank J. Wiebelt published by Quintessence Publishing Co., Inc. in 1988.
RPD Framework, Mandibular, Pre-Molars, Dentist, Dental Lab Tech
Guiding Surface Preparation for Minor Connectors and Lingual Plating
Posted on 03/28/2012
While guiding surface preparation for guide plates is the most common guiding surface preparation, there are two other framework designs that may require guiding surface tooth reduction: minor connectors and lingual plating.
Minor Connectors:
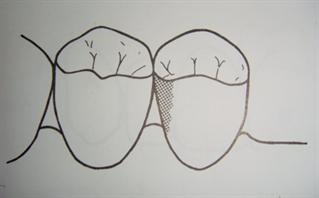
In situations where the minor connector passes between two teeth into the rest seats, it is often necessary to reduce the interproximal area to create adequate space. Please see the picture to the left.
Lingual Plating:
In mandibular RPDs with a lingual plate major connector, it is often necessary to prepare the lingual surfaces for the plating. This is also applies to posterior teeth that require lingual plating for stability. Any reduction should avoid impact on the cervical third of the tooth.
*Portions of this post were adapted from the book: Atlas of Removable Partial denture Design by Dr. Russell J. Stratton and Dr. Frank J. Wiebelt published by Quintessence Publishing Co., Inc. in 1988.
Lingual Plating, RPD Framework, Minor Connector, Removable Partial Denture, Dental Lab Tech, Dentist
Guiding Surfaces - Tooth Preparation for Guide Plates
Posted on 03/27/2012
Tooth preparation for the RPD framework starts with the preparation of guiding surfaces. Rests should not be prepared before the guiding surfaces as any reduction to the guiding surfaces after the rest is prepared will compromise the integrity of the rest seat.
Key points for the preparation of guiding surfaces for guide plates are as follows:
1. A cylindrical diamond stone or a carbide bur should be used.
2. Preparations should be parallel to each other and parallel to the desired path of insertion and dislodgement.
3. Preparation should curve bucco-lingually to follow the natural tooth contour
4. Preparation can cover about 2/3 of the occlusal-gingival length of the tooth. This is approximately 3-4mm.
5. Avoid any adjustment to the cervical portion of the tooth.
It should be noted that if the teeth are parallel for the desired path of insertion and dislodgement, tooth preparation is not required. Additionally,
Guide surfaces including those for guide plates, minor connectors, lingual plating and esthetics
*Portions of this post were adapted from the book: Atlas of Removable Partial denture Design by Dr. Russell J. Stratton and Dr. Frank J. Wiebelt published by Quintessence Publishing Co., Inc. in 1988.
RPD Framework, Guiding Surfaces, Guide Plates, Dentist, Dental Lab Tech
Preparation in the Mouth for RPD Frameworks
Posted on 03/20/2012
We are now at the final topic of discussion for removable partial denture frameworks - mouth preparation. While we often see doctors sending an unprepared cast to the laboratory for lab preparation, ideally, the preparation should be done prior to impressioning. Our discussion over the next several blogs will discuss the various tooth preparation guidelines.
First, we will focus on the order of the tooth preparation.
We recommend the following sequence for tooth preparation:
1. Create guide surfaces including those for guide plates, minor connectors, lingual plating and esthetics
2. Reduce interferences such as inclined teeth
3. Contour teeth for improved clasp location and placement
4. Create access for minor connectors between the rests and the major connector
5. Prepare rest seats
6. Prepare retentive recesses
*Portions of this post were adapted from the book: Atlas of Removable Partial denture Design by Dr. Russell J. Stratton and Dr. Frank J. Wiebelt published by Quintessence Publishing Co., Inc. in 1988.
RPD Framework, Mouth Preparation, Tooth Preparation, Partial Denture Frameworks, Guide Surfaces, Dental Lab Tech, Denture
Tube Teeth on RPD Framework
Posted on 03/19/2012
Tube teeth can be best described as metal posts incorporated into the framework (i.e. waxed and cast as part of the framework) that support acrylic, porcelain or composite teeth. Please see picture below.
The advantages of tube teeth include:
1.
Esthetics: Tube teeth can provide superior esthetics when compared to mesh supported teeth as the tooth does not require a pink acrylic base to connect to the framework. The tooth is placed directly over the post and held through mechanical retention. This allows for a more natural esthetic look.
2.
Bite: Patient's vertical dimensions (bite) can be maintained with time even when using acrylic teeth. This is because the tube tooth acts as a metal stop against the opposing to maintain the vertical and prevents excessive ware of the acrylic tooth.
Tube teeth have become less popular over time and are not very common today. This is mostly due to the following disadvantages:
1.
Fracture Rate: If the occlusal forces are heavy or if the denture tooth hole was not designed properly by the technician, the metal tube can fracture.
2.
Reline Limitation: The metal of the tube tooth cannot be relined so the residual ridge must be fully healed.
3.
Cost: Labs generally charge per tube tooth which can add significant cost to the framework. This cost cannot always be passed on to the patient.
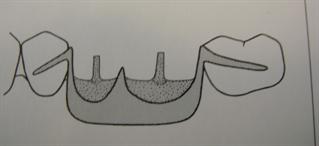
Tube teeth, RPD Framework, Denture, Dental Lab Tech, Dentist
Metal Backings or Metal Occlusals
Posted on 03/07/2012
While teeth attached to the acrylic denture base are the ideal design for flexibility of the RPD framework - including customizing teeth shape, size and position, and future relines - there are certain situations that make them difficult to use. Specifically, when a patient is a bruxer (i.e. grinds his/her teeth), the patient will often grind down the acrylic teeth quickly causing the need for replacement teeth. Porcelain teeth, while more durable, are also more abrasive and can risk injuring the opposing teeth.
In such a case, designing metal teeth into the framework itself - in the anteriors as metal backings and in the posterior as metal occlusals - is often the best design. Metal teeth are less abrasive than porcelain and retain their shape and size indefinitely. To improve the esthetics of metal teeth, the lab or doctor can place acrylic or composite facings on the facial side of the metal tooth to mask the metal. When a patient opens their mouth, though, metal will show on the posteriors. This is an important consideration especially for mandibular RPD frameworks.
The following picture shows a mandibular framework with metal occlusals.
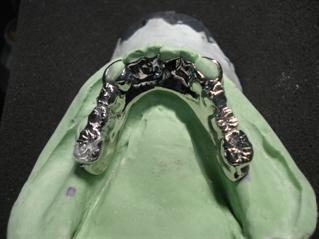
Metal Occlusal, RPD Framework, Denture, Dental Lab Tech, Dentist
Gold Teeth on RPD Framework
Posted on 03/05/2012
While gold teeth are far less common than acrylic, porcelain or composite denture teeth, they are still popular for specific patients usually for cosmetic requirements.
Gold will not chemically bond with acrylic denture base and cannot be soldered to a cobalt-chromium framework. As a result, it must be connected to the denture base through mechanical retention usually utilizing a retentive pin on the lingual of the gold. Due to the high price of gold, usage is typically limited to the facial side of the tooth and the gold is embedded inside a standard acrylic tooth.
The picture below is an example of a gold star embedded in an acrylic denture tooth.
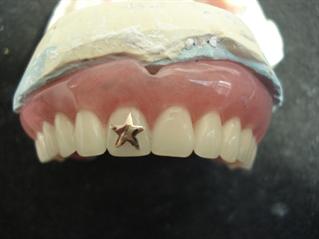
RPD Framework, Denture, Denture Base, Gold Tooth, Gold, Dental Lab, Dentist
Composite Teeth on RPD Frameworks
Posted on 03/02/2012
Composite denture teeth may be best described as somewhere in between acrylic and porcelain. In many ways, composite teeth exhibit the best properties of both materials with few of the drawbacks. Among the advantages include:
1. Strength: Composite teeth bond with acrylic to create a stable, durable denture with chemical retention. It also allows for customization without losing strength, unlike porcelain teeth.
2. Wear: Composite teeth exhibit exceptional wear longevity and durability
3. Esthetics: Composite teeth can achieve esthetics comparable to porcelain teeth with translucency and facial anatomy.
At this point, it may be logical to ask - if composite teeth exhibit so many advantages, why are they not more popular? I believe the reason is mainly due to an issue of marketing and material history.
From a pricing/marketing perspective, composite teeth are more expensive than acrylic while less expensive than porcelain. This places composite in a bit of an awkward selling point. On the one hand, composite does not have the "high end" appeal of porcelain - which can be easily identified by patients by its strength (via the sound it makes when biting) and the look. On the other hand, composite is often indistinguishable from a standard acrylic tooth in a new denture. Only with time will the patient appreciate the strength and durability of the composite material.
In addition to the issue of marketing composite teeth, the material itself is a relatively new and often not taught in dental schools. Doctors may only be introduced to the composite teeth in continuing education seminars or by their lab tech. Until the material makes its way into standard dental school education, this material will unfortunately probably not be adopted by the mainstream denture practices.
There are, however, some indications that adoption may come sooner than expected. Some large companies including Ivoclar Vivadent using their Phonares brand (see link below) and more economic brands such as Yamahachi Px, have been heavily promoting this material and have made some impact in the dental lab community. This may eventually spill over into dental practices and dental school education.
Composite Denture Teeth, Phonares, Denture Teeth, Dental Lab, Tech, Dentist
Porcelain Teeth on RPD Frameworks
Posted on 02/29/2012
Porcelain teeth, while far less common than acrylic, exhibit certain properties that make them an ideal choice for patients with a collapsed bite or high esthetic requirements. These properties include:
1. Porcelain does not wear over time allowing it to maintain the vertical dimension (patient's natural bite)
2. Porcelain does not discolor
3. Porcelain teeth often exhibit greater translucency and are often more aesthetic than acrylic teeth
While the above mentioned properties are all advantages, there are some important disadvantages that should be considered before requesting porcelain teeth:
Disadvantages:
1. Porcelain teeth rely on mechanical retention to attach to the acrylic denture base. This mechanical retention is created through diatoric holes or pins in the teeth which allow for acrylic to fill the space or grab the pins and support the teeth.
2. Porcelain teeth are abrasive if the glaze is removed and will wear down natural enamel.
3. A black line often appears over time at the junction between the porcelain teeth and the acrylic due to a build up of bacteria and the acidity of saliva.
4. Price of porcelain teeth can be prohibitive
5. Repair of porcelain teeth is difficult.
Some of the leading manufacturers of porcelain teeth include Vident*, Dentsply* and Ivoclar Vivadent*. Doctors and patients are recommended to consult with the lab tech to see if the case indicates porcelain teeth and which brand is appropriate.
*Vident, Denstply and Ivoclar Vivadent are trademarks of their respective companies.
Porcelain Teeth, Porcelain Denture Teeth, RPD Frameworks, Dental Lab Tech, Dentist
Acrylic Teeth on RPD Framework
Posted on 02/28/2012
Acrylic (plastic) teeth are the most common type of denture teeth used on partial denture frameworks. There are several reasons for this including:
1. Acrylic teeth chemically bond to the denture base resin creating a long and durable denture.
2. Modification and adjustment can be made without loss of retention or strength because the teeth are bonded to the denture base.
3. Acrylic teeth do not wear on opposing enamel
4. A range of price options are available from low end to high end. Popular brands of high end acrylic teeth include Dentsply Portrait IPN, Bioform and Ivoclar Blue Line.
There are some disadvantages of the acrylic tooth that should be noted. These include:
1. Economic (inexpensive) teeth tend to discolor with time
2. Teeth will show wear with time which results in poor chewing function. For example, a patient may find chewing meats difficult with acrylic teeth. Porcelain teeth are more suitable for such function and we will discuss their advantages and disadvantages in a later post.
Acrylic Teeth, Dentsply, Portrait IPN, Bioform, Ivoclar, RPD Framework, Dentist, Dental Lab Tech
Denture Teeth Categories
Posted on 02/27/2012
There are four categories of denture teeth which may be connected to the RPD Framework to replace the missing teeth. The four categories are:
1. Acrylic Teeth
2. Composite Teeth
3. Porcelain Teeth
4. Gold Teeth
We will discuss each of these teeth in greater detail in the upcoming blog posts.
Acrylic Teeth, Composite, Porcelain, Denture, RPD Framework
RPD Finish Lines
Posted on 02/22/2012
In our final discussion regarding the denture base elements, we turn our attention to the finish line. The finish line is the junction between the metal and the acrylic denture base. The two materials will form a butt joint when they meet and should create a smooth intersection to avoid possible food entrapment. The metal supporting the acrylic is designed to be offset from the metal of the major connector to prevent weakening of the framework.
There are two types of finish lines: Internal and External.
1. The internal finish line refers to the finish line on the tissue side of the framework (the side of the framework that rests on the tissue) and is generally placed farther from the abutment tooth or residual ridge than the external finish line. Please see the picture below.
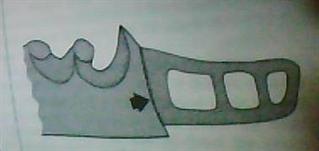
2. The external finish line refers to the finish line on the non-tissue side of the framework.
This concludes our discussion of the denture base materials and design elements.
*Portions of this post were adapted from the book: Atlas of Removable Partial denture Design by Dr. Russell J. Stratton and Dr. Frank J. Wiebelt published by Quintessence Publishing Co., Inc. in 1988.
Finish Lines, RPD, Removable Partial Denture Framework, Dental Lab Tech, Dentist
Metal Denture Base
Posted on 02/17/2012
Metal denture bases are indicated in situations of severe occlusal space limitations where no acrylic bulk is an option. Typically, they are used for tooth supported segments (i.e. metal base sits between two existing teeth) and the residual ridge is well healed. There is no acrylic attached to the denture bases aside from actual denture teeth which are joined using beads, nailheads or wire loops. Tube teeth are not recommended due to high incidence of fracture.
Among the design elements of the metal denture bases are:
1. No relief is placed under the metal denture base
2. No internal finish lines
3. External finish lines are optional and depend on method of tooth replacement
The major disadvantage of the metal base is the fact that it cannot be relined, unlike acrylic bases. This point should be well considered before designing the metal base.
RPD, Framework, Denture Base, Metal Base, Dentist, Dental Lab Tech
Mesh on RPD Framework
Posted on 02/16/2012
Unlike open lattice work which offers large spaces between each strut, mesh is essentially a thin sheet of metal with very small perforated holes. It covers virtually the same area of the residual ridge as would be covered by the struts of lattice work. The meshwork is embedded in the acrylic and the two materials adhere to each other through mechanical retention.
The primary indication for meshwork is where there is limited inter-occlusal space (vertical height) and struts would interfere with ideal teeth placement. Meshwork, being far thinner, allows more space for ideal teeth arrangement. However, due to limited strength and higher fracture rates, meshwork is not a recommended design for cases with adequate vertical space.
RPD, Framework, Frameworks, Partial Denture, Dental Lab Tech, Dentist
Open Lattice Work on RPD Frameworks
Posted on 02/15/2012
Among the three base retentive options for frameworks, open lattice work is the preferred option for all distal extension RPDs. This is because the lattice work allows for more and thicker acrylic through the large openings, as opposed to meshwork which has very small openings where acrylic cannot develop the same degree of bulk. In the long term, that bulk helps to prevent fracture.
The design elements of the open lattice work include the following specifications:
1. On the maxillary, the latticework should extend two thirds of the distance to the hamular knotch
2. On the mandibular, the latticework should extend two thirds of the distance to the retromolar pad.
3. Lattice work is completed embedded in acrylic
4. Lattice work struts meet the major connector at a butt joint.
*Portions of this post were adapted from the book: Atlas of Removable Partial denture Design by Dr. Russell J. Stratton and Dr. Frank J. Wiebelt published by Quintessence Publishing Co., Inc. in 1988.
Frameworks, RPD, Framework, Dental Lab Tech, Dentist
Denture Base Retentive Elements
Posted on 01/05/2012
The denture base retentive elements are minor connectors that connect the denture base to the major connector. They hold the denture teeth in place. There are three common types of retentive elements:
1. Open Lattice Work
2. Meshwork
3. Metal Bases
The common design requirements of all the retentive elements include:
1. Rigidity: The retentive element must be rigid enough to transfer all occlusal forces from the denture base to the natural teeth.
2. Strength: The retentive element must be strong enough to resist fracturing
3. Thin: The retentive element must be thin and not overly bulky to allow maximum space for denture teeth.
We will describe each of these elements over the next several blogs.
*Portions of this post were adapted from the book: Atlas of Removable Partial denture Design by Dr. Russell J. Stratton and Dr. Frank J. Wiebelt published by Quintessence Publishing Co., Inc. in 1988.
RPD Framework, Meshwork, Open Lattice Work, Frameworks, Dental Lab Tech, Dentures
Uses of the Infrabulge Clasp
Posted on 12/20/2011
The infrabulge clasp design is most commonly used on distal extension RPDs. One of the primary reasons for this is the requirement of space: to create an effective I-bar, there needs to be adequate edentulous space.
For example, an I-bar design where only one tooth is missing (for example, patient is missing #20 but has #19 and 21), the descending and ascending elements of the i-bar will be so close to each other that they will create a food repository - which could lead to long term oral hygiene issues. If both #20 and #21 were missing, placing an I-bar on #22 would be an effective design as it allows for adequate space of the both ascending and descending elements of the I-bar. With distal extension RPDs, the I-bar is quite effective since there is plenty of room for i-bar as there are no teeth distal to the supporting abutment tooth.
A common I-bar design for distal extension RPDs is the RPI clasp:
R: Rest - mesial occlusal rest emerging from a minor connector in the mesiolingual embrasure
P: Proximal Plate - a guide plate designed on the distal surface of the abutment tooth up to the occlusal third
I: I bar retentive arm placed at the center of the buccal/labial surface of the abutment engaging the undercut.
The Y bar and T bar designs are modifications of the I-bar and usually utilized when additional support is needed on the abutment tooth. One of the T or Y arms is designed as the retentive arm while the other is the reciprocating/bracing arm.
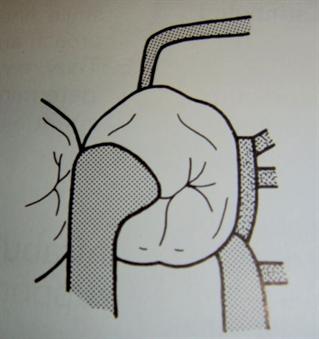
RPI, Infrabulge Clasp, Framework, Frameworks, RPD, Dentist, Dental Lab Tech
Infrabulge Clasps - I Bar, Y Bar or T Bar
Posted on 12/15/2011
Yesterday's blog completed our discussion of the most common suprabulge clasps. We will now move on to discuss the common types of infrabulge clasps - specifically the I bar, Y bar and T bar designs.
The infrabulge clasp design includes the following elements:
1. Infrabulge arm will emerge from the denture base or meshwork from the gingival direction
2. Arm should be 3mm or below the gingival margin
3. Arm should turn up at the abutment margin at a 90 degree angle
4. Tip of the arm should engage an undercut in the gingival third of the abutment tooth
5. Arm should exhibit uniform taper
The advantages of the infrabulge style clasp include:
1. Limited tooth coverage
2. Superior aesthetics as the arm emerges from the gingival
3. Increased retention
4. Decreased torquing forces
5. Improved adjustability compared to the circumferential clasp
The disadvantages of the infrabulge style clasp include:
1. Limited use - cannot be used in the presence of tissue undercuts, shallow vestibule or high frenal attachments.
2. Bracing/Reciprocal action is not equal to the bracing action of the suprabulge clasp design
3. Clasp may not fully disengage from the abutment tooth during removal - causing some pressure on the abutment tooth.
*Portions of this post were adapted from the book: Atlas of Removable Partial denture Design by Dr. Russell J. Stratton and Dr. Frank J. Wiebelt published by Quintessence Publishing Co., Inc. in 1988.
I Bar, T Bar, Y Bar, Clasp, Infrabulge Clasp, RPD Framework, Frameworks, Dentist, Dental Lab Tech
Extended Arm Clasp
Posted on 12/14/2011
The extended arm clasp is a modified circumferential clasp where the retentive and/or the bracing arms extend beyond the abutment tooth to an adjacent tooth. The design is indicated for the following situations:
1. Tooth supported RPD (not distal extension RPDs)
2. Tooth near the saddle does not have a sufficient buccal or lingual undercut
3. Infrabulge retainer is not possible due to embrasure space constraints
4. Adjacent tooth has a usable buccal or lingual undercut
The main disadvantages of this design are:
1. Tooth structure covered by the extended clasps
2. High incidence of clasp fracture
*Picture and portions of the text adapted from An Atlas of Removable Partial denture Design by Dr. Russell J. Stratton and Dr. Frank J. Wiebelt published by Quintessence Publishing Co., Inc. in 1988. Page. 63.
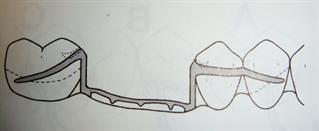
Extended Clasp, Extended Arm Clasp, Circumferential Clasp, RPD Framework, Frameworks, Dentist, Dental Lab Tech
Reverse Action Clasp (hairpin clasp)
Posted on 12/09/2011
The reverse action clasp is a clasp assembly similar to the circumferential clasp except that the buccal clasp has a reverse shape similar to a hairpin. The assembly usually has a guide plate, occlusal rest, lingual bracing arm and buccal reverse action arm.
The reverse action clasp is used specifically in cases where:
1. The undercut is on the buccal
2. The tooth is adjacent to an edentulous space
3. Abutment has a mesial tilt (often used for mandibular molars)
The advantage of this clasp design is the retentive strength of the buccal arm. The major disadvantage is the extensive tooth surface coverage which may lead to caries.
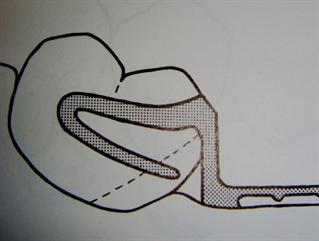
Reverse Action Clasp, Hairpin Clasp, RPD Framework, Dentist, Dental Lab Tech
Half and Half Clasp
Posted on 12/07/2011
As noted in yesterday's blog, there are specific situations where the typical circumferential clasp is contraindicated due to the inclination of the abutment. The ring clasp was an example of a modified circumferential clasp for inclined molars.
When a pre-molar is inclined lingually and there is a lingual undercut adjacent to edentulous space, it is difficult to use a standard circumferential clasp. The "half and half" clasp was designed to address this specific situation. Here are the elements of the half and half clasp design:
1. Guide Plate
2. Buccal circumferential arm originating from the guide plate
3. Lingual circumferential arm originating from a minor connector
4. One or two occlusal rest seats
The advantages of the half and half clasp are that it provides for excellent support of the premolar. The disadvantage is that it covers a great deal of tooth structure which can lean to caries.
Here is a picture of a half and half clasp
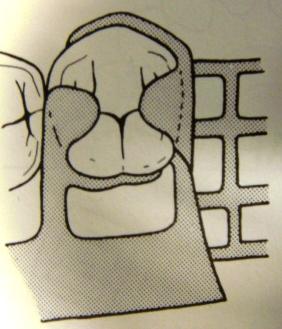
*Picture and portions of the text adapted from An Atlas of Removable Partial denture Design by Dr. Russell J. Stratton and Dr. Frank J. Wiebelt published by Quintessence Publishing Co., Inc. in 1988. Page. 61. Additional resource: www.medkaau.com/album/download.php?image_id=434.
Half and Half Clasp, Circumferential Clasp, RPD Framework, Frameworks
Ring Clasp
Posted on 12/06/2011
The ring clasp assembly is a design whereby the clasp arm encircles the majority of the tooth. Please see the photo* of the design. The ring clasp design is specifically indicated for:
1. Tilted mandibular molar that has a mesial lingual undercut
2. Buccally tilted maxillary molar
The basic elements of the assembly include:
1. Guide Plate
2. Mesial Rest
3. Retentive arm that encircles almost the entire abutment and engages the undercut on the opposite side of the tooth from the point of origin
4. Support strut & auxiliary distal rest - both providing for bracing/reciprocating functions and to maintain form of the retentive arm.
Due to the considerable tooth structure covered by the ring clasp, this clasp should be avoided for patients prone to carries. Additionally, the ring clasp poses aesthetic challenges and is seldom used on premolars or anterior teeth.
*Picture and portions of the text adapted from An Atlas of Removable Partial denture Design by Dr. Russell J. Stratton and Dr. Frank J. Wiebelt published by Quintessence Publishing Co., Inc. in 1988. Page. 60.
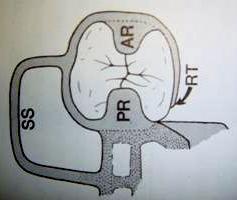
Ring Clasp, RPD Framework, Clasp Assembly, Dental Lab, Dental Lab Tech, Frameworks
Embrasure Clasp
Posted on 12/05/2011
The embrasure clasp is a clasp assembly used when there is no edentulous space near the clasp site. It is called an "embrasure" clasp because it emerges from an embrasure as it approaches the retentive area.
The embrasure clasp is most commonly composed of two adjacent rest seats and four cast circumferential suprabulge clasps - two on the buccal of adjacent teeth and two on the lingual of the adjacent teeth. On each assembly, one clasp is the bracing arm and one is the retentive arm. It is also known as a butterfly clasp as it appears to look like a butterfly from the mesial to distal view. One other name used is the double akers clasp.
The advantages to the embrasure clasp include:
1. Retention
2. Flexibility: May be used in Class II, III and IV RPDs.
The disadvantages of this style clasp include:
1. Fracturing: Fracturing of the clasps often occurs due to insufficient occlusal clearance and poor embrasure preparation.
2. Technique sensitive: The preparation for a proper embrasure clasp requires both the preparation of the rest seat and the interproximal preparation of the embrasures. If not done correctly, the abutment teeth can become wedged.
Embrasure Clasp, RPD Framework, Suprabulge, Frameworks, Dentist, Dental Lab Tech
Circumferential Clasp - Wrought Wire with Cast Clasp
Posted on 12/02/2011
As noted in yesterday's blog, the cast circumferential clasp has a number of limitations. As a result, the combination clasp of a wrought wire retentive arm with a cast bracing/reciprocating arm was developed to address those limitations. Combination clasps are most popular for distal extension RPDs.
The most common indications for the combination clasp are:
1) Presence of tissue undercut below the abutment tooth precluding the use of a bar clasp.
2) Mesial tilt of the most distal abutment causing the guide plate to preempt the mesial rest in the I-bar clasp assembly.
3) Aesthetic requirements that cannot be achieved with the bar clasp due to its bulkiness.
Among the chief advantages of the wrought wire clasp are in its flexibility and adjustability. The major disadvantages include the cost (usually labs will charge extra as more time is required) and long term durability.
Circumferential Clasp, I-Bar, RPD Framework, Frameworks, Dental Lab, Dentist
Circumferential Clasp - Cast Clasp Design
Posted on 12/01/2011
The circumferential clasp is a clasp design where both the buccal and lingual arms originate from a common source and the undercut is engaged from the opposite side of the tooth (mesial-distal) from the point of origin. One arm acts as the retentive arm while the other acts as the bracing/reciprocating arm. This suprabulge clasp design can be designed with either both clasps cast or one cast and one wrought wire.
The design with cast buccal and lingual arms offers the advantages of excellent retention, rigidity and long term durability. As such it is ideally indicated for tooth supported RPDs (i.e. RPDs where abutment teeth lie distally to the circumferential clasp).
However, there are several important disadvantages to this design including:
1. Aesthetics: the cast clasps are prominent
2. Food Deflection: the cast clasps often disrupt normal food deflection patterns that are needed for stimulation of the gingivae.
3. Adjustment Difficulty: the cast clasps can only be adjusted at the final third of the clasp closer to the clasp tip - just where the arm crosses the height of contour.
4. Distal Extension RPD: Contraindicated for distal extension RPDs dues to torque applied to the abutment teeth.
Due to the above mentioned disadvantages, an alternative design where one of arms is wrought wire is often utilized. This design will be discussed in tomorrow's blog.
RPD Framework, Circumferential Clasp, Aesthetics, Dental Lab Tech, Dentist
Clasp Categories: Suprabulge and Infrabulge
Posted on 11/30/2011
We will begin now to outline various clasp designs utilized as retainers and part of the elements of the "clasp assembly". The design of clasps can be broadly broken down into two distinct categories:
1. Suprabulge
2. Infrabulge
Suprabulge refers to clasps that original from the occlusal direction (at or above the height of contour) angling towards the gingiva. Usually, the suprabulge clasp originates from a rest, a guide plate or a minor connector. The clasp will contact the tooth at an available undercut.
Examples of suprabulge clasps are:
1. Circumferential clasp
2. Embrasure Clasp (aka butterfly clasp)
3. Ring Clasp
4. Half-and-Half Clasp
5. Reverse Action (Hairpin) Clasp
6. Extended Arm Clasp
The infrabulge clasp refers to clasp originating from the gingival direction (typically from the denture base) and contacting the tooth at an available undercut.
Examples of the infrabulge clasp are:
1. I Bar
2. Y Bar
3. T Bar
It should be noted that above terminology is based off of the book Atlas of Removable Partial denture Design by Dr. Russell J. Stratton and Dr. Frank J. Wiebelt published by Quintessence Publishing Co., Inc. in 1988. Many clasp designs have alternative names that refer to the same design. There is really no correct or incorrect naming convention so long as both the doctor and lab technician understand the design. Diagrams are often helpful to avoid misunderstandings.
Circumferential Clasp, Embrasure Clasp, I Bar, T Bar, Y Bar, RPD Frameworks, Dental Lab Tech, Dentist
Direct versus Indirect Retainers
Posted on 11/29/2011
Before we begin our discussion of various retentive arm designs, there is one important categorical distinction that has not been properly addressed hitherto: the definition of direct retainer versus indirect retainer.
Direct Retainer: We will refer to the direct retainer as a clasp assembly; that is a retentive element that includes a rest, a clasp and perhaps a guide plates but that touches any abutment tooth at three distinct points.
Indirect Retainers: Conversely, an indirect retainer is simply a rest that protrudes from the major connector. Examples of indirect retainers are cingulum rests or occlusal rests. The purpose of the indirect retainer is to provide for additional support in preventing dislodgement. Generally, the indirect retainer is placed anterior to the direct retainer. Anterior placement offers numerous advantages including:
1) Aiding greater efficiency of the direct retainer
2) Acting as vertical stops for the anterior portion of the framework and thereby preventing food from causing the major connector to place pressure on soft tissues.
There are some specific constraints to utilizing direct retainers - chiefly occlusal clearance concerns. As such, indirect retainers are typically placed in the mesio-occlusal fossa of the premolars or the cingula of the canines.
Direct Retainer, Indirect Retainer, Rest, Canine, Premolar, RPD, Dental Lab Tech, Dentist
Retentive Arm Material Options
Posted on 11/27/2011
Metal retentive arms are designed using two primary materials: cast metal or wrought wire.
- The cast clasp is more rigid, durable, and inflexible. It is indicated for tooth supported RPDs, or when the retentive tip releases during functional movement for distal extension RPDs, or when minimal undercut is utilized.
- The wrought wire clasp is flexible and more fragile. It is indicated in Kennedy Class I (distal extension designs) when the retentive tip of the clasps are placed forward of the axis of rotation. The axis of rotation is the imaginary line that connects the most posterior rests of a framework. For example, if the rest is designed on the distal side of the most posterior teeth, then the WW clasp is indicated as the retentive arm since it will sit forward of the axis of rotation.
Regardless of the material chosen, retentive arms should exhibit the following characteristics:
1. Uniform tapering of thickness and width.
3. Thickness of the tip should be approximately half of the thickness of the origin.
*Portions of this post were adapted from the book: Atlas of Removable Partial denture Design by Dr. Russell J. Stratton and Dr. Frank J. Wiebelt published by Quintessence Publishing Co., Inc. in 1988.
Cast Clasp, Wrought Wire WW Clasp, RPD Frameworks, Framework, Dentist, Dental Lab Tech
Retentive Arm Design Factors
Posted on 11/25/2011
Among the elements of the clasp assembly, the retentive arm offers the most varied design options. These options include the I-bar, T-bar, Y-bar, circumferential clasp and numerous others. These retentive arm designs will be discussed in more detail in future blog posts. However, I would like to take a moment to outline the factors that influence which retainer should be chosen.
The factors that influence the design of the retentive arm include:
1. The location of the undercut
2. Ability to provide adequate reciprocation
3. Minimize disruption to normal tooth and tissue contours
4. Achieve aesthetic requirements of the patient
It should be noted that all clasp assemblies should be designed to touch the abutment tooth surface at three distinct points - essentially providing for more than 180 degree encirclement of the abutment tooth. These three points of contact are created through all of the various elements of the clasp assembly, and also influence the retentive arm design chosen.
*Portions of this post were adapted from the book: Atlas of Removable Partial denture Design by Dr. Russell J. Stratton and Dr. Frank J. Wiebelt published by Quintessence Publishing Co., Inc. in 1988.
Retentive arms, RPD Framework, Frameworks, Dental Lab Tech, Dentist
Clasp Assemblies
Posted on 11/23/2011
As outlined in the previous blog post, there are four elements of clasp assembly. We will now discuss the purpose of each element and explain how they provide for mechanical retention.
1. Rests
The purpose of rests is to prohibit movement of the prosthesis in a gingival direction. This is important as it prevents the framework from placing too much pressure on the gingiva which could lead to gingival resorption.
2. Retentive Arms
The retentive arm combined with the reciprocating element, restrict horizontal movement of the appliance. The retentive arm will typically emerge from the buccal side and restrict movement in that direction. It will utilize the natural or prepared undercuts in the tooth. More discussion of the retentive arm will follow when we discuss various clasp options.
3. Reciprocating or bracing element
The reciprocating or bracing element of the clasp assembly is designed to restrict movement in the horizontal direction - together with the retentive arm. Typically, the bracing arm will restrict horizontal movement in the lingual direction. In addition, the reciprocating element will offset the forces placed by the retentive arm during insertion and removal of the prosthesis.
4. Minor connector/s
Minor connectors are elements which connect the major connector to the various clasp assemblies including the rests, clasps and bracing arms. As such, they provide the necessary attachment to create the retentive assembly.
*Portions of this post were adapted from the book: Atlas of Removable Partial denture Design by Dr. Russell J. Stratton and Dr. Frank J. Wiebelt published by Quintessence Publishing Co., Inc. in 1988.
RPD Framework, Clasp Assemblies, Rests, Retentive Arms, Bracing Elements, Minor Connectors, Dentist, Dental Lab Tech
Mechanical Retention: An Introduction
Posted on 11/22/2011
Of the three categories of retention outlined in previous blogs, phenomenal retention, frictional retention and mechanical retention, the latter is the most common and perhaps the most complex category. As such, we will treat mechanical retention over a series of blog posts.
Clasps, the basic form of mechanical retention, are really part of a greater unit called the "clasp assembly". The clasp assembly is composed of four elements:
1. One or two rests
2. A retentive arm
3. A reciprocating or bracing element
4. Minor connector/s
The goal of the clasp assembly is to restrict dislodgement while being totally passive when the framework is seated. This last point is critical and often neglected: clasps are not intended to support a framework; they are designed to restrict movement. Clasps should not torque the abutment during normal wear and tear (such as chewing). If the clasp is placing pressure on the abutment tooth, it will inevitably damage the abutment.
*Portions of this post were adapted from the book: Atlas of Removable Partial denture Design by Dr. Russell J. Stratton and Dr. Frank J. Wiebelt published by Quintessence Publishing Co., Inc. in 1988.
Mechanical Retention, Clasps, RPD Framework, direct retainer, minor connector, dental lab, dental lab tech, dentist
Frictional Retention
Posted on 11/21/2011
Frictional Retention, or the retention created from contact surfaces like guide plates, is an excellent source of retention but often not possible to achieve. This is because guide surfaces must be parallel. Since creating parallel guide plates is difficult and often impossible, frictional retention is not always a reliable source of retention.
In addition to non-parallel guide plates leading to minimal frictional retention, the following two design mistakes will lead to further deterioration of frictional retention:
(1) Blockout of the master cast is excessive
(2) Guide plates are over-relieved
The one situation that does lend itself for use of frictional retention is when abutment teeth are crowned and the proximal and lingual surfaces are paralleled by the lab.
As a result, utilizing frictional retention relies heavily on the lab tech working on the case. If the lab tech is not highly experienced, relying solely on this form of retention can lead to continual retention issues.
*Portions of this post were adapted from the book: Atlas of Removable Partial denture Design by Dr. Russell J. Stratton and Dr. Frank J. Wiebelt published by Quintessence Publishing Co., Inc. in 1988.
RPD Framework, Frictional Retention, Dental Lab Tech, Dentist
Categories of Retention
Posted on 11/18/2011
RPD Framework retention can be broadly categorized into three types:
1. Phenomenal Retention: retention provided by adhesion, cohesion or other natural phenomena.
2. Frictional Retention: retention derived from contact surfaces such as guide plates to guide planes.
3. Mechanical retention: retention provided by clasps (direct retainers).
Phenomenal Retention
In order to understand the phenomenal retention, it is appropriate that we define the terms:
Adhesion refers to the retention from dissimilar molecules.
Cohesion refers to the retention created from similar molecules.
Both adhesion and cohesion (including interfacial surface retention) are phenomena that are exhibited when appliances are placed in the mouth and due to the naturally wet environment from the mucosa. Both adhesion and cohesion are directly proportional to the area covered and as such a palatal plate will create more retention than an A-P bar.
*Portions of this post were adapted from the book: Atlas of Removable Partial denture Design by Dr. Russell J. Stratton and Dr. Frank J. Wiebelt published by Quintessence Publishing Co., Inc. in 1988 and the website: Wikipedia http://en.wikipedia.org/wiki/Surface_tension
RPD Framework, retention, adhesion, cohesion, frictional forces, mechanical retention, dental lab tech, dentist
RPD Framework - Retention: An Introduction
Posted on 11/17/2011
Retention and the retainers that provide it, is an important but often misunderstood aspect of partial denture design. While it may seem logical that a framework with strong retention is ideal, in fact, many frameworks with few retentive elements are the most successful in the long term. This is because excessive retention often dislodges abutment teeth or causing permanent change to clasps. Ideal retention will prevent the RPD from reasonable dislodging, but not one that would prevent dislodging completely.
To fully understand this concept, we must define the term retention: Retention is resistance to dislodgement of the prosthesis in an occlusal direction*. Since our only goal is to avoid occlusal dislodgement, any retentive elements that prevent other forms of dislodging will often cause more negative outcomes than positive.
In fact, many long term RPD wearing patients show incredible neuromuscular control and adaptability to frameworks that often provide little direct retention. As such, it will be our goal in the posts discussing retention to offer guidelines that will achieve occlusal dislodgement, but provide for long term positive outcomes for the patient.
*Portions of this post were adapted from the book: Atlas of Removable Partial denture Design by Dr. Russell J. Stratton and Dr. Frank J. Wiebelt published by Quintessence Publishing Co., Inc. in 1988. Pages 45-46.
RPD Framework, Retention, Frameworks, Dentist, Dental Lab Tech, Dental Laboratory
Kennedy Classification for Partially Edentulous Arches
Posted on 11/16/2011
Following our discussion of major connectors for both the maxillary and mandibular arches, it is appropriate that we expand on some terminology used but not adequately defined in previous blogs. Specifically, the Kennedy Classification for Partially Edentulous Arches needs to be properly outlined before proceeding to discuss retainers and retention.
The Kennedy Classification system was originally introduced by Dr. Edward Kennedy in 1923 in New York. The classification is divided into four partially edentulous arch designs:
Class I - Bilateral distal edentulous area located posterior to the existing teeth
Class II - Unilateral distal edentulous area located posterior to existing teeth
Class III - Unilateral edentulous area with remaining teeth mesial and distal to the edentulous area.
Class IV - Bilateral (i.e. crossing the midline) anterior edentulous area with remaining teeth distal to edentulous area.
These classifications have been further sub-divided, but the general classification is still the broadest and most commonly used.
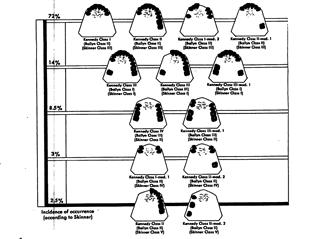
Kennedy Classification, RPD Framework, Edentulous Arch, Dentist, Dental Lab Tech
U-Shaped (Horseshoe) Palatal Connector
Posted on 11/15/2011
One final version of the palatal plate is the U-Shaped (horseshoe) palatal connector. This design is specifically indicated when a torus extends to within 6-8mm of the soft/hard palate junction, or in a case where the patient cannot tolerate any posterior palatal coverage. The design is similar to a platal plate, except that the plate does not extend to the posterior region of the palate but creates a concave design with lateral "open ends" extending towards the maxillary tuberosity.
This design is not ideal due to the lack of rigidity of the framework - especially on the open ends. Additionally, as with all palatal plate designs, coverage of the palate can lead to tongue or speech interference.
As a result, it is recommended to use this design only as a last resort. If the torus is more than 8mm from the hard/soft palate junction, an A-P strap is preferred - as it will provide more rigidity and cover less palate.
Major Connector, Maxillary, RPD Framework, Frameworks, Dental Lab, Dentist, Dental Lab Tech
Modified Palatal Plate Major Connector
Posted on 11/11/2011
Given the drawbacks to the design of the palatal plate - especially the diminished sense of taste and compromised tongue function - an alternate design termed the "modified palatal plate" was introduced. The design is used specifically for Kennedy Class II RPDs and especially in cases of an inoperable torus.
The design elements include:
1. Anterior and posterior borders are determined by the location of the most anterior and most posterior rest seats.
2. The plate is extended to create a lateral plate on one of the palate. This extension ends with a butt joint at the entrance to the hamular notch.
3. All borders of the plate are beaded. The beads should end 6mm from the gingival margin.
Advantages to the modified palatal plate:
1. Less coverage of the palate than the palatal plate
2. Offers excellent rigidity and support via the posterior extension
3. Offers a good solution for inoperable torus
*Portions of this post were adapted from the book: Atlas of Removable Partial denture Design by Dr. Russell J. Stratton and Dr. Frank J. Wiebelt published by Quintessence Publishing Co., Inc. in 1988.
RPD Framework, Frameworks, Hamular Knotch, Maxillary Major Connector, Dental Lab, Dental Lab Techs, Dentist
Maxillary Palatal Plate Major Connector
Posted on 11/10/2011
The maxillary palatal plate major connector refers to the design where the entire palate is covered by either metal or acrylic with metal. It is indicated for Kennedy Class I arch forms (anterior teeth or anterior teeth plus premolars are present, but no posterior teeth are present) where the support from the residual ridge is poor, remaining teeth are weak and may require future extraction.
There are three common design options for the palatal plate:
1. All Metal Plate with no lingual plating
2. All Metal Plate with lingual plating
3. Metal Anterior with Acrylic Posterior
All Metal Plate with no lingual plating
This design is indicated where maximum palatal support is necessary but future anterior extractions are not likely.
All Metal Plate with Lingual Plating
Lingual plating is added when future extractions are likely or additional indirect retention is necessary.
Metal Anterior with Acrylic Posterior
An Acrylic posterior is indicated when relines or rebases may be necessary in the future.
The design elements common to all options include:
1. Beading must be placed in the posterior palatal seal area.
2. Beading for metal palates should be 1mm wide and 1mm deep and must be designed in the master cast.
3. Acrylic palates can have beading added to the model any time prior to acrylic processing
The negative features of the palatal plate major connector design include:
1. Palatal plates be used in the presence of a torus
2. Palatal coverage may diminish sense of taste
3. Palatal coverage may interfere with tongue function and may be uncomfortable
*Portions of this post were adapted from the book: Atlas of Removable Partial denture Design by Dr. Russell J. Stratton and Dr. Frank J. Wiebelt published by Quintessence Publishing Co., Inc. in 1988.
RPD Framework, Frameworks, Palatal Plate, Major Connector, Dentist, Dental Lab, Dental Lab Tech, Dental Labs
Anterior - Posterior Strap Major Connector
Posted on 11/09/2011
Unlike the single palatal strap which is indicated for only Kennedy Class III arches, the Anterior-Posterior (A-P) strap is arguably the most versatile major connector design, and is indicated for Kennedy Class I, II, III or IV partially edentulous arches.
The A-P strap is a combination of a palatal strap across the anterior section of the palate and another palatal strap across the posterior of the palate - connected by lateral straps. This leaves an opening in the middle of the palate. The major advantages to this design are:
1. The thin straps exhibit excellent rigidity
2. Offer minimal tissue coverage
3. Exhibit little interference with the tongue function
4. Is an ideal option for inoperable tori that end 6 to 8mm short of the hard and soft palate junction.
The key design elements are as follows:
1. Anterior posterior and lateral straps should be 6 to 8 mm wide
2. Lateral straps should be parallel
3. Anterior strap should not sit forward of the most anterior rests
4. Anterior border should sit in the a valley between the rugae
5. Posterior border should ideally be placed at the junction of the hard and soft palates
6. Palatal opening (space between anterior and posterior straps) should be at least 15mm
*Portions of this post were adapted from the book: Atlas of Removable Partial denture Design by Dr. Russell J. Stratton and Dr. Frank J. Wiebelt published by Quintessence Publishing Co., Inc. in 1988.
A-P Strap, Major Connector, RPD Framework, RPD Frameworks, Dentist, Dental Lab, Dental Lab Tech
RPD Framework - Palatal Strap Major Connector
Posted on 11/08/2011
The palatal strap major connector is used generally for tooth supported frameworks - Kennedy Class III.
Here are the general guidelines:
1. Width should be at least 8-10mm and should be as wide as the area bounded by the four principal rests.
2. The anterior border of the strap should be positioned in the valley between the rugae.
3. Both anterior and posterior border should be beaded
The major drawback to this design is that it covers more tissue than an A-P strap and offers less rigidity.
*Portions of this post were adapted from the book: Atlas of Removable Partial denture Design by Dr. Russell J. Stratton and Dr. Frank J. Wiebelt published by Quintessence Publishing Co., Inc. in 1988.
RPD Framework, Frameworks, Palatal Strap, Dentist, Dental Lab Tech, Rugae
RPD Framework - Maxillary Major Connector - An Introduction
Posted on 11/04/2011
Unlike the mandibular major connector, the maxillary major connector does not need to be designed around moveable tissues. As such, the border of the maxillary major connector should be designed much further (6mm minimum) from the gingival margin.
In addition to the above mentioned design, the maxillary major connector should exhibit these features:
1. All elements of the connector should cross the palatal midline (suture line) at right angles
2. Any curves should be placed on one side of the midline
3. Avoidance of the anterior palate is highly recommended so as not to interfere with speech and tongue function.
4. Anterior borders should be hidden in the rugae to create an even palatal surface
5. Borders should be beaded or 0.5mm to 1.mm wide and deep
The last feature - the beading of the borders - is very important for the following reasons:
- Beading creates and maintains positive contact with the soft tissue
- Beading increases the rigidity of the connector
- Beading provides a finishing line for the dental lab technician
- Beading allows edges of the connector to be tapered and less noticeable to the tongue through the bulk created
*Portions of this post were adapted from the book: Atlas of Removable Partial denture Design by Dr. Russell J. Stratton and Dr. Frank J. Wiebelt published by Quintessence Publishing Co., Inc. in 1988.
Maxillary Major Connector, RPD Framework, Frameworks, Dentist, Dental Lab Tech, Midline, Suture Line
RPD Framework - Double Lingual Bar and Labial Bar Connector
Posted on 11/03/2011
While the lingual bar and lingual plate are the most common designs for lower RPD framework major connectors, there are other variations of these designs used for specific and highly uncommon situations.
The
double lingual bar design is essentially a lingual plate design where the plate itself is only a superior border - creating two lingual bars - one below the gingival margin and one at the contact points of the anterior teeth. This design is used specifically when a lingual bar is indicated but additional support of anterior teeth is required and when large interproximal spaces exist. A lingual plate would create a severe aesthetic concern due to the metal plate showing in the interproximals. The problems with this design are the food entrapment created at the superior bar and irritation to the gum.
The
labial bar connector is a design where the bar is created on the labial side instead of the lingual side. This is a rare design due to aesthetic concerns and used only in situations where natural teeth are severely lingually inclined - not allowing for a lingual bar or lingual plate.
Finally, a variation of the above mentioned designs is the
swinglock attachment - which is a combination of a lingual plate and a labial bar. Here is a picture of swinglock attachment. A link to Swinglock's website has also been provided.
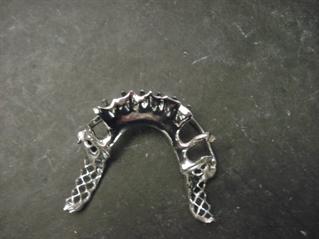
*Portions of this post were adapted from the book: Atlas of Removable Partial denture Design by Dr. Russell J. Stratton and Dr. Frank J. Wiebelt published by Quintessence Publishing Co., Inc. in 1988.
Double Lingual Bar, Labial Connector, Swinglock Attachment, RPD Framework, Dental Lab Tech, Dentist
RPD Framework - Linguoplate (Lingual Plate) Major Connector
Posted on 11/02/2011
While the lingual bar is the recommended design for the mandibular arch, it is not always possible or indicated. Specifically, if the patient exhibits any of the following features, a lingual plate is indicated:
1. High floor of the mouth (i.e. less than 7mm from the gingival margin)
2. High Lingual Frenum
3. Inoperable Lingual Tori
4. Future extraction of anterior teeth is likely
5. Posterior teeth are missing and additional retention is needed
The lingual plate has a lingual bar but extends to cover the lingual side of the indicated teeth up to the middle third of the tooth. As such, it provides additional support for the framework. However, it also introduces two important potential complications:
1. Oral Hygiene: It is difficult for the patient to clean the lingual side of the teeth and food tends collect in any crevices
2. Caries and Periodontal Problems: Food collection can lead to caries or periodontal problems.
There are two very important design specifications for the lingual plate:
1. Lingual plating does not extend superior to the middle third of the teeth
2. Superior border should be scalloped and thereby extending into the interproximal contact areas.
*Portions of this post were adapted from the book: Atlas of Removable Partial denture Design by Dr. Russell J. Stratton and Dr. Frank J. Wiebelt published by Quintessence Publishing Co., Inc. in 1988.
RPD Framework, Frameworks, Lingual Plate, Periodontal Problems, Caries, Dentist, Dental Lab Tech
RPD Frameworks - Mandibular Major Connectors
Posted on 11/01/2011
The major connector is defined as the component that connects the minor connectors from one side of the arch to the other side of the arch. It must be rigid, adaptable to existing anatomic structures and avoid food entrapment. In addition, major connectors must not damage tissue or gingiva during removal and insertion.
There are two types of mandibular major connectors:
1. Lingual Bar
2. Lingual Plate
The lingual bar is the preferred design for the mandibular major connector as it provides adequate rigidity without causing long term plague build up or impeding gingival health. The lingual bar design is not possible if the there is a high floor of the mouth, a lingual tori, or extreme lingual tilt of anterior teeth.
The preferred designs of the mandibular lingual bar include:
- 4mm in height (gingival-occlusal)
- Superior border should be 3 to 4mm below the gingival margin
- If less than a total of 7mm is available in space between the gingival margin and the lower border of the bar, a lingual plate should be used. Measurement can be performed by using a perio-probe measuring from the floor of the mouth to the gingival margin.
*Portions of this post were adapted from the book: Atlas of Removable Partial denture Design by Dr. Russell J. Stratton and Dr. Frank J. Wiebelt published by Quintessence Publishing Co., Inc. in 1988.
RPD Frameworks, Lingual Bar, Lingual Plate, Dentist, Dental Lab Tech, Perio Probe
RPD Framework Minor Connectors
Posted on 10/31/2011
As mentioned in our earlier dicussion, the guide plate, while technically a minor connector, is treated separately due to its function. So now, we will turn our attention to the minor connectors that serve strictly to connect various RPD design elements to the major connector. Generally, there are three categories of minor connectors:
1) Minor connectors that attach primary rests to the major connector
2) Minor connectors that attach indirect retainers to the major connector
3) Minor connectors that attach clasps to the major connector
The key design protocols for minor connectors are:
1. Should be positioned in interproximal embrasures
2. Must be rigid and strong
3. Must not interfere with the opposing occlusion
4. Should not create a food trap
5. Should not interfere with normal anatomic contours
6. Should join the major connector at a right angle to cover as little of the marginal gingiva as possible
7. Ideally, there should be 4-5mm of space between each minor connector
*Portions of this post were adapted from the book: Atlas of Removable Partial denture Design by Dr. Russell J. Stratton and Dr. Frank J. Wiebelt published by Quintessence Publishing Co., Inc. in 1988. Pages 43-44
RPD Framework, Minor Connector, Dental Lab Tech, Dentist
Recommendations for Guiding Sufaces
Posted on 10/28/2011
Guide plates are highly indicated for distal extension RPDs - i.e. arches where wholly edentulous areas are distal to natural teeth. An example would be an upper arch with teeth #5-12 still present with but with 1-4 and 13-16 missing. In such a case, the distal of #5 and the distal of #12 would be guide surfaces to contact the guide plate.
Here are some general recommendations for the guiding teeth:
1. The occlusal-gingival dimension should be 3-4mm
2. Guide surfaces should not extend beyond the height of contour
3. If natural tooth surface is parallel to the path of insertion/dislodgement, no preparation is needed.
4. Lingual surfaces can be prepared for lingual plating, but no preparation should be done in the gingival third.
During try in of the framework, relief of the metal guide plates is often indicated. In order to relieve the guide plates correctly, contact disclosing material should be applied to the guide plate. The framework should be seated and stresses to mimic biting forces should be applied. This process should be repeated until all binding forces are relieved.
*Portions of this post were adapted from the book: Atlas of Removable Partial denture Design by Dr. Russell J. Stratton and Dr. Frank J. Wiebelt published by Quintessence Publishing Co., Inc. in 1988. Pages 30-31
Guide Plates, Distal Extension RPDs, Removable Partial Denture, Dental Tech, Dentist
Guide Plates for RPD Frameworks
Posted on 10/26/2011
Guide plates (also known as proximal plates or guide surfaces) are metal struts primarily used to help to determine the path of insertion and removal of the RPD framework. Guide plates are technically a "minor connector", but serve a unique, specific function and are often discussed separately from the other minor connectors.
A guide plate is typically designed to contact a mesial or distal surface of a tooth. However, from a technical standpoint, any metal strut surface even along the lingual is a guide plate. The term proximal plate refers specifically to metal struts that contact only the mesial or distal surface of an abutment tooth.
Another term that is often confused with the guide plate is the term "guide plane" - which technically refers to the surface of the abutment tooth that has been designated to contact with the guide plate. However, the two terms are often used interchangeably on prescription Rx forms.
In addition to helping determine the path of insertion, other functions of the guide plate include:
1. Improved retention through frictional contacts
2. Stabilization against horizontal forces (together with other metal components such as clasps)
3. Provide reciprocation
4. Stabilization of individual teeth.
5. Elimination of negative strain on abtument teeth during insertion and removal of prosthesis
*Portions of this post were adapted from the book: Atlas of Removable Partial denture Design by Dr. Russell J. Stratton and Dr. Frank J. Wiebelt published by Quintessence Publishing Co., Inc. in 1988. Pages 25-27
Guide Plates, Guide Planes, Proximal Plates, RPD Framework, Dentist, Dental Lab Technician.
Rest Options for RPD Frameworks
Posted on 10/25/2011
There are three main categories of rest designs for RPD frameworks:
1. Occlusal Rests
2. Cingulum (Lingual) Rests
3. Incisal Rests
1. Occlusal Rests
The occlusal rest is an extension of the minor connector that is designed into an occlusal recess prepared by the doctor. The rest must form an angle of less than 90 degrees with the minor connector. The purpose of the angle is to avoid horizontal stress to the abutment and ensure seating into the prepared recess. Occlusal rests are design on posterior teeth only and typically sit on either the mesial occlusal or distal occlusal surface.
2. Cingulum Rest
The cingulum rest is an extension of the framework that sits on the lingual surface of an anterior tooth - primarily designed for canines, although it is possible to create a cingulum rest on lateral or centrals. A vertical stop is essential, and if not possible to create in the prepared tooth, a restoration such as a crown with a built in rest seat is fabricated.
3. Incisal Rest
The incisal rest is an extension of the RPD framework that sits on the incisal edge to provide support for the framework. Although not nearly as common as occlusal rests or cingulum rests, incisal rests are viable option when cingulum rests are contraindicated. An example is lower anterior teeth where there is insufficient space for a cingulum rest. The major disadvantage of the incisal rest is aesthetics. Additionally, the use of the incisal rest is not possible on the maxillary due to interference with incisal edges of the mandibular anterior teeth.
*This post was adapted from the book: Atlas of Removable Partial denture Design by Dr. Russell J. Stratton and Dr. Frank J. Wiebelt published by Quintessence Publishing Co., Inc. in 1988. Pages 20-23
Rest Seats, Framework, Occlusal Rest, Cingulum Rest, Incisal Rest, Dental Lab Tech, Dentist
Step 3 In RPD Design: Rest Preparation
Posted on 10/24/2011
After surveying and designing the RPD, the next step is to prepare the teeth in the mouth. While chairside preparation in advance of the fabrication of the RPD is recommended, many pracitioners who do not prescribe RPD frameworks regularly, prefer to have the lab prepare the teeth on the model - and they work to replicate the preparation in the mouth. Either way, the first preparation to consider is the creation of the rests.
Rests are defined as rigid extensions of a partial denture that contacts a remaining tooth (or teeth) to dissipate functional forces.*
The goals of the rests are to:
- Prevent movement in a cervical direction which would damage the mucosa
- Maintain retentive portions of clasps in their desired positions
- Distribute occlusal loads over several teeth
- Direct food away from tooth contacts and embrasures
A few notes about rests:
Rests must be located in a prepared occlusal, cingulum or incisal recess. They should avoid common contact areas and attempt to mimic the natural occlusal surface. Sufficient metal thickness is essential to prevent breakage. According to Tsao (1970), the minimal metal thickness is 1.38mm for cobalt-chromium partials and 1.43mm for cast gold based on a 80kg occlusal load.
*This post was adapted from the book: Atlas of Removable Partial denture Design by Dr. Russell J. Stratton and Dr. Frank J. Wiebelt published by Quintessence Publishing Co., Inc. in 1988. Page 19.
Rests, RPD Frameworks, Occlusion, Dental Lab Tech, Dentist
Step 2 in RPD Framework Design: Drawing on the Cast
Posted on 10/19/2011
After surveying the cast, the case is ready for the framework design. Preferably, the design should be drawn on a diagnostic cast. This allows the technician to transfer the design to the working model using the normal procedures that are practiced in that particular lab.
While drawings on casts are ideal, in many cases they are just not practical due to time constraints faced by the doctor. In such cases, drawings on the Rx are helpful when accompanied by written instructions. Drawings on paper alone are often ambiguous and lead to common errors such as incorrect clasp design.
For complex frameworks, we highly suggest to ask the lab for a digital image of the waxup before casting. The photo below is an example of such a waxup. With an image, the doctor can easily correct simple mistakes and save a great deal of time and aggravation. At Streamline, we offer waxup design images free for any case and the design images can be approved on our website or through email.
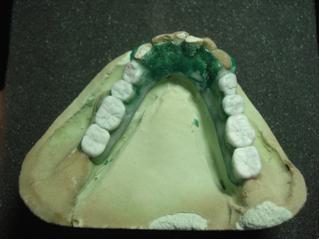
RPD Frameworks, Cast, Refractory Model, Partial Denture, Dentist, Technician
Step 1 in RPD Framework Design: Surveying
Posted on 10/11/2011
The first step* for proper design of the RPD framework is to survey the diagnostic cast. If possible, surveying should be done by the practioner using a flat surface table and a surveyor. Should the practioner not have a surveyor or not feel comfortable surveying, the lab will need to perform the initial survey before teeth are prepared.
The purpose of surveying is to determine:
1. Path of Insertion: Determine the most effective and advantageous path of insertion from both functional and aesthetic requirements
2. Guiding Surfaces: Determine which if any teeth can be used as guiding surfaces naturally or through preparation
3. Undercuts: Locate and measure recesses and undercuts
4. Interferences: Identify potential hard or soft tissue interferences
The steps outlined in this blog are adapted mainly from the book: An Atlas of Removable Partial denture Design by Dr. Russell J. Stratton and Dr. Frank J. Wiebelt published by Quintessence Publishing Co., Inc. in 1988.
RPD Framework, Design, Surveying Cast, Surveyor, Dental Lab Tech, Dentist
Partial Denture Frameworks - An Introduction
Posted on 10/10/2011
While the removable partial cast framework has lost some of its popularity with the rise of implant retained prostheses, its durability, convenience and relatively inexpensive cost make it an important restorative option for patients. And although complex precision or semi-precision attachments may have seen their peak in terms of demand, the principles and applications of these attachments continues to apply - especially to implant dentistry. In addition, hybrid implant supported dentures, are rising in popularity and often incorporate a partial framework either cast or machined.
We will begin to discuss the cast partial framework in detail over the next several blogs. Our hope is that we may spur increased awareness and interest in their function.
Before we begin, I would like to define a couple of terms that will be used in these blogs:
Partial framework: The term "framework" will always refer to a cast metal framework - although technically there are now frameworks available in acetal resin or other non-metal materials.
Precision attachments: Precision attachments refer to machine made attachments purchased in their final metal state from the manufacturer. Lab modification may take place to adjust or alter the attachment, but the lab will not add to the attachment.
Semi-Precision: Semi-Precision attachments refer to castable or alterable plastic or metal attachments purchased from the manufacturer in an unfinished stage.
Partial Denture Framework, Cast Framework, Cobalt Chromium, Vitallium, Dental Lab Tech, Dentist
Screw Retained or Cement Retained Provisionals
Posted on 10/07/2011
When a case indicates provisionals over implants, doctors have the option of choosing either a screw retained or cement retained provisional. Screw retained temporaries require a plastic temporary abutment. Cement retained can use either a plastic or a titanium temporary abutment.
However, not all provisional materials can be used for screw retained crowns. For example, Radica by Dentsply cannot be used for screw retained restorations as the composite resin will not bond with the plastic made for temporary abutments. Most PMMA provisional materials will work for screw retained restorations.
For ideal aesthetics, we recommend the cement retained provisional - unless occlusal space is an issue. When there is limited occlusal space and the abutment will be insufficiently short if made as cement retained, we recommend to change the restoration to a screw retained restoration.
Screw Retained Implant Crown, Cement Retained Crown, Abutment, Dental Lab Tech, Dentist
Temporaries Over Implants
Posted on 10/06/2011
Among the more popular indications for lab fabricated temporaries is for use over implants. Many large implant cases require long term provisionalization (six months to a year) to allow for tissue healing.
The implant supported temporary is different from the standard temporary because it requires implant parts. Most implant companies make temporary abutments either out of plastic or low grade titanium. These parts are less expensive than final abutments, but still add a significant cost to the case. As a result, some doctors decide to fabricate the final abutments with the temporary bridge. The danger with using final abutments is that as the tissue heals from the surgery, it tends often to grow over the abutment margin requiring further tissue reconstruction. Additionally, if the final working model is made using a direct impression of the abutments (so the stone cast is a replica of what is in the mouth rather than the original abutments), restoration fit will not be as snug.
We recommend to use low grade titanium temporary abutments rather than plastic temporary abutments - as the plastic are prone to breakage with deep bites or excesssive lateral excursions.
Temporaries, Implants, Abutments, Dental Lab Tech, Dentist
Material Options for Lab Processed Temporaries
Posted on 10/05/2011
There are several different material options for lab processed temporaries. The main factor influencing the material choice is the duration of patient usage. For temporaries that are expected to last three to six months, popular brands and materials include Jet Acrylic by Lang Dental or DVA C&B Resin by Indenco. We have also had success in using the Stern Vantage Varnish made by Sterngold. The varnish can enhance the final temporary giving it a much more glossy look and feel.
For long term temporaries designed to last more than six months, we recommend Radica by Dentsply. It is a composite resin with long lasting durability. Additionally, it has a very nice finish almost mimicking porcelain.
Acrlic Temporaries, Provisionals, Materials, Jet Acrylic, DVA, Dental Lab Tech
Rx Instructions for Lab Processed Temporary Bridge
Posted on 10/04/2011
For lab processed temporary bridges, we recommend that the doctor send the lab upper and lower unprepped models and a bite registration. The doctor can take either an alginate impression (poured in office) or a rigid impression material such as PVS or impregum.
Although labs should already be aware of the following points, we recommend that the doctor specifically list these instructions on the Rx to avoid any miscommunication.
1. Duplicate the working model. This allows the doctor to have a pre-prep study model in case he does not have one in the office.
2. Prep the model conservatively. We recommend 1.5mm circumferential reduction of all indicated teeth.
3. Indicate if a "shell" design is requested. A shell temporary refers to a temporary bridge where there are no internal embrasures delineating individual teeth (see photo below).
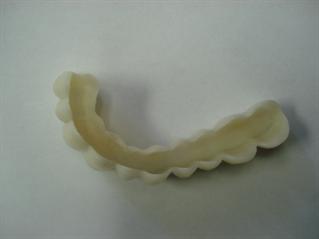
This allows for easier seating and chairside reline without grinding necessary. It is really an ideal design for long span bridges. Additionally, it is often difficult for doctors to match lab preps exactly, so a shell design helps to avoid tedious prep matching and binding issues. The downside is that the doctor may not always have the same color acrylic as labs, in which case the different shades may show if the acrylic shell is thin.
4. If not using a shell, ask for a thermoplastic prep guide. A thermoplastic prep guide is similar to a thin retainer (like an Invisalign retainer) constructed over the lab prepped model. It allows the doctor to check his preps before inserting the temp. Because it is clear, the doctor can continually check where it may be binding to allow for the easiest prep match before inserting the temporary bridge.
Temporaries, Temporary Bridge, Provisional Bridge, Acrylic Provisional, Shell, Prep Guide, Dentist, Dental Lab Tech
Laboratory Processed Temporaries
Posted on 10/02/2011
Returning to our discussion of material categories that appear on the Rx form, I would like to dicuss the lab processed temporary over the next several blogs.
For most practioners, temporaries fabricated by laboratories are an unnecessary expense that cannot be passed on to the patient. Indeed, there are a wide range of options for in office temporaries. The three general material categories* include
- Bis-Acryl like Protemp by 3M Espe, Integrity by Denstply Caulk, and LuxaTemp by DMG America
- PEMA (polyethyl methacrylate) including Snap by Parkell
- PMMA (polymethyl methacrylate) such as Jet by Lang or CrownTek by GC America
However, for specific cases - especially large pontic spans or long term provisionals that must last three or more months - a lab processed temporary is really an ideal product which can and should be factored into the overall treatment plan price.
Over the next several days, we will discuss the best way to approach the lab processed temporary and what materials should be sent to the lab.
*A very interesting article on this subject was written for JADA by GORDON J. CHRISTENSEN, D.D.S., M.S.D., Ph.D. A link is available below.
Lab Processed Temporaries, Provisionals, Bis-Acryl, PEMA, PMMA
Lead Free Laboratory
Posted on 09/28/2011
One of the more common questions we receive from doctors regarding alloys is the questions about lead content in crowns. We are a "lead free" laboratory which means that none of our alloys used contain lead.
The real concern about lead in crowns was evaluated at length by the ADA (see link below). In their discussion of the topic, they found traces of lead in various feldspathic porcelains. According to the article, the trace elements of lead in feldspathic porcelain result from the fact that porcelain is a natural mineral mined from the earth and refined for dental use. As a result, porcelain will contain many naturally occurring elements including trace elements of lead. However, based on comprehensive testing analysis by the ADA, they concluded that "...we are confident that no measurable levels of lead are released from dental crowns made from dental porcelain typical of available source." This is due to the fact that the mouth never reaches a temperature that could possible release lead or other elements that make up porcelain.
Lead in Dental Crowns, PFM, Crown and Bridge, Dental Lab Tech
Copper Usage in Dental Alloys
Posted on 09/27/2011
With its rich yellow color, copper has been used in crown and bridge alloys primarily for its color enhancing properties. As the price of gold increased, alternative alloys were utilized to maintain the golden color and copper was a good substitute. Other advantages to this alloy are its strength and its ability to increase thermal expansion when alloyed with palladium based alloys.
The major disadvantage to using copper is similar to the disadvantage of silver - it can tarnish and can cause discoloration to porcelain. This is rare if the alloy is predominantly palladium.
Today, many full cast alloys contain limited amounts of copper for both its color and strength. But most PFM alloys are copper free.
PFM, Crown and Bridge, Copper, Gold, Yellow, Dental Lab Tech
Silver Alloys in Dentistry
Posted on 09/26/2011
Silver has been used in dentistry as an alloy within amalgam fillings for many years. Its use within dental laboratories grew since the 1980s due to an increased use of palladium as a substitute for gold. Silver-Palladium alloys were for many years the most common crown and bridge alloys that were categorized as "noble metal" or "semi-precious" metal alloys.
Silver has historically been alloyed to either gold or palladium because it offered a number of physical properties that improved gold and palladium's use within dentistry. The advantages of silver include:
- Silver raises the thermal expansion of palladium
- Silver lowers the melting range of gold and palladium
- Silver adds fluidity to casting alloys and solders
- Silver helps to control the strength and harness of crown and bridge alloys
The major disadvantage to silver is that it can tarnish. If not alloyed correctly, silver can turn green and thereby cause porcelains to discolor. However, most alloys that include silver on the dental lab market today are alloyed correctly and will not cause noticeable tarnish or porcelain discoloration.
Silver, Crown and Bridge, PFM, Dental Lab, Dentist
Palladium Based Alloys for Dental Applications
Posted on 09/23/2011
The use of palladium in dentistry is a rather recent event (1). As the price of gold increased in the 1980's dental labs looked for alternatives and palladium was an excellent substitute for gold.
Palladium is both stronger and harder than gold, allowing it to act as a strengthener especially popular in restorative cases involving one or more missing tooth (i.e. a bridge). Additionally, palladium has a higher melting point and a higher modulus of elasticity than gold - making it a superb alloy for porcelain baking as it can withstand high temperatures without melting.
In addition, palladium is corrosion resistant and does not tarnish, both of which are positive attributes for the wet, saliva filled environment of the mouth.
The major drawback to palladium is the silver color - it dulls the yellow color of gold considerably when alloyed with gold. As a result, patients who expect to see gold will not be satisfied with a palladium-gold substitute.
Today, as the price of palladium has increased considerably, labs face increasing pressures to use substitutes for this alloy which still conform to the Noble Metal content requirements of the ADA. Substitutes include any of the platinum group of metals including platinum, rhodium, iridium, osmium or ruthenium. However, aside from platinum, most other platinum group alloys are not ideal for dental applications as the majority metal, and are used typically in small quantities for specific purposes.
(1) More information on this topic can be found on the ADA's website: http://jada.info/content/133/6/759.full
Thanks to Marlin Gohn CDT from Argen Corporation for his memo on the uses of alloys in dental applications.
Palladium, Dental Alloys, PFM, Full Cast, ADA, Noble Metal, Dental Lab Tech
Disadvantages of Gold Based Full Cast Restorations
Posted on 09/22/2011
There are three main disadvantages of the gold based full cast metal restorations:
- Aesthetics
- Price Volatility
- Softness
Aesthetics is typically the number one reason why more doctors do not prescribe gold crowns. An increasing number of patients are reluctant to see metal anywhere in their mouth (even in the posterior molars), and this forces doctors to prescribe alternative materials even if the alternatives may not last as long as gold.
Price volatility is another big consideration and in today's economy with the price of gold at record levels, it is not easy to convince a patient to pay more money for a gold tooth. Additionally, most doctors do not enjoy price guessing for lab work, they prefer to know the price of a restoration before prescribing it. With gold, the price of a restoration depends on the amount of gold alloy being used, so the final lab bill can be sometimes 50 to 60% more than expected if the the tooth prep required a lot of gold
Finally, the issue of softness of gold is a consideration for high gold content crowns. Because gold is a soft and malleable metal, it really cannot be prescribed for bridges if the gold content is high. However, most dental labs use gold alloys (not pure gold) - usually containing palladium (Pd), indium (In), rhodium (Rh) or tantalum (Ta) - each of which can add strength to gold.
Gold Crown, Gold Bridge, Dental Lab Restorations, Dental Lab Tech
Advantages of Gold Based Full Cast Restorations
Posted on 09/21/2011
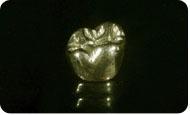
Gold has been used for dental restorations for as long as records have been kept. It can be called the alloy of choice for the mouth.
Its key advantages are:
- Corrosion resistant
- Non-reactive in the mouth
- Malleable for superb marginal adaptation
- Soft on the opposing dentition
Among the most important concerns for using any foreign material in the mouth is the concern for the constant and ever changing environment. With both saliva and acidities from the body and food, dental restorative materials are subject to extremely harsh conditions. That, together with chewing and grinding forces, creates challenges for many materials. Gold, as a corrosion resistant and a non-reactive material, adapts very well to these harsh conditions. Additionally, with its natural softness and malleability, gold allows for almost perfect margin adaptation and does not wear away at the opposing dentition.
Gold, Crowns, Bridges, Full Cast, Dental Lab Tech
Full Cast (All Metal) Restorations
Posted on 09/20/2011
The full cast (all metal) crown or bridge remains among the most enduring dental restorations available. Unlike porcelain based restorations, full cast crowns do not chip, fracture or discolor. In many cases, these restorations can last a lifetime.
However, the popularity of the full cast metal restorations has wained over the past several decades (1970s forward) especially in rich countries. This decreased demand is mostly attributed to the cosmetic demands from patients. Few patients, especially in the US, want to have a full metal crown in their mouth - especially in the smile region from the second pre-molar forward.
For doctors and patients that still enjoy the reliability and longevity of this restoration type, we will offer a few blog posts over the next several days covering various alloys used in full cast crowns and discussing their benefits and drawbacks.
Full Cast Crown, Bridge, All Metal, Aesthetics, Dental Lab Tech
Zirconia Cementation
Posted on 09/19/2011
Unlike IPS Empress or even IPS e.Max, Porcelain fused to zirconia or All zirconia (no porcelain layer) have the advantage of being strong enough for virtually every traditional cement. Additionally, they can be bonded with resin cements.
For standard preparations where the prepared tooth abutments height is 4mm or more, traditional cements are indicated. Where the prepared tooth abutment height is shorter than 4mm or where retention may be an issues, it is recommended to bond the zirconia using a resin cement.
For traditional cements, options include: Panavia 21 by Kuraray or GC Fuji by GC America.
Resin Cements include: Rely X ARC by 3m Espe, Clearfil by Kuraray, Multilink by Ivoclar, NX3 by Kerr, or Panavia F 2.0 by Kuraray.
For an interesting article on this topic, please visit the link below.
Zirconia Cementation, Porcelain to Zirconia, All Zirconia
e.Max Cementation and Care
Posted on 09/16/2011
Cementation and care of the all ceramic restoration is a bit different than a PFM, and differs depending on the actual material. Zirconia differs from e.Max which further differs from IPS Empress.
We will discuss the cementation of IPS e.Max today.
IPS e.Max crowns or bridges can be cemented adhesively (using Variolink II by Ivoclar), self-adhesively (using Multi-Link by Ivoclar) or conventionally (using Vivaglass by Ivoclar, GC Fuji by GC America, Panavia F by Kuraray, or C&B Metabond or other popular cements). For greatest strength, it is recommended to use adhesive bonding or another similar dual cure material such as Nexus by Kerr or Lute-It by Pentron.
IPS e.Max inlay, onlays and veneers must be adhesively cemented and recommended cements include Variolink II for the total etch technique or Multi Link for the self etch technique - both by Ivoclar.
More information and guides to cementation and care for e.Max are available here:
e.Max, Cementation, Variolink II, Nexus, Panavia F, Bonding, Etching, Dental Lab Tech
e.Max Veneer Preparation
Posted on 09/15/2011
While e.Max is popularly prescribed for crowns, inlays and onlays, the e.Max veneer is really one of the best all ceramic veneers available. With its strength and translucency, e.Max solves the problem common with veneer chipping while not compromising on the aesthetics. Additionally, with the ability to create a 0.3mm veneer, e.Max can be placed over existing teeth as "no prep" veneers.
Here is a guide to preparation of the veneer based on Ivoclar's Chairside Prep Guide:
- 1.0mm-1.5mm Incisal Reduction
- Depth cuts of 0.6mm - 0.8mm
- Medium grit, round-ended, diamond bur can be used to remove a uniform thickness of facial enamel by joining the depth-cut grooves.
- Diamond bur is angled to bevel back the incisal edge
- Chamfer margins interproximally will allow for enough bulk of porcelain
e.Max, Veneers, No Prep, Dental lab Tech, Dentist
e.Max Preparation for Full Coverage Anterior Crowns
Posted on 09/14/2011
e.Max is most often used for anterior cases - biscupid forward. With its natural translucency and strength (400 mPA in a pressed form), it really is among the best materials labs have for centrals, laterals and canines. The material is used most often for full coverage crowns, but it really works well for veneers and even thin veneers (0.3mm).
The preparation of the anterior full coverage crown is as follows*:
- 1.2mm incisal reduction
-1.2mm - 1.5mm facial reduction
- 1.2mm lingual contact clearance (Football shaped finishing bur used for lingual reduction)
- 1.0mm reduction at the gingival margin
- Shoulder Margin
- Rounded internal line angles
Pictures available at: http://www.ivoclarvivadent.us/empress/documents/all_ceramic_prep_guide.pdf
e.Max, Preparation, Shoulder Margin, Crown, Veneers, Shoulder Margin, Dentist, Doctor, Dental Lab Tech
e.Max Preparation Guide: 3 Unit Bridge Restorations
Posted on 09/13/2011
e.Max is a terrific all ceramic option for 3 unit bridges from the bicupsid forward. Unlike PFMs, e.Max will not develop a gray margin and offers natural tooth like translucency.
Here is a guide to tooth preparation for a 3 unit anterior bridge based on Ivoclar's prep guide:
http://www.ivoclarvivadent.us/empress/documents/all_ceramic_prep_guide.pdf
- 1.5mm Occlusal Reduction
- 1.2mm Axial Reduction
- Rounded internal line angles
- Shoulder Margin
- 1.0mm reduction at the gingival margin
e.Max, Preparation, Occlusal Reduction, Anterior 3 Unit Bridge
e.Max Preparation Guide - Posterior Single Unit Crowns
Posted on 09/12/2011
Probably the two most common reasons for a doctor to avoid all ceramic
restorations - especially e.Max - is due to (1) the preparation technique
and (2) cementation guidelines. Many doctors are comfortable with
preparation styles for PFM - especially the chamfer, chamfer bevel or knife
edge - and would rather not try to create the shoulder necessary for an
e.Max. Additionally, many doctors are experts at cementing the PFM, but are frustrated with the techniques and materials required to cement the all
ceramic restoration.
Over the next several blog posts, we will discuss both of these issues.
Indeed, it is true that the E.max requires a shoulder prep for a crown. But
the truth is that the same shoulder is required for a porcelain butt joint
margin on a PFM. So for doctors who dislike the graying margin that shows
up over time on the PFM and always request a Butt Joint for anterior cases,
it is a good idea to consider e.Max since you avoid the graying margin and
may save some money- since there is no additional butt margin fee on an all
ceramic.
As far as the technical specification for preparation of the e.Max crown, we
will highlight the guidelines issued by Ivoclar in this blog and the next
few blogs:
POSTERIOR - Single Unit Crown
- 1.5mm occlusal reduction
- 1.5mm axial reduction
- 1.0mm reduction at gingival margin
- Use a flat ended, tapered diamond to create a shoulder margin
For conventional cementation please be aware of the following
- Coronal length (i.e. abutment height) of at least 4.0mm
- Shoulder prep must have at least 1.0mm of proximal reduction
- Occlusal reduction of at least 1.5mm in contact area
- Taper between 4 and 8 degrees
Here is a picture guide. Source: Ivoclar Chairside Preparation Guide for
IPS E.Max available here: http://www.ivoclarvivadent.us/empress/documents/all_ceramic_prep_guide.pdf
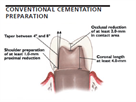
e.Max, Ivoclar, IPS e.Max, Tooth Prep, Chamfer, Bevel, Shoulder, Occlusal Reduction, Dental Lab Tech, Dentist
IPS E.Max
Posted on 09/09/2011
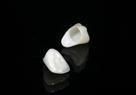
While zirconia is certainly the strongest all ceramic material available today, its major drawback is aesthetics - as it is an opaque material. Alternatively, Ivoclar's IPS E.Max is made from a lithium disillicate - a glass ceramic material. In the pressed form, e.Max can offer a flexural strength of 400 MPa, while the CAD/CAM e.Max has strength of 360MPa. Although this is significantly lower than the zirconia flexural strength, it is sufficient strength for posterior molars and 3 unit bridges.
But the real advantage to this material is the natural translucency. In the right technician's hands, this material is arguably the best material to mimic the natural tooth. It allows light to transmit in many of the same ways that natural teeth do, and as such is an ideal material for single centrals when shade matching is critical.
IPS E.Max, Press, CAD/CAM, Crowns, Bridges, Dental Lab Tech
All Zirconia
Posted on 09/08/2011
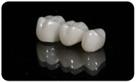
As briefly mentioned yesterday's blog post (sep. 7), zirconia based restorations can be made with or without a porcelain overlay. The advantages to the porcelain overlay are aesthetics - similar to the PFM - porcelain will create the tooth like appearance and can be built up with multiple shades or stains. However, adding porcelain has its drawbacks - namely the strength of the restoration is only as strong as the porcelain, and porcelain exhibits a significantly lower flexural strength than zirconia.
In addition, it has been reported that incidence of porcelain fracture or chipping off of zirconia is more common than off of metal substructures. There is little empirical evidence to support these claims, but as zirconia is a relatively new material compared to the PFM, porcelain fusing to zirconia is still a new art and science.
As a result of these issues, there has been a recent increased interest in all ceramic restorations that are less likely to fracture. One such product - the All Zirconia restoration - has become increasingly popular for molars. The reason for this is that the All Zirconia is entirely milled by a machine (including occlusal anatomy) and as such is one homogeneous material. Chipping or fracture lines that porcelain exhibits are almost non-existent. However, aesthetics - especially shading - continues to be a challenge. As zirconia blocks come in monolithic shades, it is difficult for labs to offer true shade match especially at the incisal edge. For this reason, most all zirconia restorations are prescribed for teeth not inside the smile zone.
However, with more research and development spurred by the high costs of precious alloys, it may be only a few years before we see All Zirconia restorations with multilevel shade options and more translucency. This is a product in its infancy and we look forward to seeing a great deal of new materials come into the market that will help doctor, patient and lab.
All Zirconia, Bruxzir Zirconia, Crown and Bridge, Dental Lab Tech
Porcelain to Zirconia
Posted on 09/07/2011
The first category of All Ceramics that was outlined yesterday are the Zirconia based restorations - also known as Porcelain Fused to Zirconia or PFZ for short. These restorations are similar to the PFM in that they have a coping with a porcelain overlay. The zirconia substructure is fabricated through a CAD/CAM process whereby the lab mills the zirconia (composed of zirconium oxide) in a machine and then sinters it to give it strength.
Zirconia based restorations, like the PFM, have an opaque quality that easily masks dark stumps or post/cores. The tooth shade is created using a standard porcelain build up technique. As such, zirconia is less translucent than other all ceramics such as IPS Empress, IPS E.Max or Procera Alumina. However, it does allow for incisal translucency and is prescribed quite often for anterior teeth.
The real advantage to the Zirconia based All Ceramics is strength. Zirconia, after sintering, can reach flexural strengths of 900-1300 MPa - depending on the process and manufacturer. Compared to the Empress Press (180 MPa) or E.Max Press (400 MPa), zirconia is quite a bit stronger. This allows for the use of zirconia in the both posterior and anterior regions of the mouth, and allows for large bridges spanning even 3 pontics. One important note to understand about zirconia is that it is a material - not a brand. As such, each lab may purchase the material from a different supplier which results in different strengths and shades of the coping.
Preparation style requires a chamfer or shoulder finish. Knife edge or chamfer bevels are not recommended.
However, like the PFM, zirconia actual strength is dependent on the porcelain overlay. So even a quoted strength of 1000 MPa, may refer only to the understructure. Once porcelain is added, the strength may reduce to 600 MPa or less - which is why porcelain can fracture off of zirconia. The use of All Zirconia (popularized by Glidewell Dental Labs as the Bruxzir crown) allows zirconia to exhibit its actual flexural strength. However, aesthetics are compromised as there is no porcelain added. We will discuss the the All Zirconia restorations in an upcoming blog post.
Zirconia, PFZ, Porcelain to Zirconia, Crown and Bridge, E.Max, Empress, Dental Lab Tech
All Ceramics for Crown and Bridge
Posted on 09/06/2011
As an increasing number of patients request metal free restorations, labs have worked to offer all ceramic materials that are both functionally and aesthetically equal to or superior to the PFM. Today, there are several materials that meet these requirements.
The options can be classified into two general categories: Zirconia based all ceramics (such as Lava, Prismatik or Generic Zirconia) and Non-Zirconia based all ceramics such as IPS E.Max, IPS Empress, and Procera Alumina.
We will discuss these materials over the next several blog posts.
All Ceramics, PFM, E.Max, Empress, Zirconia, Aesthetics, Dental Lab Tech
Titanium for PFM
Posted on 09/02/2011
In 2003, the ADA created a new classification specifically for titanium based alloys. The alloy is placed between the Noble and High Noble category and qualifies if the alloy contains 85% or more titanium. While the benefits of titanium as a bicompatible material for the body are quite well known within both dentistry and medicine, its applications within fixed prosthodontics is actually quite limited outside of implant dentistry.
The limitations result from the difficulty in casting titanium (virtually all titanium is milled by machines) and the difficulty in applying porcelain to titanium. Very few porcelain systems work with titanium - which means that technicians who have experience with traditional porcelains cannot use them when applying them to titanium. Additionally, because most titanium understructures are milled, the same application and design limitations that apply to all CAD designed fixed restorations applies. Indeed, it is important to remember that the human hand is capable of waxing and casting a restoration to fit virtually any situation including inlays, onlays, rests, wings, and attachments. CAD fabricated crowns are limited by the software and the milling unit. Even the most sophisticated machines cannot do certain restorations that the human hand finds easy.
This all being said, titanium is the preferred alloy for virtually all implants and the most common alloy for implant abutments and abutment screws. It will probably continue to play an important role in implant dentistry. But unless more porcelain systems adapt to it, we do not believe this alloy will ever become the alloy of choice for PFMs.
Titanium, ADA, PFM, Porcelain fused to metal, Implants
Captek - High Noble PFM
Posted on 09/01/2011
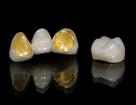
Captek, while a high noble metal with 88% gold, really deserves its own discussion due its unique qualities and strengths. Unlike standard cast high noble PFMs, Captek is created through a foil technique - a puddy like material - whereby the technician creates the coping using pre-fabricated sheets of gold directly on the die. The coping is baked in an oven and then porcelain applied to it.
As such, Captek copings are not very strong or durable by themselves. For example, a single unit molar coping try in is not recommended. This is because even after baking, the coping is still soft and malleable. This leads to a number of problems when attempting to seat on the prepped tooth - one being that the margin can actually be manipulated or damaged. We recommend to avoid try ins with all single unit captek cases.
Captek bridges, on the other hand, are usually created through the use of a separate alloy (such as a palladium-silver or white gold alloy) which creates a framework around each individual captek coping. This technique allows for the copings to be tried in and avoids damaging the coping design. However, the margins are still very fragile and must be handled with extreme care.
The real strength of Captek comes from the combination of the metal foil and the porcelain build up. Once baked, the crown is very durable and suitable for virtually any situation in the mouth - single molars, anterior cosmetic cases, and even bridges with up to two adjacent pontics.
The beauty of captek is both in its marginal fit, the beautiful color of its gold and the warmth of the final restoration, and the predictable price of the alloy. Even in times when gold is soaring in price, Captek allows for at least a level of predictability not offered for cast metals. And this allows doctors to offer it as a premium product without fearing a lab bill twice what they expected.
Captek, PFM High Noble, Gold, Palladium, Dental Lab Tech
PFM High Noble
Posted on 08/31/2011
The High Noble PFM, also known as "precious metals", is defined by the ADA as metals that include 60% or more gold + platinum group metals (palladium, platinum, rhodium, iridium, osmium or ruthenium) and at least 40% gold. This means, for example, that an 80% palladium, 20% gold alloy would NOT be a high noble alloy, since it does not contain 40% gold. Additionally, a 40% gold, 15% palladium, 45% other base metals would also not be a high noble metal since it does not have 60% of gold and palladium.
So, essentially, the High Noble PFM is a gold based alloy. However, not all high noble alloys look the same. 40% gold alloys most often look like silver and are typically called: white gold. Even a 75% gold alloy will often have a very dullish gold appearance - looking more like a semi-precious alloy than a gold alloy. It requires about 85 - 90% gold to give the PFM alloy a goldish hue. This is important especially when the patient has asked for gold and wants the golden look.
The above qualifications, however, do not apply to full cast alloys. Many high noble full cast alloys, even with a very low gold content of 40% can look very golden if copper or indium as added to the alloy. Copper is itself a golden metal and indium, when combined with palladium, can give a goldish hue. Copper is not often used in PFM alloys because it has potential to cause porcelain to discolor.
High Noble, PFM, Porclelain Fused to Metal, Dental Lab Tech, Gold, Palladium, Copper, Precious metal
PFM Semi-Precious
Posted on 08/30/2011
The term semi-precious is a bit of a misnomer - as metals are really classified as either base metals or precious metals. However, this term has become so commonplace in our industry that it certainly warrants its own name.
The term semi-precious typically refers to the ADA Classification of a Noble Alloy - i.e. an alloy that contain 25% or more of either gold, palladium, platinum, rhodium, iridium, osmium or ruthenium. Essentially, this classification was designed to help doctors and labs with rising gold prices and allow for alloys that have other precious metal contents other than gold. Historically, most labs used high palladium content (palladium content of 50% or more) alloys and typically these alloys also contained silver. However, with the recent rise of alloy prices, labs have begun to incorporate even lower content metals - such as Callisto-CP Plus by Ivoclar - with 25% palladium content. The "low palladium content" alloys, which contain high amounts of Chrome and Cobalt, typically feel more like a non-precious than a standard semi-precious in terms of their brittle properties. But they are still noble metals and can be reported as such.
The most compelling difference between the semi-precious (noble) metal and the non-precious metal is the physical properties of the metal - it is softer and more malleable for technicians and dentist and it does not contain nickel. Of course, the final difference is cost - as noble metals are much more expensive than base metals and as such reimbursements are different as well.
More information about our semi-precious alloys is available at:
https://www.streamlinedental.com/products/PFM/SEMI-PRECIOUS/
PFM Semi-Precious, ADA Noble Metal, Ivoclar, Palladium, Silver
PFM Non-Precious Options
Posted on 08/29/2011
The Non-Precious (base metal) PFM continues to be a very popular restoration for price conscious doctors who enjoy working with PFMs. Non-Precious metal alloys are typically nickel based, although nickel free alternatives (such as a predominanty cobalt-chromium alloy) are now increasingly popular. The reason why most alloys are nickel based is because nickel is easier to handle by technicians and reports high porcelain to metal bond strengths,
However, there are a small percentage of patients (9% of women and 0.9% of men) that have incidence of nickel sensitivity*. It is advisable to do a nickel allergy test (using a nickel sensitivity patch) before placing a nickel based alloy. If the nickel test is not available, at the least it is advised to ask patients if they tend to avoid costume jewelry due to skin irritation. If they do avoid it, it is quite possible that they have the nickel allergy.
We offer both the nickel and nickel free alloys. More information is available on our website under the products tab or by copying this url: https://www.streamlinedental.com/products/PFM/NON-PRECIOUS/
*A detailed article on the ADA's website about nickel alloys is available here: http://www.agd.org/publications/articles/?ArtID=8571
Non-Precious PFM, Base Alloy, Nickel, Chromium-Cobalt, Dental Lab Tech
PFM Metal Alloy Categories
Posted on 08/26/2011
According to the American Dental Association (ADA), PFM Alloys are classified into four broad categories:
1. High Noble Alloys: Noble alloys (gold + platinum group*) >= 60% and gold >= 40%
2. Titanium and Titanium Alloys: Titanium >= 85%
3. Noble Alloys: Noble alloys (gold + platinum group*) >= 25%
4. Base Alloys: Nobel alloys (gold + platinum group*) <= 25%
*Platinum group includes: Platinum, Palladium, Rhodium, Iridium, Osmium, and Ruthenium.
For more information, please visit: http://www.ada.org/2190.aspx
PFM, Porcelain Fused to Metal, Base Metals, Noble Metal, High Noble Metals, Dental Lab
Advantages of the PFM
Posted on 08/18/2011
The PFM (porcelain fused to metal) restoration continues to be the most popular restoration type prescribed by dentists. Even with the surge in All Ceramic materials, the PFM has a long and tested history and remains the mainstay of our industry. Undoubtedly, this may change in the future as dentists adopt intra oral scanners and demand for CAD/CAM milled restorations increases. However, for the current time the PFM still provides some key advantages over other materials:
1. Flexibility: Metal understructure is adaptable to virtually any type of case. PFMs can be contoured with metal rest seats, metal contacts, metal occlusals, metal linguals, removal arms, screw retained implant crowns, metal arm extensions and of course all sorts of attachments. This is not possible with all ceramic materials.
2. Preparation: PFM preparation allows for a knife edge, chamfer, chamfer with bevel and of course the shoulder, shoulder bevel.
3. Shade: Adjustments to shades are possible. Unlike all ceramic restorations, if the shade is wrong for a PFM, the porcelain can be stripped and a new shade of porcelain can be applied. Most pressed all ceramics are pressed using shaded ingots, which means that changing the shade often requires starting the case over from scratch.
4. Cost: Although the price of noble and high noble alloys is at record levels, non-precious PFMs continue to be the least expensive restoration type with a durability that may exceed any all ceramic.
Porcelain Fused to Metal, PFM, Lab Tech, Dentist
Rx Due Date
Posted on 08/17/2011
No matter which lab you use, one field that will appear on virtually every Rx is the "due date" field. This date refers to the doctor's due date - i.e. when he/she wants the case back in the office.
The confusing part about this date is that it is often ambiguous by time - for example, some offices will write: "one week" or "two weeks" as the due date. Or, other offices will write an actual date, but not a time.
Writing a time frame like "one week" is not advisable as it leads to ambiguity in regards to the start date - is it one week from when the doctor sent the case, or one week from when the lab received the case. Indeed, most labs calculate turnaround time as "working days in lab" - which means from the date they receive the impression, they require 5 or 7 business days in lab to complete the case. This time does not include the transit time to return the case back to the doctor's office.
Writing a date without a time can also be misleading - as there are situations where a doctor's office has the patient scheduled on the due date for 12pm, but the case will not arrive until 5pm.
As a result, some labs put the text: "Due by 5pm on:" and encourage the practice to assume the case will not arrive until 5pm.
We suggest the following protocol:
1. Always include an actual due date on the Rx and preferably include a time as well.
2. Schedule your patient for a day or two after the due date you write on the Rx.
3. Try to calculate the time needed to complete the case using your lab's schedule and based on the date the lab should receive the case. For example, if you send out a case on a Monday and it should arrive on Tuesday in lab, and the lab requests 5 working days to complete the case, assume you will not get the case back until the following Wednesday. So schedule your patient for the following Thursday.
Dental Lab Rx Form, Due Date, Dental Lab Case, Lab Tech, Dentist
Missing Rx Information
Posted on 08/16/2011
It may seem a bit counterintutive, but one of the most common omissions we have seen on Rx forms is missing dentist practice information or missing patient information.
Perhaps, these types of omissions can be explained by the nature of lab-dentist relationships - most labs know their doctors personally and there is an underlying assumption that the lab can decipher the practice from the handwriting or the case materials itself - like the impression material or models. Nonetheless, missing doctor name or address, and certainly missing patient information, can delay cases or lead to avoidable mistakes.
The most common mistakes would include: incorrect shipping (for example, if a doctor practices at multiple locations), incorrect billing, and incorrect patient case history if the case is a continuation of a previous case.
As a result of these omissions, some labs have decided to pre-print the account information on the Rx form for the doctors, but this method can be a costly and logistical nightmare for small labs and does not solve the problem of missing patient information.
After years of experimentation, we have developed the following standards to help us avoid these types of mistakes:
1. Doctor Name and Address Box. Instead of a line item, we show a box on our Rx which allows the doctor to place a standard 3x1 inch label or stamp imprint.
2. We will not proces a case without a patient name or identifier.
3. We offer automaic email tracking confirmations for every case - which will confirm the patient name, due date, shipping address, and billing address.
It is indeed the very simple email confirmation that has helped us to avoid mistakes with shipping or billing without the need for a phone call. We highly recommend incorporating automatic email confirmations for all labs and practices.
Dental Lab Rx, Dentist, Omissions
Dental Lab Rx Forms
Posted on 08/15/2011
Probably the most important and basic tools used to communicate between dentist and laboratory is the Rx form. Curiously, the dental Rx, unlike medical rx forms, is typically provided by the lab rather than the dentist.
The reason for this is likely a result of non-standardized naming conventions within the dental lab industry. Without a standards coding system (like ADA codes for insurance billing), labs have historically created terminology that suited their style, skill set, materials available or business model.
As a result, labs have become accustomed to providing dentists with custom Rx pads that listed all the available options from their particular lab. Labs mostly view Rx pads as a cost of doing business, or occasionally as a marketing tool to show doctors what they are capable of doing.
Over the next several blogs, we will begin discussion of the Rx form - explaining various terminology used on it and ways to help improve communication between dentist and lab tech using the forms.
Dental Lab, Rx Forms, Dentist, Dentist Lab Tech Communication
How to Troubleshoot an Unclear Margin
Posted on 08/12/2011
While we all strive for perfection, dentistry, like life in general, is often faced with challenging circumstances that limit our ability to perform perfect work. Not all tooth preparations are perfect. The die tech may miss the margin. These are, unfortunately, the reality of doing business even with all the advancements in CAD technologies.
The question really is what to do in circumstances where the margin is just not clear. As a lab, of course, we would love to assume that the doctor can bring the patient in again for another impression. But often that is just not possible. Sometimes it's an upper molar where the patients cannot sit still. Other times, due to excessive bleeding, the doctor cannot capture the margin in the impression. These, and many other, situations occur on a daily basis in our industry.
Through our experience, we have developed the following recommendations to improve communication between dentist and our lab and help trouble shoot difficult cases where the margin is difficult to read. Here are a couple of the recommendations:
1. Make sure your tech is familiar with your general finishing line. As long as the tech knows to look for a bevel, he probably will make the extra effort even if the impression is not 100% clear. However, if he thinks your prepping a chamfer with no bevel, you may end up with short margins.
2. If you decide to change your general finishing line for a specific case (i.e. use a feather edge prep instead of a chamfer), please indicate it on the Rx.
3. If you think the margin may be unclear and it may be impossible to get a better impression, we recommend to slightly overextend the margin in metal (about 0.5mm) on a PFM. With high noble alloys, you can probably burnish the metal to adapt it to the margin.
4. If you are doing an All Ceramic, an unclear margin is really difficult to troubleshoot. There is no way to manipulate the material (whether e.Max, Empress, Zirconia or others) and the risk of fracture is quite high. We recommend to change the restoration to a PFM or Full Cast crown.
Unclear Margin, Chamfer, Chamfer with Bevel, Dental Lab Tech, Dentist
Shoulder with Bevel
Posted on 08/11/2011
The shoulder with a bevel preparation is indicated for all ceramic inlays and onlays.
One can also use the shoulder bevel with PFM where the end of the margin will be in metal. For example, a PFM with a lingual metal collar will work well with a shoulder bevel.
Shoulder with Bevel Preparation, Tooth Preparation, Shoulder, Bevel, Dental Lab Tech
Shoulder Preparation
Posted on 08/10/2011
The shoulder finishing line is ideal for PFMs with porcelain margin or All Ceramic restorations (including E.Max or Zirconia with Porcelain Overlay). It requires a straight edge (with either a 45 or 90 degree angle) flat surface without a lip. It can be created using a flat end tapered diamond.
A shoulder preparation for a porcelain butt margin requires a complete right angle 90 degree shoulder. The right angle can be created with a flat end bur such ase the Brassler 558 and finished with a flat end diamond such as the Brassler 846.
Shoulder Preparation, PFM, Porcelain Fused to Metal, All Ceramic, E.Max, Dental Lab Tech
Chamfer Preparation
Posted on 08/09/2011
Chamfer Preparation:
The chamfer preparation comes in two primary forms: the standard chamfer or the long or deep chamfer. The distinguishing characteristic of the chamfer is that it is rounded from the margin into the axial wall. This stands in contrast to the shoulder prep which has a 90 degree angle.
The standard chamfer prep has a short curve to the axial wall. The long or deep chamfer has a more extended curve going deeper subgingivally. The standard chamfer can be prepared with a long torpedo shaped diamond. The long chamfer is prepared using a round end tapered diamond.
The chamfer prep can be used for both PFM (porcelain fused to metal), Full Cast, or most All Ceramic Restorations. It cannot, however, be used for a porcelain butt margin - which requires a 90 degree angle to fully support the porcelain.
Tooth Preparation, Dental Tooth Preparation, Chamfer, Deep Chamfer, Dental Lab Tech
Knife Edge (Feather Edge) Finishing Line
Posted on 08/08/2011
Over the next several blog posts, we will discuss various finishing line styles of tooth preparations and the restorations that are ideal for each style.
Knife Edge:
The knife edge finishing line has historically been used exclusively for metal margins. The advantage of this prep is that it can go deeply subgingival to give added retention especially on short preps. The disadvantage was, until recently, that there was no all ceramic option. This changed with the introduction of the full contour zirconia crowns (also known as Bruxzir crowns by Glidewell) which require no porcelain build up. Since porcelain requires a shoulder or chamfer "shelf" to support it, porcelain knife edge margins were known to fracture. However, the full contour zirconia margins can be made very think similar to a full cast crown.
Preparation, Knife Edge, Tooth Prep, Dental Lab
Internal Hexagon Implant Components
Posted on 08/05/2011
The internal hexagon (6 sided) implant has become one of the most common implants platforms available. Marketed by Zimmer under the Screw Vent brand name, this design is now offered by a number of both branded and generic companies. Some examples include Bio-Horizons, MIS, Implant Direct, Diamo Dent, and Blue Sky Bio. In addition, Atlantis Abutments manufactures custom abutments to the hexagon platform.
One of the advantages of the Zimmer design is the abutment's internal screw threads - which secures the screw inside of the abutment to help with screw position (as the screw is secured in one position) and also avoid misplacement of the screw.
Many of our dentists have asked us about cross-compatibility - i.e. using one systems parts with another. While we do not recommend this as the Implant Company warranty can be voided through use of third party components, in reality many dentists do purchase generic parts to match branded implants. Through our experience, most of the generic manufacturers parts are machined well, to high tolerances and work well in lab environments.
One note to keep in mind is that each systems screws are unique and the doctor must ensure he has the correct driver to match the screw used. Some sytems will use a square head while others will use a hexagon head. Please be sure to confirm the driver before purchasing the parts!
Internal hexagon, implant components, cross compatibility, dental lab tech
Nobel Biocare Tri-Channel Position - For Replace Select
Posted on 08/04/2011
The Nobel Biocare Tri-Channel implant (Replace Select) system is one of the most well known implants on the market. Its simple connection design makes its parts easily identifiable - aiding in the communication between dental lab and dentist.
One of the lesser known recommendations for this system is for the surgeon to place one of the channels facing the buccal side. This allows the lab tech to verify that the impression coping was seated correctly in the mouth - avoiding an implant position mis-transfer to the model.
As a result, it is highly recommended for doctors to visually verify the position of the buccal channel in the mouth or radiographically. After impressioning, doctor should look at the impression and confirm that the channel is in the same position.
There are occasions when the surgeon is unable to position one of the three channels towards the buccal side. In such an instance, the doctor should write on the Rx - "Note - tri-channels do not show on buccal, but position is correct". This will avoid any delays in case processing - as labs may contact the doctor before pouring the model to verify accurate position of the impression coping.
Nobel Biocare, Tri-Channel, Implant Position, Impression Coping, Dental Lab
Limited Interproximal Space for Cement Retained Crown
Posted on 08/03/2011
Devising long term restorative solutions for patient with edentulous narrow spaces (for example, congenital missing laterals or tooth crowding a missing bicuspid) can be quite challenging. Standard implants- perhaps the ideal restorative treatment plan - require sufficient space to contour the crown to match the parallel tooth. Mini implants are a viable alternative. The only major drawback to the mini implant is that custom abutments are not usually an option and the mini implant abutments are typically quite small and may not provide sufficient support for the final crown.
In a recent case, the doctor placed a 3.5mm narrow Nobel Replace Select implant. The initial request was for a custom abutment with cement retained crown. We had no space to make the two as separate pieces, so we offered the option of a screw retained crown with metal mesial and distal contacts. Although the doctor was concerned about the metal contacts, the alternative - reducing the adjacent teeth each by 0.5mm, was less appealing.
The doctor agreed to the recommendation but will wait for the patient to approve it in the mouth.
This type of case really has limited options. Any other suggestions would be quite welcome.
Interproximal space, cement retained implant crown, screw retained crown, dental lab, dental lab tech
Using an Abutment Analog
Posted on 08/02/2011
A number of implant systems now offer a complete restorative kit which is packaged together with the implant. The kit is typically purchased by the oral surgeon and passed along to the restorative dentist.
These kits typically include the implant, the healing cap, the final abutment, the final abutment screw, the abutment lab analog, and a plastic impression sleeve. Among the companies offering such items are Straumann with their Solid Abutment System (Ref 048.245 for example), MIS with their complete prosthetic system (Lot WO724718 for example), Nobel Biocare Snappy Abutment (Ref 35799) or Lifecore/Keystone with their RDS COC abutment analogs and a number of other companies.
For this type of impression, the doctor would insert the abutment into the mouth and torque it. She/he would then place the plastic impression sleeve over the abutment and take an impression.
The dental lab would then pour a soft tissue model with the abutment analog provided by the doctor and make a standard crown. Occasionally, the lab may need to modify the abutment analog in the event that there is insufficient occlusal clearance, but the lab can fabricate a metal reduction coping as a tool for the doctor to mimic the reduction in the mouth.
Among the advantages to this style of impression is the cost savings (no lab fabricated abutment required) and the simplicity.
The major disadvantage is that reduction of the abutment prior to impressioning is not possible if using the plastic sleeve (recommended approach) and that doctors can only do cement retained crowns. In most cases, this approach is used for molars. It is rarely used bi-cuspid forward due to aesthetic demands requiring a custom abutment.
Implant Abutment Analogs, Straumann Solid Abutment, Nobel Snappy Abutment
All Ceramic Implant Abutment
Posted on 08/01/2011
As single unit implant restorations became more common, the use of both pre-fabricated metal abutments or UCLA abutments began to see their limitations. Specifically, restorations in the maxillary anterior demanded a more cosmetic option than metal margins.
To address this challenge, the ceramic abutment was developed, and has become increasingly popular over the past several years. This style of abutment is the third and final abutment type that we classified.
The ceramic abutments are typically constructed using CAD/CAM technology whereby the doctor will send a digital impression to the lab or the lab will scan a poured model. A machine will then mill out a ceramic abutment - typically made of zirconia. Many implant companies now sell pre-fabricated zirconia abutments that can be adjuted by the lab. And although it is possible to wax and press an abutment using standard pressing techniques, the materials available - even a material as strong as IPS E.Max (360mpa), is not recommended as an abutment.
The ceramic abutment typically comes in a pure white color - although there are now options to mill shaded abutment. Additionally, ceramic abutments can be milled as either complete abutments with the connection made in zirconia, or as combination zirconia with titanium base (zirconia abutment is cemented to the titanium base by the lab). The advantage of the zirconia with a titanium base is that the doctor eliminates the chance of fracturing the abutment when torquing. The all ceramic abutment can and does fracture if torqued to tightly or if too much pressure is applied to the screw.
We highly recommend the latter option - the zirconia abutment with the titanium base.
Ceramic Abutment, Zirconia Abutment, Metal Abutment, Titanium Base, Dental Lab
UCLA Abutment
Posted on 07/29/2011
As discussed in the previous day's blog, we have classified the three common abutment types as (1) Prefabricated Metal Abutment, (2) UCLA Abutment, (3) Ceramic Abutment. Today, we will focus on the UCLA Abutment.
According to Frank Spear, DDS, MSD (JADA Vol. 140 - http://goo.gl/BwKBd) the UCLA abutment was invented by Dr John Beumer at the University of California Los Angeles in 1988 - thus the name "UCLA". The unique aspects of the UCLA abutment were:
1. The abutment screws directly into the implant without the use of a transmucosal abutment cylinder*
2. The abutment is made from a castable material - in most cases plastic or plastic with gold base.
There were several discernible advantages to this style abutment over earlier metal abutments. The chief advantage is the flexibility: the lab could wax and cast the plastic part using the lost wax technique to achieve virtually any style abutment indicated. Here is a short list of some of the advantages:
1. The lab can make a patient specific collar depending on tissue height.
2. The lab can make a patient specific angulation to address implant fixture angulations issues.
3. The part could be used for either screw retained or cement retained final restorations.
The UCLA abutment can come as either a completely plastic abutment which is cast in any alloy the doctor or dental lab requests (although it is preferred to us at least a noble alloy**), or a gold base with a plastic castable extension. The advantage to the latter style - the gold base - is that the base is machined, offering typically a more consistent fit with the implant fixture. A completely plastic UCLA abutment requires that the lab tech be very experienced with semi-precision castings to ensure the interface connection is accurate.
The only major disadvantage to this style of abutment is the rising cost of precious metals - which creates for unpredictability with the final cost of the abutment. Since it is recommended to use a gold or palladium majority alloy the alloy used for the abutment can become quite expensive.
However, from our experience, the plastic/gold UCLA is still the best option for complex implant restoration. Its flexibilty allows for almost any abutment shape and contour - something not possible with pre-fabricated abutments and sometimes not achievable with CAD/CAM.
References
*The UCLA Abutment: A Four Year Review by Steven G. Lewish DMD and D. Llamas, DDS and S.Avera. University of California, School of Dentistry, Los Anageles Calif April 1992 - available in the Journal of Prosthetic Dentistry April 1992, Volume 67 Number 4.
**Galvanic corrosion behavior of titanium implants coupled to dental alloys: M. Cortada, LL. Giner, S. Costa, F.J. Gil, D. Rodriguez, J.A. Planell. Journal of Materials Science: Materials in Medicine 11 (2000) pages 287-293. Online at: http://goo.gl/VgaQA
Dental Lab, UCLA Abutment, Implant Abutment, Transmucosal abutment cylinder
Pre-Fabricated Metal Implant Abutments
Posted on 07/28/2011
Continuing our discussion regarding the implant abutment, it is important for us classify the types of abutments available. These classifications are our own, and based on current products available in 2011.
Three general styles of abutments:
1. Prefabricated Metal Abutment
2. UCLA Abutment
3. Ceramic Abutment
Over the next several blog posts, we will discuss each of these abutments in detail.
Prefabricated Metal Abutment
The prefabricated metal abutment refers to a metal abutment that has been machined or cast by the implant company and not by the laboratory. Today, virtually every system offers both straight and angled metal abutments with many options for collar heights depending on subgingival depth of the implant. Typical metal abutments are machined from Titanium alloy - making them exceptionally biocompatible and durable.
The abutments can come in engaging or non-engaging platforms, although engaging abutments are much more common. This is because most pre-fabricated metal abutments are used for cement retained crowns or bridges. Creating a screw-retained crown with a metal abutment is quite difficult as techniques to cast to titanium alloys have not been successful.
Here are a list of advantages and disadvantages to the Pre-Fabricated Metal Abutment:
Advantages:
Cost - typically this is the least expensive way to create an abutment to support a crown.
Durability - titanium alloys are strong and durable
Biocompatibility - titanium is among the best materials for the mouth - remember that virtually all implants are made out of titanium.
Disadvantages:
Esthetics -- Because these abutments are prefabricated, the lab or doctor only has the option to modify them. In situations with limited inter-occlusal space, severely subgingival or supragingival implants, or angulation issues, these abutments cannot offer ideal esthetics
Flexibility - prefabricated abutments can pretty much only be used for cement retained crowns. Doctors who like the retrievability of a screw retained crown cannot use these abutments.
Dental Lab, Pre-Fabricated Metal Abutment, UCLA Abutment, Ceramic Abutment, Implant Abutments
Screw Retained Versus Cement Retained Implant Parts
Posted on 07/27/2011
Although the parts listed in yesterday's blog (7/26/2011) apply to most situations, there are some parts which will vary depending on the final restoration type: screw retained versus cement retained. As listed yesterday, there are five parts required by the lab: (1) impression coping, (2) impression coping screw, (3) implant analog, (4) abutment, (5) abutment screw.
It is specifically part #4 - the abutment, that depends on the final restoration type. Here are the general rules of thumb:
1. Single Restoration - Screw Retained or Cement Retained: A single unit (non-bridge) restoration whether screw retained or cement retained requires an ENGAGING ABUTMENT. An engaging abutment is an abutment with an extension into the implant that "locks" into place. This secures the abutment in a specific position to avoid rotations.
2. Bridge - Cement Retained: A cement retained bridge also requires an ENGAGING ABUTMENT. This is because the abutment is separate from the crown, so the position of the abutment must be secure without consideration to the crown. If there is any path of insertion issue, this will be addressed through contouring the abutment and design of the crown. But the abutment itself cannot be allowed to rotate - and thus an "engaging" abutment is required.
3. Bridge - Screw Retained: A screw retained bridge requires a NON-ENGAGING abutment. A non-engaging abutment is an abutment that has no extension directly into the implant - i.e. it does not engage the implant. Essentially, it merely sits on top of the implant and is secured to the implant using the final abutment screw. The reason why a non-engaging part is used is because the abutment and crown are one single unit - which thus creates a severe path of insertion issue if it is bridged with other screw retained crowns. Essentially, with a screw retained bridge, no individual units should lock the others into place as the path of insertion is so difficult as to make it almost impossible to achieve a complete seating. As a result, the non-engaging part is used which will allow for a small amount of rotation of each abutment over the implant. Securing the abutments with the screw is sufficient to ensure retention.
Screw retained crown, screw retained bridge, cement retained crown, cement retained bridge, implant restoration, dental lab
Lab Required Parts - Fixture Level Impression - Closed or Open Tray
Posted on 07/26/2011
While the implant systems may vary, the parts necessary for the lab complete a case are actually pretty standard. Here is a list of parts based on technique:
Implant Fixture Level Impression - Closed or Open Tray - 5 Required Parts
1. Impression Transfer Coping
2. Impression Transfer Coping Screw
3. Implant Replica (Analog)
4. Abutment (either metal, plastic with gold base, or zirconia)
5. Abutment Screw
These five parts are always required. There are some systems where the abutment is the impression coping (Bio Horizons) or the impression coping is attached to the final abutment (Implant Direct Replant), but the parts remain the same. If you can identify all these parts, the lab can proceed with the case.
Here is an explanation of the purpose of each part:
1. Impression Transfer Coping - used to transfer the position of the implant fixture in the mouth to the implant analog in the model.
2. Impression Coping Screw - used to secure the impression coping to the implant fixture in the mouth and to secure the impression coping to the implant analog in the impression (prior to pouring the model)
3. Implant Analog - A replica of the implant fixture from the mouth. After attaching the implant analog to the impression coping, the lab can pour a model which will secure the implant analog in stone to replicate the position of the implant fixture that is in the mouth.
4. Abutment - the final abutment that will be placed in the mouth to support the crown. If a cement retained crown is requested, a metal or zirconia abutment may be provided to the lab - which will be modified by the lab. If the doctor requests to make a custom abutment, or if the doctor wants to do a screw retained single crown, it is ideal to use a UCLA Plastic Abutment with a Gold Base.
5. Abutment Screw - This screw secures the abutment to the implant analog in the model. Some doctors may use this screw as the final screw to secure the abutment to the implant. However, it is recommended that doctors use a new virgin screw for the final screw.
Implant Parts, Impression Coping, Impression Coping Screw, Implant Analog, Implant Replica, Abutment, Abutment Screw, Dental Lab
Implant Parts - Who Buys Them?
Posted on 07/25/2011
For the week of July 25th, 2011, we will continue to cover implants, discussing some of the more common questions we encounter when working on implant cases. Today, we will address the very basic question of parts - who buys them and why.
For a dentist, one of the most aggravating aspects of dealing with labs is the unpredictability of implant cases. This is particularly difficult for practices that price the case to the patient before they receive the lab bill - and get a surprising shock when they underestimated the bill by hundreds of dollars. Much of this unpredictability is due to the cost of parts. One our goals at Streamline is to offer an almost completely predictable, flat rate implant price. This allows you to price the case to your patient without hidden costs- maximizing your profit and alleviating the stress.
Here are a couple of recommendations we make to doctors working with an implant case with us:
1. Purchase the parts for the case. It is really in the doctor's best interest to purchase all of the necessary parts for a case. The old rumor that labs get deep discounts on parts and pass those along to the doctor is really not true. Labs will almost always charge a markup on parts they purchase. The markup can be from 30% up to 100% of the cost. We charge a 30% markup on parts we purchase.
2. Ask the lab for an estimate. Most labs are willing to offer a free estimate of a case - excluding the price of the metal alloy. If using gold, allow for a $200-300 additional charge to any lab bill per unit.
3. For new systems, price the case as your labor plus lab fee. When working with a new system (for example, a doctor who regularly restores Zimmer has a patient with a Camlog implant), it will be very difficult for you to predictably price the case. We highly recommend that until you are very comfortable with a system and the fees associated with it, you price the lab fee as a separate item and show the invoice to your patients. This will allow you to ensure you maintain your profit margin. Once you are comfortable with the system and its associated costs, you can offer a flat rate price to your patients.
Implant parts, Implant Case Estimate, Zimmer, Camlog Implant, Dental Lab
Abutment Level Impression - Benefits
Posted on 07/22/2011
While there are numerous challenges associated with the abutment level impression, as discussed in yesterday's blog, there are some significant benefits to this method which will be discussed today.
1. Avoiding an implant analog position transfer error: One of the most common and frustrating errors with implant restorations is the incorrect transfer of the implant position to the model. This occurs in the implant fixture level impression technique - especially common in the closed tray impression technique - as the impression coping must be replaced into the impression. Should the impression coping be placed incorrectly, or should the impression tear, the implant analog will be transferred incorrectly into the model. This is especially common for systems that rely on a hexagon shaped implant interface (Zimmer Screw Vent, MIS Six, Bio Horizons) or an octagon shaped implant (Straumann Tissue Level) - as the impression coping may be one or two degrees off when replaced in the impression. The implant analog is thus turned one or two positions off, and the final abutment and crown, while seating in the model, do not transfer correctly to the mouth. With an abutment level impression, this type of mis-transfer is completely avoided as the abutment has already been screwed down and the model must replicate the exact position of the abutment.
2. Cost Savings: The second major benefit of the abutment level impression is the cost savings. Labs who make a crown over an abutment analog or a die model will often treat it as standard crown and bridge with an additional charge for the soft tissue model and alloy surcharge since the abutment is typically smaller than a standard tooth prep. However, compared to the fees associated with parts handling and the modification of an abutment or the fabrication of a custom abutment, any small additional fees for a tissue model or alloy will be trivial.
Implants, Implant Analog, Transfer Error, Zimmer Screw Vent, Straumann, Dental Lab
Abutment Level Impression
Posted on 07/21/2011
The second common implant impression technique is the ABUTMENT LEVEL IMPRESSION. This refers to the technique where the abutment has been secured into the implant fixture (through the use of a screw, or a tap system like Bicon) and has been adjusted based on occlusal and interproximal space constraints. This technique is not as common as the implant fixture level technique due to some serious challenges that the doctor must address before impressioning. Today, we will list some of the more common challenges:
1) Capturing the Margin: Abutment margins are typically subgingival (i.e. beneath the sulcus). Getting impression material to accurately capture subgingival margins is not easy - especially on maxillary molars. As a result, the impression will often miss part of the margin.
2) Occlusal Space: Assessing whether there is sufficient occlusal clearance in the mouth is a challenge. In some cases, a doctor may have not realized that the abutment is too high to allow space for a porcelain occlusal. In that scenario, the only options are to leave a metal occlusal (for PFMs) or to allow the lab to adjust the abutment and provide a reduction coping. However, matching lab adjustments can be frustrating and imprecise.
3) Compromising the Implant: Some doctors are concerned about adjusting the metal abutment in the mouth because of possible effects on the implant fixture. Excessive heat generation or excessive movement of the fixture, they argue, can cause long term instability of the implant - which may not be realized for years.
4) Screw Retained Crown: Many doctors enjoy the retrievability of a screw retained crown. An abutment level impression forces the lab to create a cement retained crown with no option for a screw retained crown.
Abutment Level Impression, Subgingival Margin, Occlusal Space, Implant Fixture, Screw Retained Crown, Cement Retained Crown
Implant Fixture Level Impression - Closed Tray Technique
Posted on 07/20/2011
The closed tray technique for taking an implant fixture level impression varies significantly by system. Generally, the technique requires the use of a metal impression transfer coping with a long ball top screw. The ball top screw is designed to create an undercut in the impression to lock in the impression coping after replacement. However, systems can vary greatly - and some systems - including Bio Horizons and Implant Direct - offer options that allow for the final metal abutment to be used as the impression coping.
Today, we will discuss the technique for a standard Nobel Replace Select 4.3mm implant. A visual guide for this technique is available on Nobel Biocare's website: www.nobelbiocare.com.
The following steps outline the procedure:
1) Uncover the implant by unscrewing the healing cap
2) Secure the Nobel Replace Select Regular Profile 4.3mm closed tray impression coping (part #33540) to the implant. Verify that you have the ball top screw.
3) Add medium or heavy body VPS (vinyl polysiloxane) impression material around the impression coping to ensure secure fit. Light body impression material is not advised.
4) Fill in the remainder of the tray with medium or light body impression material
5) Allow for impression material to set based on manufacturers guidelines - but at least 6 minutes.
6) Remove the impression from the mouth.
7) Unscrew the impression coping from the implant
8) Replace the healing cap.
9) Attach the impression coping to the implant analog (part #29500).
10) Insert the impression coping/implant analog back into the impression ensuring that the ball top screw "locks" into place and the impression coping/implant analog are secure, exhibiting no movement. If there is movement due to ill setting impression material, it is advised to take a new impression.
11) If you do not have the implant analog, then send the impression coping separately to the lab and allow the lab to place it into the impression after they attach it to the implant analog.
12) Send the case to Streamline Dental Lab or your lab of choice.
Implant, Fixture Level Impression, Closed Tray Technique, Nobel Replace Select 4.3mm Regular Profile
Implant Fixture Level Impression - Open Tray Technique
Posted on 07/19/2011
Continuing on our previous topic, today we will explore the steps involved in taking an implant fixture impression. Broadly, there are two techniques to take an implant fixture impression: (1) OPEN TRAY TECHNIQUE, (2) CLOSED TRAY TECHNIQUE.
The OPEN TRAY TECHNIQUE is designed to keep the impression transfer coping in the impression at all times. This is typically a more accurate technique since there is no room for error of position of the impression coping, although it is a more difficult technique - especially on maxillary posteriors. The technique utilizes an open tray impression coping and long, thin screw. One of the discernable features of the open tray impression coping is that it is typically shorter than the closed tray coping and has a standard thin screw head - i.e. no ball top. The procedure for taking the impression is follows:
1) Uncover the implant by unscrewing the healing cap
2) Secure the open tray impression coping to the implant using the long thin screw. The screw should be longer than the impression coping and should stick out beyond the impression coping (away from the gingiva) by at least 2mm for easy retrieval.
3) Make a screw access hole in the impression tray in the area of the implant to allow for the unscrewing of the impression coping from the back of the impression.
4) Add medium or heavy body VPS (vinyl polysiloxane) impression material around the impression coping to ensure secure fit. Light body impression material is not advised as the impression coping may move after removal.
5) Fill in the remainder of the tray with medium or light body impression material
6) Allow for impression material to set based on manufacturers guidelines - but at least 6 minutes.
7) Unscrew the impression coping screw from the back of the impression.
8) Remove the impression tray with the impression coping securely in place.
9) Replace the healing cap back into the implant.
10) Place the screw back inside the impression coping (from the back of the tray) and add wax or tape to the screw to ensure the screw does not fall out from the back.
11) Place the impression in a bag separate from the bite and the counter model to ensure the parts do not get lost.
Implant, Fixture Level Impression, Open Tray, Impression Transfer Coping, VPS, Heavy Body, Light Body
Implant Impression Techniques
Posted on 07/18/2011
The difficulty that many doctors face with regards to restoring implants is recognizing the correct parts to use when taking the impression. This challenge should not be trivialized - with over thirty commonly used implant systems, it is a daunting task for a doctor to recognize the correct parts. In addition, as each system offers multiple parts for different techniques, a doctor familiar with even a standard Nobel Replace Select implant may find that he is confused when he sees a plastic transfer coping given to him by the surgeon, instead of his traditional metal transfer. Over the next few blogs, we will discuss several techniques and their associated parts for the more common systems.
To get started, we will begin by classifying the two most common implant impression techniques as: (1) IMPLANT FIXTURE LEVEL IMPRESSION, (2) ABUTMENT LEVEL IMPRESSION.
The IMPLANT FIXTURE LEVEL IMPRESSION refers to the technique where the final abutment is NOT in the mouth. The doctor's goal is to transfer the position of the implant directly to the model. The doctor will take an impression of the implant fixture itself using a transfer part. The key components for this technique are: (1) impression coping, (2) impression coping screw (aka Long Screw), (3) Implant Analog.
The ABUTMENT LEVEL IMPRESSION refers to the technique where the final abutment is already screwed or otherwise secured to the implant in the mouth. The doctor will take an impression of the abutment as if it were a standard prepared tooth, or he may use a transfer basket made of plastic or metal. The transfer basket is placed over the abutment and requires the use of an abutment analog.
Implants, Impression Techniques, fixture level impression, abutment level impression
Feather Edge Preparation
Posted on 07/15/2011
The feather edge preparation (or knife edge preparation) is a popular preparation by doctors who like metal collars or full gold crowns. The advantage of this prep is that the crown margin can be extended into the sulcus (sub-gingival). Until recently, this prep was not available for All Ceramic materials - specifically pressed ceramics such as E.Max or other All Porcelain crowns. These materials required a shoulder or chamfer prep to allow sufficient space for porcelain buildup. However, with newer products such as full contour milled zirconia (also known as All Zirconia or Bruxzir by Glidewell Dental Labs), a feather edge prep is now possible. The advantage of the All Zirconia is that it can be made thin - 0.5mm thickness is sufficient (although 1mm is preferred). The main disadvantage is that the aesthetics are not ideal. Currently, milled crowns cannot achieve the shade variation of standard porcelain and are typically opaque. As such, we really do not recommend the All Zirconia for teeth bicsupid forward. However, it is a very nice material for posterior teeth and can replace the standard gold crown as it requires between 0.5mm-1mm occlusal reduction only.
Margin Preparation, Feather Edge Margin, Chamfer Margin, Shoulder Margin
Porcelain Butt Margin
Posted on 07/14/2011
Doctors who prefer a metal based restoration
- such as a PFM - over the all ceramic counterpart - are often frustrated by
the gray line that appears at the margin over time. This is particularly
relevant to non-precious or semi-precious metal alloys. High gold content
alloys - especially Captek - will typically show a more yellowish margin. One
technique to avoid this graying at the margin is to create a "Porcelain
Butt Joint" margin. A butt joint is a shoulder preparation with a complete
right angle (90 degree) shoulder. This technique allows for the lab to build
porcelain to the edge of the preparation as porcelain requires a
"platform" to support it. There are a number of common preparation
mistakes which often results is porcelain fracture at the margin. We highlight
five key items below:
(1) The right angle preparation must be created with a FLAT END BUR such as the
Brassler 558 and FINISHED with a FLAT END diamond such as the Brassler 846. A
round end or tapered bur will not create the flat right angled preparation
needed for a butt joint.
(2) The shoulder must be carried through the proximal embrasures. If it is not,
the metal margin will show in the proximals as laboratory tech cannot build
porcelain on a chamfer or feather edge prep. It is recommended that the
shoulder be extended two-thirds facially of the tooth.
(3) The preparation must be flat and cannot have bumps - especially common on
the mesial and distal shoulders. If bumps are not smoothed out, porcelain will
not sit cleanly and is likely to fracture.
(4) The edge of the prep should be smooth WITHOUT A LIP. A lip is often created
when using a narrow or round end bur. A fragile lip will often fracture. The
edge of the prep should be smoothed off with an instrument such as a flat end
diamond.
(5) For anterior cases, it is critical that the margin is extended by 0.5 to
1.0mm into the sulcus (sub-gingival). This will allow for correct crown
contours and closed gingival embrasures.
We thank our friends at Bay View Dental Lab in Virginia for providing some of
the information for this post.
Labial Butt Joint, Butt Shoulder, 360 Degree Butt Joint, Porcelain Extension
Stump Shade
Posted on 07/13/2011
In recent years, labs have added a term called the "Stump Shade" to the Rx form. Many doctors are confused by this term as it was introduced only as a result of new all ceramic materials and was not previously required for communication with the lab. The term "Stump" refers to the prepared tooth (also known as abutment tooth) color. The stump is often a different color from the original unprepared enamel. For traditional PFM restorations, the stump is not a necessary shade as the metal coping will always mask the underlying color. This is true for zirconia based all ceramics as well - since the zirconia material is opacious. However, pressed or CAD high translucency ceramics - specifically IPS e.Max, IPS Empress or similar materials were created to offer a material that can more closely mimic the natural tooth shade and translucency. While it is true that these materials can achieve shades not possible with PFMs or Zirconia restorations, it is critical that the doctor take into account the following items: (1) Stump shade (2) Ingot or CAD block shade lab is using (3) Shade of any layering ceramic/porcelain (4) Cementation Shade. Items 1 and 4 are in the doctors hands - the doctor needs to take a stump shade and consider what color cement (i.e. high opacity cement) he or she will use when cementing. Items 2 and 3 are in the labs hands - based on what shade the doctor gives on the Rx. As always, achieving the correct shade is a joint effort between doctor and lab technician.
Stump Shade, Vita Shades, Ivoclar, E.Max, PFM
Masking a Post & Core
Posted on 07/12/2011
Masking a post core is rather an easy thing to do with a standard PFM (porcelain fused to metal) restoration. The metal coping itself will mask the post no matter what color the post is - gold, silver or dark gray. This is true for Captek as well since the Captek foil will disguise the post. The more challenging cases are anterior teeth where the doctor and patient have opted for an all ceramic material. We recommend to add an opaquer to the post which will give it a whitish look, and to use a zirconia based all ceramic. The zirconia core will block out any post. And while E.Max does have high opacity ingots, we have achieved better aesthetic results using zirconia with a porcelain build up. For any questions, please feel free to contact us.
Post/Core, Post and Core, Opaquing, Opaquer, E.Max, Zirconia
Advantages of Captek
Posted on 07/11/2011
With gold and palladium prices at record levels, many doctors have moved away from gold based restorations since lab prices fluctuate and its very difficult to predict the final cost of a restoration. This makes billing very difficult as most doctors will quote the crown cost up front to the patient. Doctors are left with either base metal options for PFMs, or All Ceramic Options such as e.Max or Zirconia. The problem that many practioners face is that some feel uncomfortable with base metals or do not like the eventual gray margin, and others feel that All Ceramics require a new style prep or will not block out a dark root or post. This is where Captek can really be an effective material. While it is still gold and while most labs have raised their prices for it recently, it still offers some of the best features of any materials: it has a warm color which mimics the vitality of living tooths structures, it refracts and reflects light and it is very biocomptible. Finally, since it is a foil based PFM, the amount of gold used for sinlge units is always predictable and short span bridges typically will have only small amounts of additional gold for the connectors. This really does make it an ideal choice for doctors seeking a premium option for their patients.
Captek, crown and bridge, post/core
Flexi Clasps in Acrylic
Posted on 07/08/2011
Patients today are rarely willing to allow metal to show in their smile. While functionally a metal cast clasp may offer the best long term support and strength, most practioners today try to avoid metal clasps bicuspid forward - especially on the maxillary arch. As a result, labs have worked for years to offer more aesthetic clasp options. Part of the challenge is creating clasps that can work with acrylics - since acrylics themselves do not lend to clasping. A number of manufacturers have introduced products - many in the last couple of years. We offer both a gingival colored valplast clasp (by Valplast International) and various tooth shaded flexi clasps. These clasps work only if the tooth has natural undercuts or prepared undercuts...otherwise the flexible clasps will not give sufficient support to maintain the stability of the partial. Both clasps can be embedded in acrylic but should ideally be attached to some sort of metal understructure to give longer term support.
Flexi clasps, valplast clasps, acrylic partials, tooth colored clasps.
Valplast to Metal Framework
Posted on 07/07/2011
Among the more frustrating experiences in dealing with a flexible denture material such as valplast is addressing the issues of repairs. If a tooth comes out or a patient wants to add an additional tooth, it is often difficult or impossible to repair for long term use. One recommended option for a situation where the patient may require future extractions is to make a metal framework with valplast finishing. Metal frameworks allow the lab to add additional teeth or repair much more easily - and the repair can last for years!
Valplast, Partial Denture, Repairs, Adding a tooth, Frameworks
Tips for cleaning removable prosthesis: dentures, partials, nightguards
Posted on 07/06/2011
Here are a couple of helpful tips for cleaning your removable partial appliance including dentures, partial dentures or nightguards:
Always clean over a sink
Close the drain
Fill the sink with water so in case the denture falls, it will not fall on a hard surface
Use mild soap and a mild brush
DO NOT use toothpaste as it contains pumice which will scratch the surfact
Cleaning removables, denture, nightguard, partial denture
Tracking Email Alerts
Posted on 07/05/2011
Keeping track of your dental lab cases is an arduous task even for the most organized dental practices. With multiple labs and multiple stages for each case, its often difficult to foresee unexpected delays with shipping and processing that often occur. To help improve the communication between or our lab and our clients, we have used a simple email tracking system for close to three years. As soon as a case is received by our lab and the information entered into our system, an email is sent to the client confirming the patient name, due date, billing and shipping address. This simple email helps us avoid situations where one of our staff enters the order info for the wrong office - particularly when a dentist works at multiple offices. If we mistakenly entered the wrong shipping address, we will often get a reply from the dentist with the correct shipping address. Additionally, after a case is completed, we will send an email with tracking information including a tracking number for the case and an estimated delivery date. These pieces of information help you to keep track of your work without doing anything - all part of our continual effort to make our communication better, faster and easier for you!
Tracking email alerts, email communication, case status updates
Email communication between Doctor and Lab
Posted on 07/01/2011
While the phone has been the most common tool used in the dental lab industry for communication between doctor's office and dental lab, it is certainly not the most efficient or effective. We have all experienced the holding time while waiting for the doctor to finish up with the patient, or the "technician is at lunch, he'll call you back." Both of these situations are quite frustrating for both doctor and lab. And although email is certainly a more effective mode of communication, and has been adopted by many labs, organizing the emails and ensuring there is proper follow up to email communication remains a challenge. At Streamline, we created an online ticketing system to address this issue. With our ticketing system, Streamline customer support agents can email out information to the doctor - such as case pictures, Rx forms, and invoices, within just a couple of clicks. No uploading is necessary as all case information is already stored on our servers. The email generates a unique ticket in our system which is left in an "open" status until the doctor replies. If the doctor replies by email, the email is automatically imported into our ticketing system to update the case so all communication is documented. Staff is then required to send a confirmation email reply to confirm we received the instructions and we are proceeding with the case. This system has been quite revolutionary for us - allowing us to communicate with many more doctors, more efficiently and effectively - than by phone or by standard email. We invite you to try working with us by email - we're sure you won't be dissapointed!
Email communication, case discussion, case images, rx forms
Communication with Images
Posted on 06/28/2011
Custom shades and custom staining is one of the most common requests for matching single centrals. Pictures are always helpful to the technician to convey nuances of shading. Using your online Streamline Dental account, its easy to share pictures with our team. Just login, upload pictures to your case and send us a ticket. Alternatively, you can email: support@streamlinedental.com and we'll confirm receipt. If you have a patient name or case id number, please include that in the subject of your email.
Images, Shades, 1M1, 2M1
Implant Direct Implant Analogs
Posted on 06/24/2011
For those using implant direct "Replant" implants, please note that the implant analogs from Nobel for Replace Select will not fit these abutments. The only option we are aware of is to purchase the implant analogs from Implant Direct which can be used for either genuine Nobel parts or Implant Direct parts. The issue is that Implant Direct's Tri-Lobe has an extension that impedes on the fit with Nobel Biocare analogs.
Implant Direct, Implant Analogs, Fit
Challenges of multiple implant cases with cement retained framework
Posted on 06/23/2011
We recently worked on roundhouse implant case with implants in positions: 4,5,7,8,9,10,12,13. We fabricated custom abutments and a 12 unit bridge (two cantilevers) from 3,4,5,6,7,8,9,10,11,12,13,14. We also fabricated a duralay insertion key to help the doctorinsert the abutments to match the position in the model.
Upon try-in, it was realized that the two distal abutments, 4,13 were not correctly aligned in the model - as such the bridge could not seat correctly in the mouth. Troubleshooting such a case, which is not uncommon in multiple implant restorations, is often a challenge.
After attempts to make a new master model with correct alignment failed to achieve ideal fit, it was decided that the easiest way to fix the issue was to secure the abutments in the mouth, section the bridge as needed, and have the doctor take a pickup impression of the position of the copings as they were seated in the mouth. This approach avoided the recurring error of a second mis transfer to the model and allowed us to adjust the copings and reconnect them. An additional tryin was necessary.
This type of case is no doubt a challenge and frustrating for all parties, but with open communication between techs and doctors, this type of case can be solved and the patient will enjoy a well fitting final bridge.
Implant abutments, semi-precious framework, noble alloy, sectioning framework
Hiring and Retaining Employees
Posted on 06/22/2011
I attended a conference this morning hosted by The New York Enterprise Report (www.nyreport.com) entitled: "Beyond Motivation: Ignite Your Employees & Watch Profits Grow". Excellent event. Highly recommeded to check out future events on their website.
For me, a couple of key takeaways:
(1) We should change our processes to a strategy of constant hiring - i.e. move from a hiring by deadline to fill a position to developing a relationsihp over time with potential hires and hire them when an opportunity arises.
(2) Create 100 day plans or similar for managers to strive for. Do not work on annual reviews.
(3) Look at a company called "Criteria for Success" - a sales and training company.
Dental Lab, Employees, 100 Day Plans, Constant Hiring, New York Enterprise Institute
Biomet 3i Abutment Screw
Posted on 06/21/2011
There are few experiences more aggravating than an implant abutment coming loose due to a faulty screw. Generally speaking, most implant companies make a "lab" screw and a "final" screw. However, in practice, most doctors utilize the lab screw provided by the lab for the final insert. For standard titanium screws, this is generally acceptable as the screws will rarely ever strip. However, if the lab mistakenly uses the final insertion screw, the screw can strip and problems may ensue. This is specifically an issue with Biomet 3i as they provide a "gold" final screw. As gold is a soft metal, any significant torque by the lab can strip the screw threads. It is highly recommended that the doctor use the gold screw once and only once upon insertion.
Implant Abutment Screw, Biomet 3i, Gold Screw, Titanium Abutment Screw
Zimmer Screw Vent Abutments with Internal Screw Threads
Posted on 06/20/2011
We recently had a case for a Zimmer Screw Vent Implant where the doctor sent in abutment parts from a generics manufacturer. There was an issue with the screw position in the mouth. We then realized that among the advantages to genunine Zimmer parts is the internal screw thread in the abutment. This thread forces the screw through only one position and secures it in side the abutment. An additional benefit is that the screw rarely gets lost as it is secured to the abutment.
Zimmer Screw Vent, Implant Abutment, Internal Screw Thread
Generic Implant Parts for Nobel Biocare Replace Select System
Posted on 06/19/2011
As one of the oldest and most prevalent systems on the market, Nobel Replace Select seems to have and incredible number of generic parts available. These parts, available from companies such as Implant Direct, Diamo Dent, Attachments International and a plethora of smaller implant companies, have their advantages and disadvantages. The chief advantage is the cost difference - generic parts can cost thirty to fifty percent less than brand name parts. This cost can sometimes make or break the profit margin for the dentist - depending on the situation. But the disadvantages can outweigh the cost benefit - chiefly - poor connection interface.
For example, we recently did a case for a Nobel Replace Select 3.5mm implant with generic parts from Implant Direct. The particular abutment provided by the doctor was made by Implant Direct in a way where the tri-lobe interface on the abutment has an extended lobe. However, the analog provided was a Nobel analog. As a result, the abutment does not engage the analog completely. This type of situation, which is not uncommon in Implant Dentistry, is a frustrating situation for all parties - case gets delayed for parts, office staff is frustrated for the need to reschedule because of this delay, and doctor is justifiably frustrated since the parts packaging implies compatibility.
To avoid this situation, we highly recommend that the doctor or the office staff always try to screw the abutment into the implant analog before sending it to the lab. This will ensure that all parts are compatible and help to avoid the inconvenience of implant case delays.
Dental Implant Parts, Implant Analogs, Impression Copings, Nobel Biocare
Implant Analog Mis-Transfer
Posted on 06/17/2011
Among the most frustrating situations that arises in implant dentistry is an implant model mistransfer - where the master model has the position of one or more implant analogs different than the actual implant positions in in the mouth.
Unfortunately, this mistranfer is sometimes not realized until the framework is already made, and when multiple implants are involved, trouble shooting such a case can be quite challenging. If you have had this experience as a practioner, we highly recommend the following steps to ensure proper transfer:
- Open tray impression copings are typically much more accurate than closed tray. If possible, try to use the open tray technique as it does not require the removal of the impression coping from the impression
- If using the closed tray impression technique, after impressioning, take the impression coping and attach it to the implant analog. Then place the impression coping into the impression in the correct position. This ensures that the lab does not need to take out the impression coping before pouring the model.
- If you do not have the implant analog and your using the closed tray technique, just try placing the closed tray impression coping into the impression and make sure it "locks" into position and is not moving. Any movement will cause a mis-transfer.
- Lastly, we recommend to take an X ray before removing the impression coping. This will allow you to see if the impression coping fully engaged the implant when impressioning.
Dental Implant, Implant Transfer Coping, Open Tray Impression Coping, Closed Tray Impression Coping
Redesigned Rx Form
Posted on 06/16/2011
We are happy to announce our revised and updated Rx forms. Among the changes:
- Increased space for doctor to write instructions
- New options for IPS e.Max Veneers, Crowns, Inlays and Onlays including 5 business day turnaround and Rush Services
- We shifted the placement of the upper and lower arch diagrams to sit closer to your instructions - helping you to utilize the diagram more easily
- More nightguard options
We hope you like the redesign and we appreciate any feedback!
Rx Form, More Space, IPS e.Max Options
Valplast Impression
Posted on 06/15/2011
Some of the key ingredients to success with Valplast starts with the initial impression. As per valplast's guide, impressions with alginate are the best for valplast as they do not cause tissue compression. But the alginate should really be poured within 15 minutes. Waiting longer can cause distortion which will never be noticed until final insertion.
Vaplast impression, alginates
New Streamline Dental Website
Posted on 06/01/2011
We are proud to announce the launch of our new website at
www.streamlinedental.com.
The new website has been redesigned to give a more modern look. Here are some of the highlights:
-
Products information now offers more data about the products including Indications, Material Composition, Cementation and FDA registration information if relevant.
-
Gallery includes more photos and better quality images.
-
Contact page allows you to submit request for new customer welcome kits, to schedule a pickup, order supplies or contact customer service. A ticket will be generated within our internal system and you should receive a reply within one business day. For immediate response, please call us at 212-643-1620.
-
Blogallows us to update information about new products or services, personnel changes or general information.
Streamline Dental Website, Faster, Easier
Streamline Dental's New Location
Posted on 02/01/2011
We are proud to announce our move to a brand new state of the art lab in midtown Manhattan. Just one block from Penn station, our lab is on 35th street between 7th and 8th Ave. We are conveniently located close to the 1,2 A, C, and E subway lines as well as all trains coming into Penn Station. We welcome visitors between 9am and 5pm and we are happy to offer new services including customs shades for difficult anterior cases and custom staining. Please contact us at 212-643-1620 for details.
New location, custom shades, custom staining, anterior cosmetic cases